
From time to time, I get a question from IT folks about automating SNMP configuration on Windows client and Windows server machines. Imagine a scenario where you changed, or you want to change the SNMP community string and/or IP address of your network monitoring product, or even that you switched or want to switch from one to a network monitoring solution. The same change you did on the network monitoring product should be also made on hundreds or thousands of Windows machines. This sounds like a huge project. Doesn’t it?
Things get way easier when there is the opportunity to automate them. By using GPO (group policies), I will show you how in less than 10 minutes you can apply SNMP configuration on thousands of Windows machines.
GPO (Group Policy Object) is used to define or change specific Windows settings. It is applied centrally from ADDS (Active Directory Domain Services) server to other Windows domain-joined machines.
The complete procedure is done using Windows Server 2022 and Windows 11, but it is equally applicable to previous Windows operating systems. Let’s do some actual work.
For writing this article, I run my workloads on powerful mini PC - Intel NUC powered with the CPU i7 the latest generation, 64 GB RAM DDR4, 256 M.2 SSD. Intel® NUC Mini PCs are fully complete and ready to work out of the box. You can learn more here Intel® NUC Products.How To Do It?
You need Domain Admin right to create a new group policy object and apply it to other Windows machines.
- Connect to your Active Directory Domain Services (ADDS) server.
- Open Server Manager > Tools > Group Policy Management.
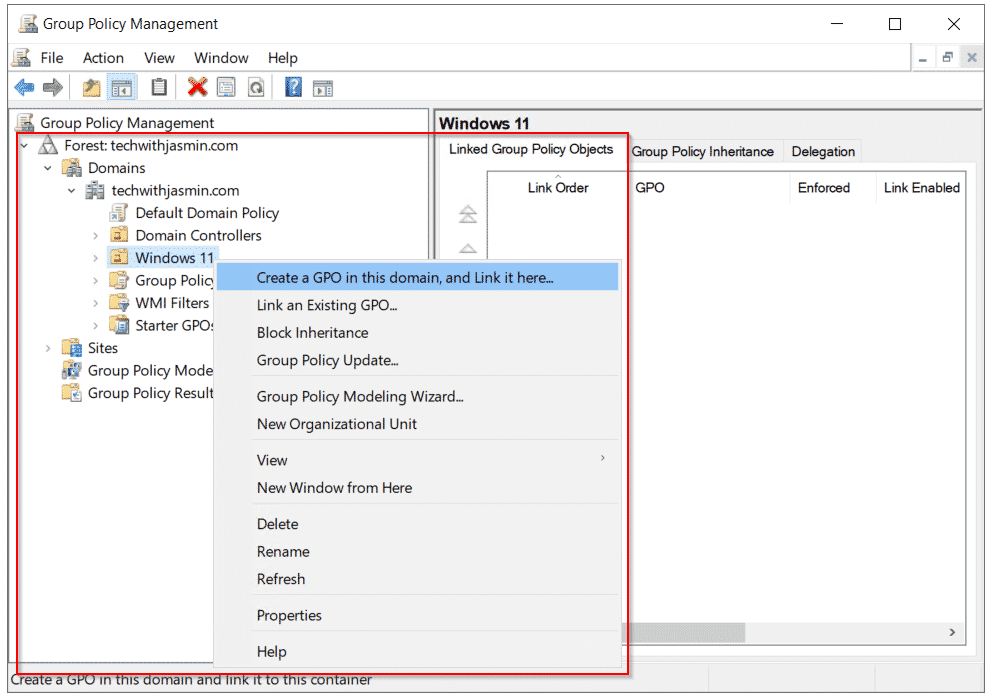
- Expand your forest (in my case, it is techwithjasmin.com). The best practice is to create OU (organization units) and populate it with corresponding computers or users (e.g. Pre-Sales, Finance, Windows 10 machines, etc.). In my case, there is OU called Windows 11. It includes all Windows 11 machines used in my network. If you don’t have OU and you want to test what we do here, you can create GPO directly on a domain level.
- Right-click on the OU and then click Create a GPO in this domain and Link it here.
- Define the name of GPO and click OK.
- Right click on GPO and click Edit.
- Expand Computer Configuration > Policies > Administrative Templates > Network > SNMP.
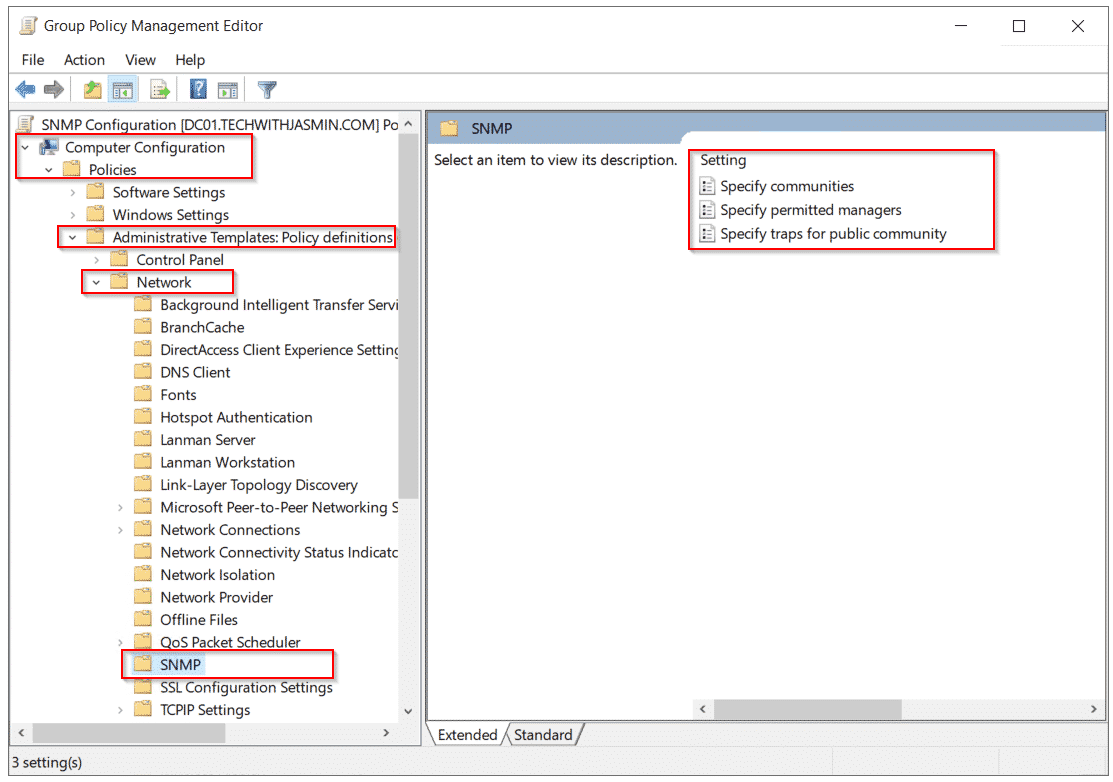
- Double-click on Specify communities. This policy setting configures a list of the communities defined by the Simple Network Management Protocol (SNMP) service.
- Click Enabled and then Show… and add your community string, and then click OK. In my case, the community string is prtgnetworkmonitor.
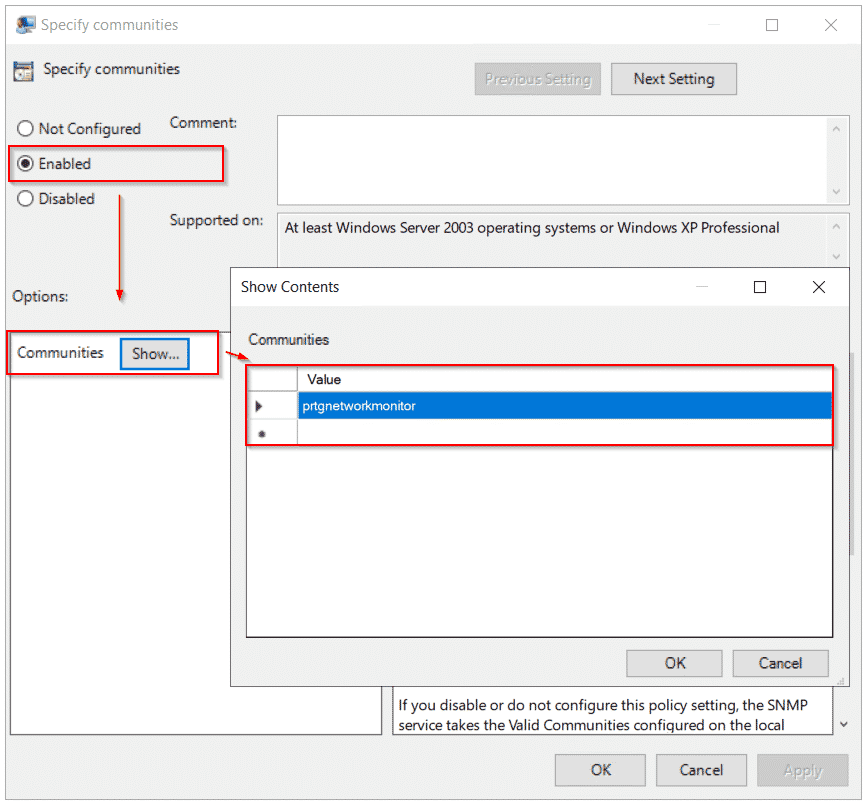
- Click Apply and then OK.
- Double-click on Specify permitted managers. This policy setting determines the permitted list of hosts that can submit a query to the Simple Network Management (SNMP) agent running on the client computer.
- Click Enabled and then Show… and add the IP of your network monitor solution and then click OK. In my case, the IP is 192.168.88.100 (PRTG Network Monitor).

- Click Apply and then OK.
- Double-click on Specify traps for public community. This policy setting allows trap configuration for the Simple Network Management Protocol (SNMP) agent.
- Click Enabled and then Show… and add the IP of your network monitor solution and then click OK. In my case, the IP is 192.168.88.100 (PRTG Network Monitor).
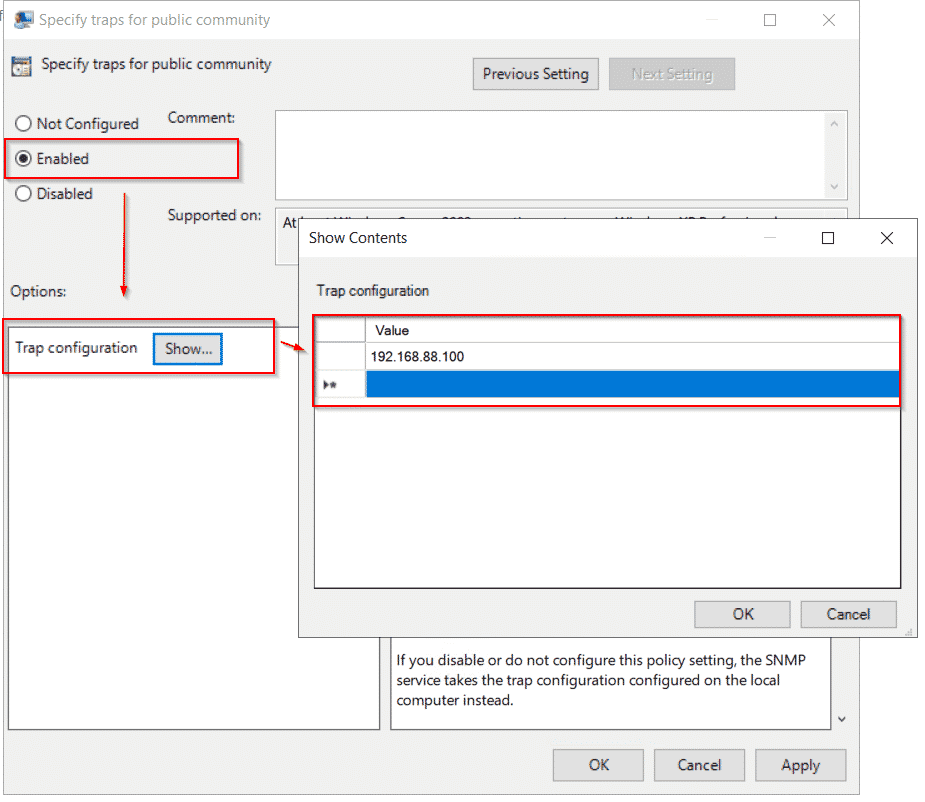
- Click Apply and then OK.
- Close Group Policy Management Editor.
- Open PowerShell or Command Prompt as Administrator and force group policy update by executing the command:
gpupdate /force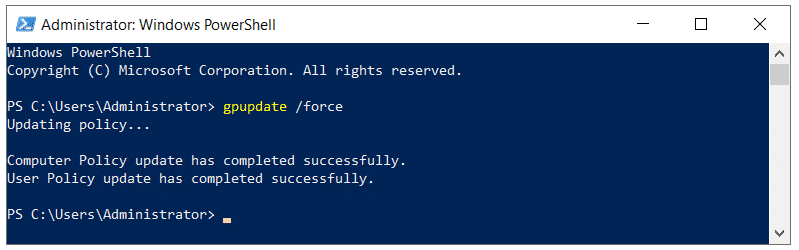
- The policy will be applied on Windows client or Windows server machines after the next log-on. You can force it by signing out and signing in again, or by login into your target Windows machine and executing the same command in PowerShell or Command Prompt.
gpupdate /force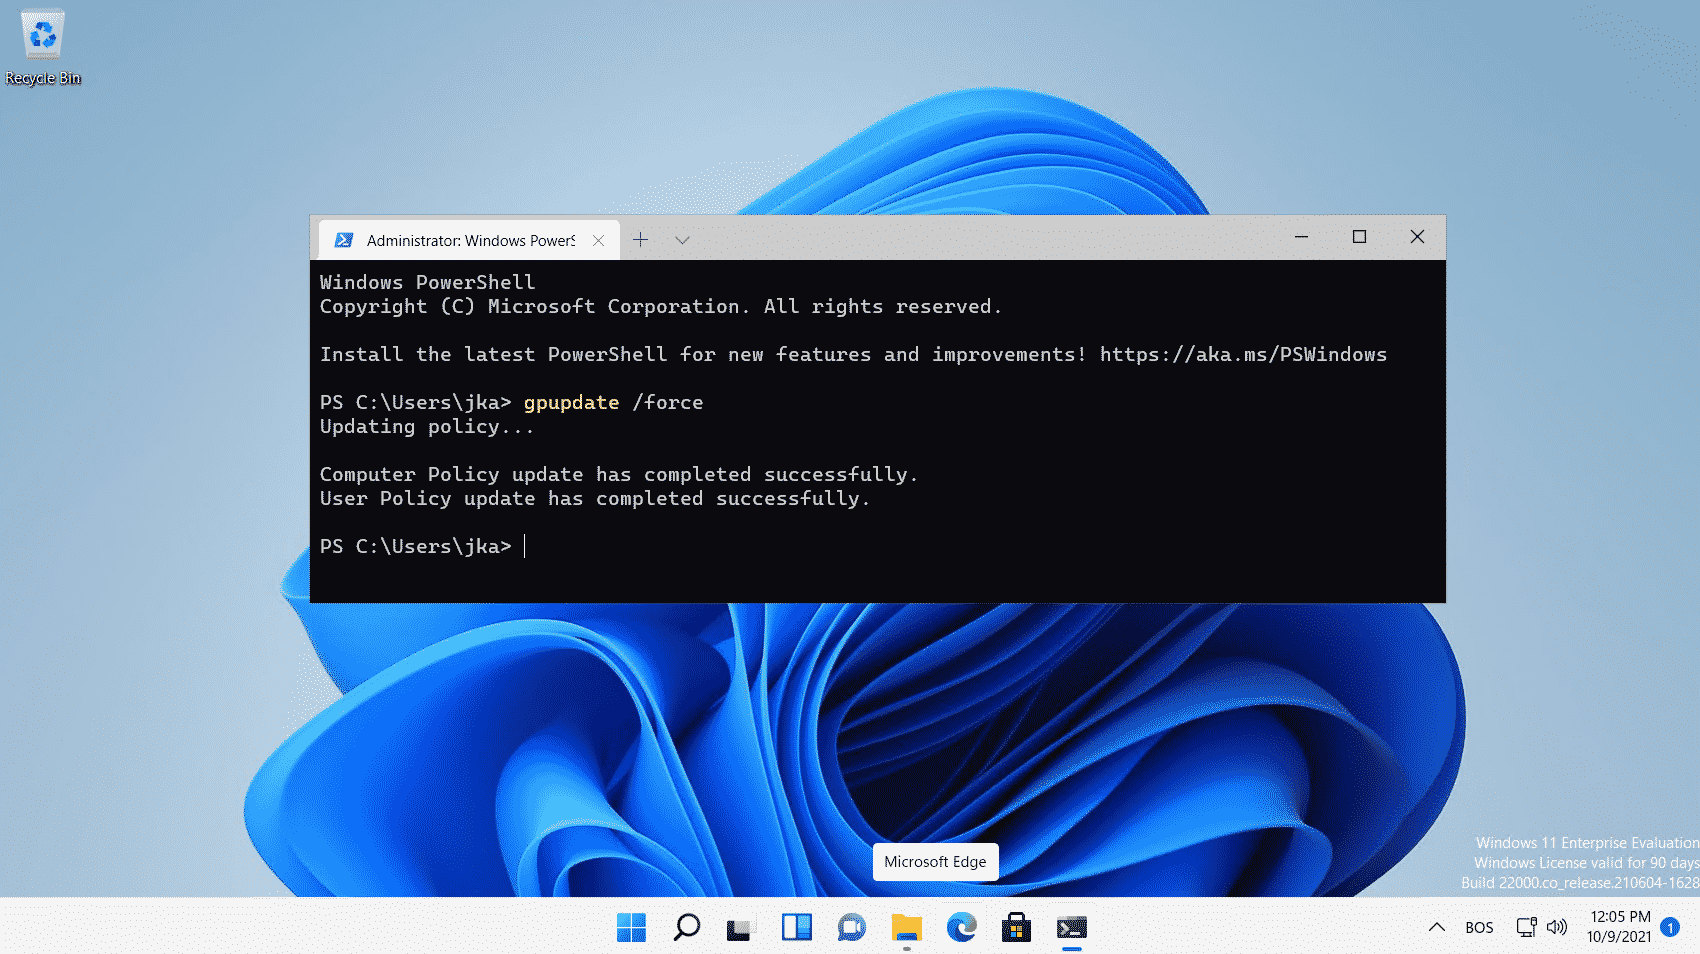
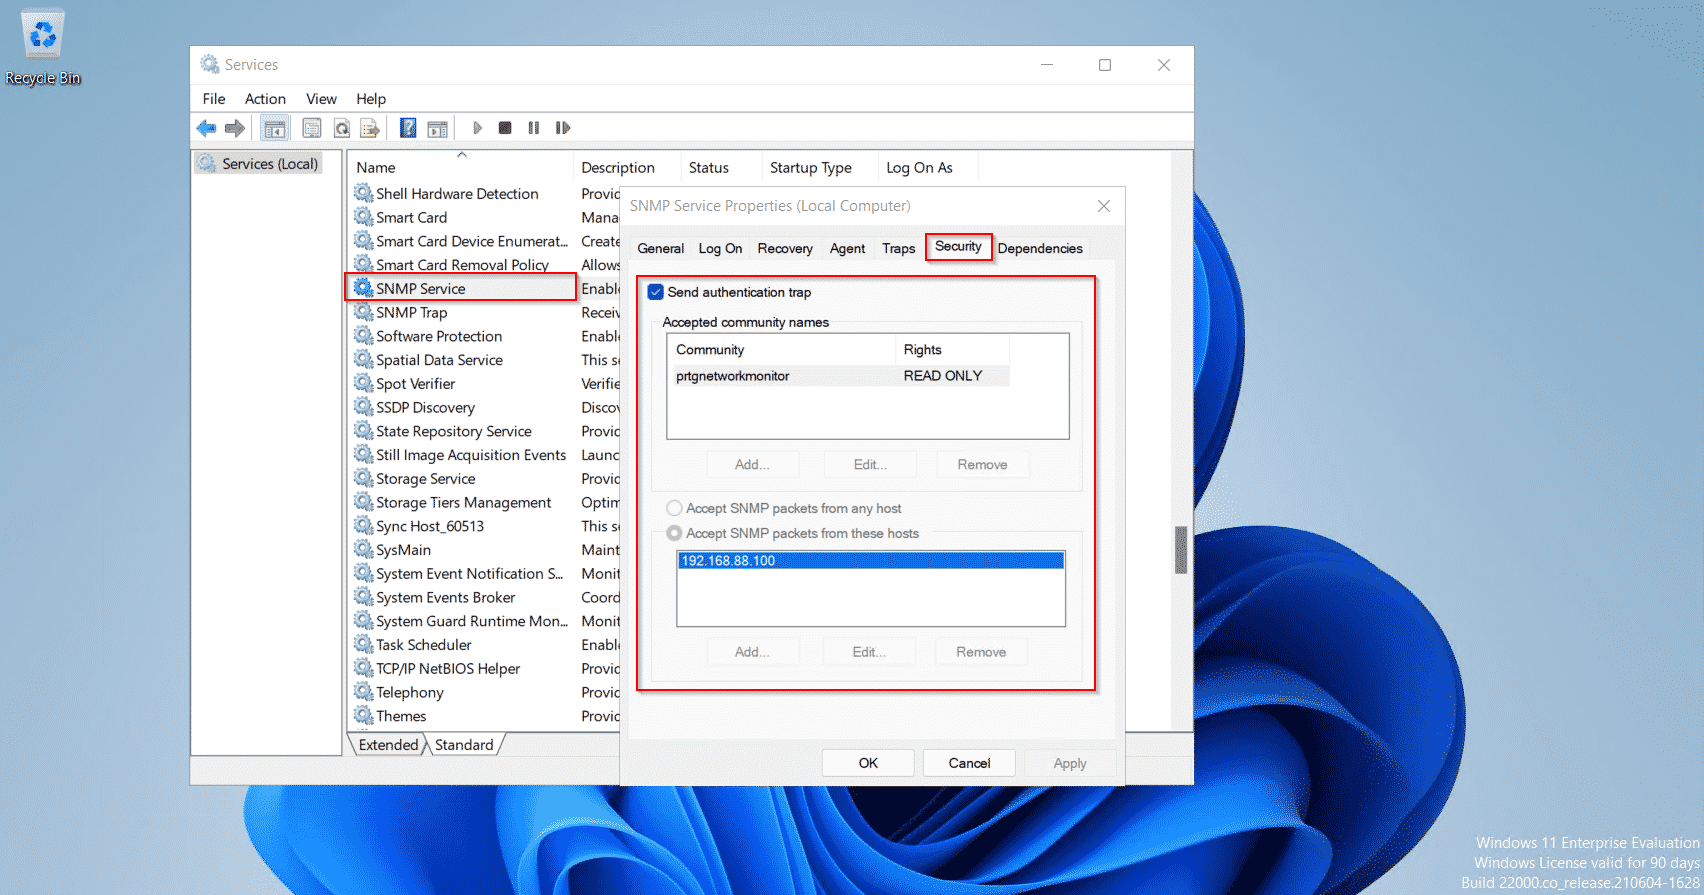
- Open the Services tool and navigate to SNMP Service and verify if the community string and IP are changed. In my case, everything is as expected.
In case you want to automate SNMP service enablement, you can do it using the PowerShell script. The script can be also deployed with GPO to computers or users, or you can deploy it as scheduled tasks. Here is one of the scripts I found for that purpose, but haven’t tested it.
I hope you found this article helpful, as I did. If so, and if you think your network would like this too, I’d love you to share it by clicking on the social media button below. Thank you.

Amel Spahic
October 12, 2021 at 07:47
This looks awesome, and pretty clear explanation. Thanks for sharing your knowledge with us.
Jasmin Kahriman
October 12, 2021 at 12:16
Happy you like it, Amel. Thank you.