
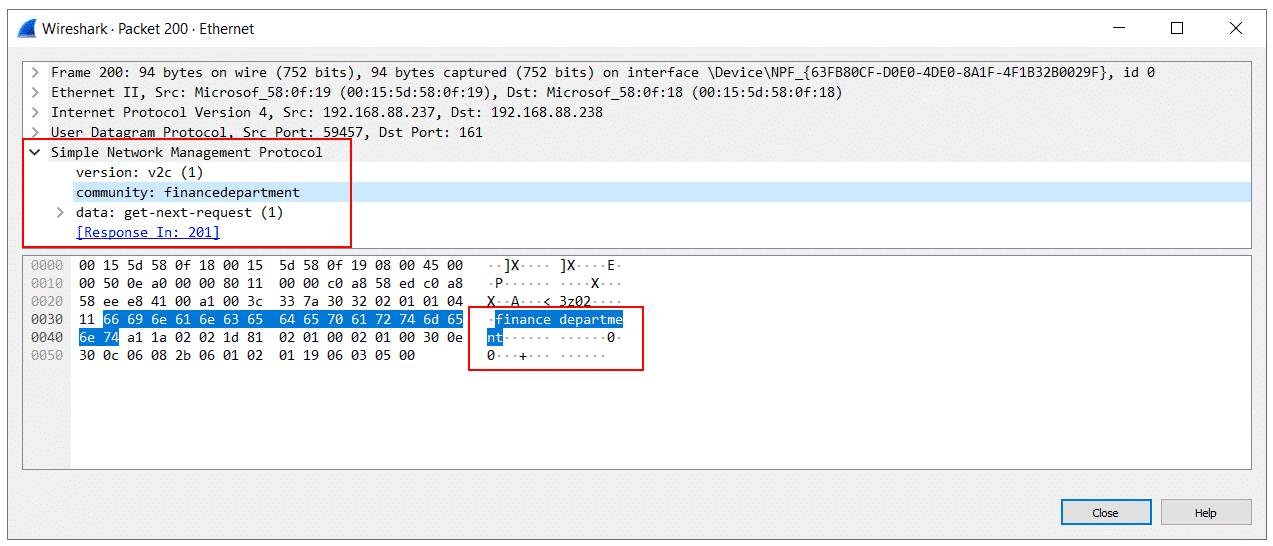
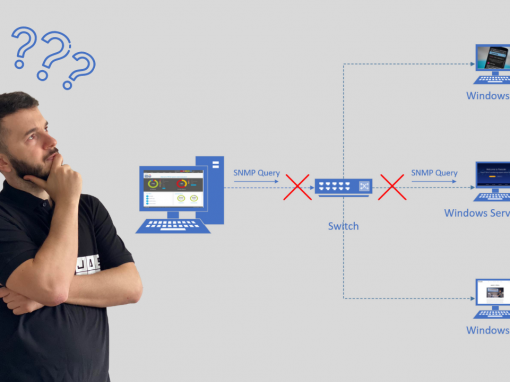
SNMP is a common network monitoring protocol used to get different metrics from target hosts. It supports three versions. SNMP v1 and SNMP v2c are not encrypted. If a malicious IT guy tries to intercept the communication, he will see things going in plain text. SNMP v3 is encrypted, but unfortunately not supported in Windows and Windows Servers.
The common question we can hear is how can we perform secured monitoring between network monitoring solutions and target Windows machines? There are two ways of doing it. The first one is to use third-party SNMP v3 agents. I already talked about that in the article How to achieve SNMPv3 compliance in Windows and Windows Server.
The second way is to use SNMP v1 and SNMP v2c and encrypt it with IPsec. IPsec is natively supported in Windows and can be easily configured using Active Directory and Group Policy Management Objects (GPMO). In case you want to use IPsec in the Workgroup environment, you need to use the Local Security Policy and configure it on each Windows machine separately. Yes, this would be a time-consuming task.
In this article, I’ll show you how to encrypt SNMP v1 and SNMP v2c traffic that is happening between NMS (Network Monitoring Solution) and target Windows machines. The complete procedure is done using Windows Server 2022 and Windows 11, but it is equally applicable to previous Windows versions.
HOW TO DO IT?
You need to have Administrator rights on Active Directory Server to configure the IPsec security rule and apply it in the domain network.
- Open Group Policy Management (Server Manager > Tools).
- Expand forest and select the OU where you wan to create group policy object. If you don’t have OU and you want to test what we do here, you can create GPO directly on a domain level.
- Right click on OU and click Create a GPO in this domain, and Link it here…
- Type the name of the group policy and click OK.
- Richt click on created group policy and click Edit.
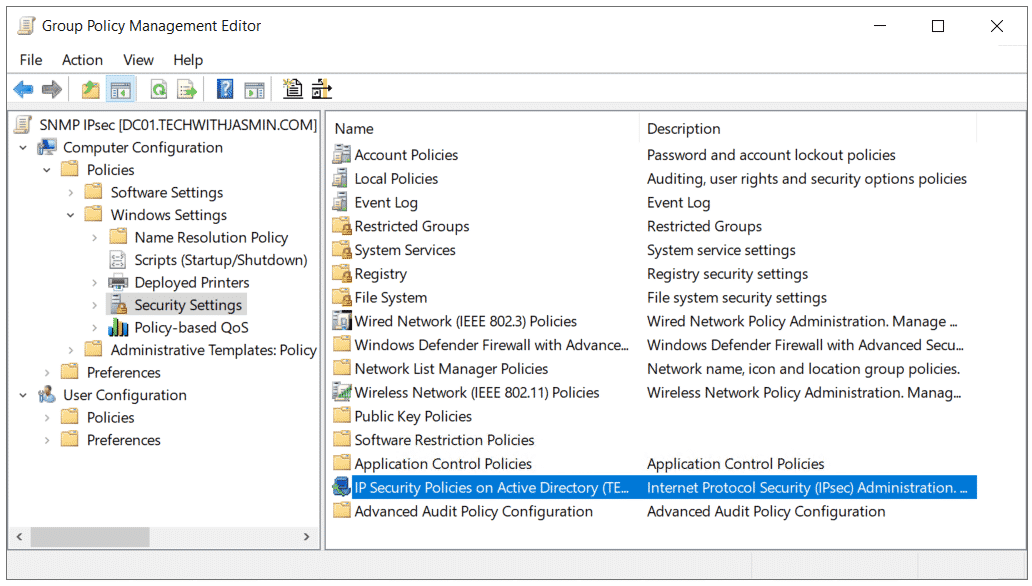
- Expand Computer Configuration > Policies > Windows Settings > Security Settings and select IP Security Policies on Active Directory.
- Right click on IP Security Policies on Active Directory and click Create IP Security Policy to run the wizard for creating a policy.
- Under Welcome to the IP Security Policy Wizard click Next.
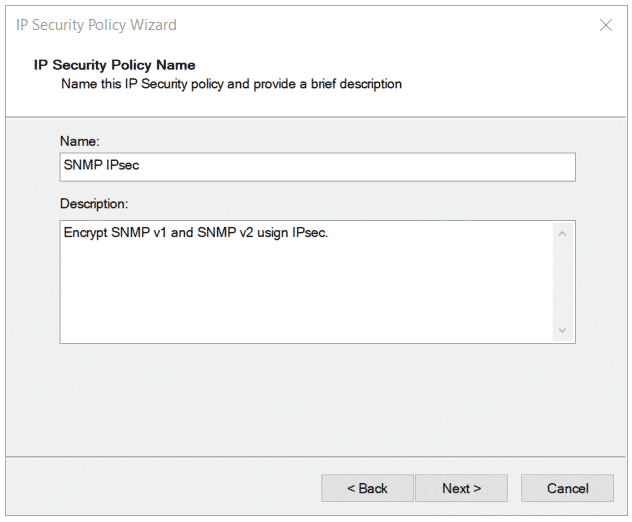
- Define the name of the policy. In my case it is SNMP IPsec.
- Under Requests for Secure Communication click Next.
- You have successfully completed specifying the properties for your new IP Security policy. Select Edit properties (new window will open) and click Finish and close the wizard.
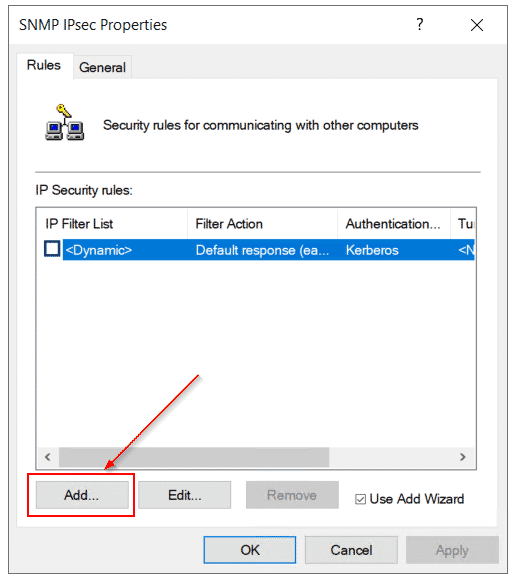
- Click Add to a add a new security rule.
- Under Welcome to the Create IP Security Rule Wizard click Next. A security rule contains a collecation of security actions that ae activated whena communication matches the criteria in the IP filter list.
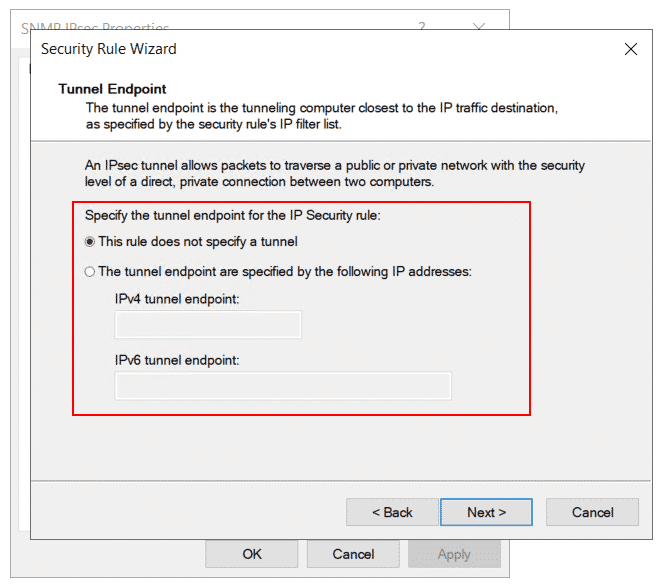
- Select This rule does not specify a tunnel and click Next. An IPSec tunnel allows packets to traverse a public or private network with the security level of a direct, private connection between two computers.
- Under the Network Type select All network connection and click Next.

- Under IP Filter List click Add to add a new filter.
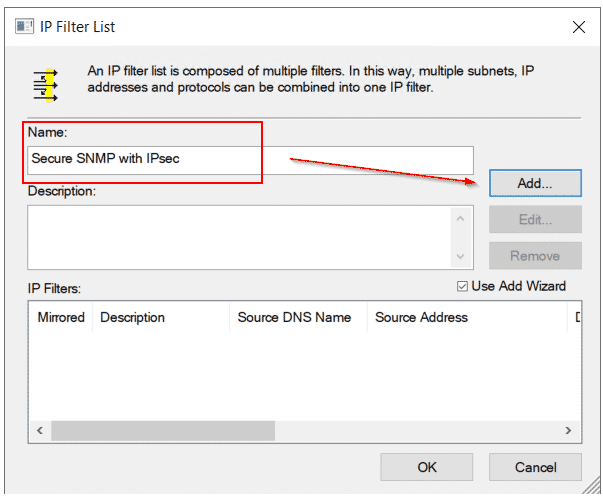
- Type the name of new IP filter list and click Add.
- Under Welcome to the IP Filter Wizard click Next. This wizard helps you provide the source, destination adn traffic type information needed to filter IP traffic. You can add multiple filters to buil an IP filter list that matches on IP packets for multiple source or destination computers, or for many different traffic types.
- Add the IP filter description and select mirrored property and then click Next.
- Choose Any IP addess as a source address and click Next.
- Choose Any IP addess as a destination address and click Next.
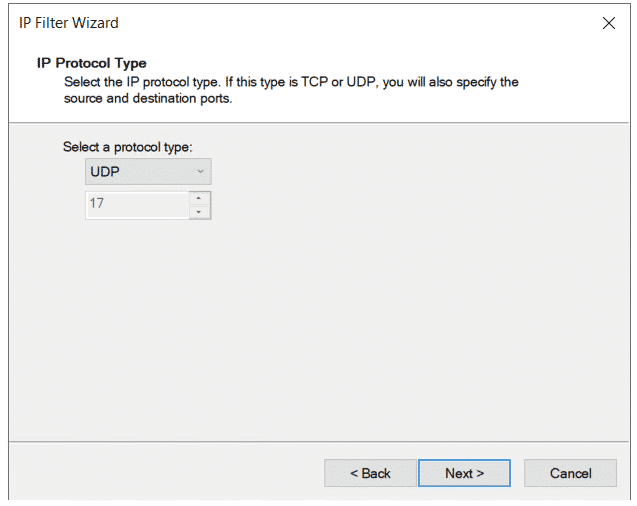
- Select UDP as a protocl type and click Next. Why UDP? Because SNMP is based on UTP.
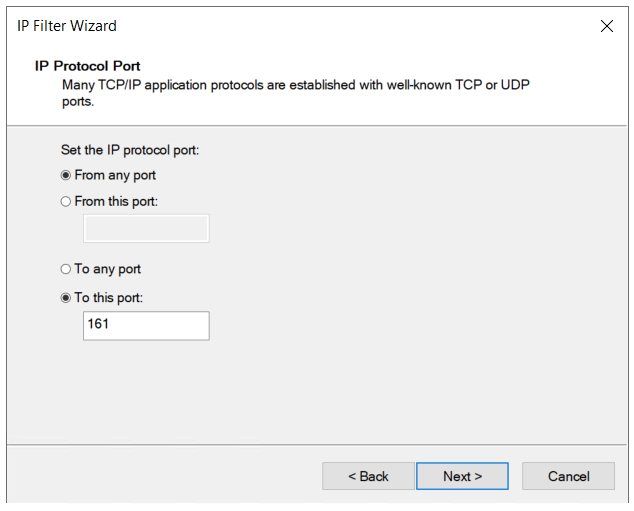
- Specify the SNMP port you use in your network and click Next. By default it is port 161 (SNMP) and 162 (SNMP Traps).
- Click Finish to close the wizard.
- Click OK to close the wizard. You can see the IP filters are created and available in tje list.

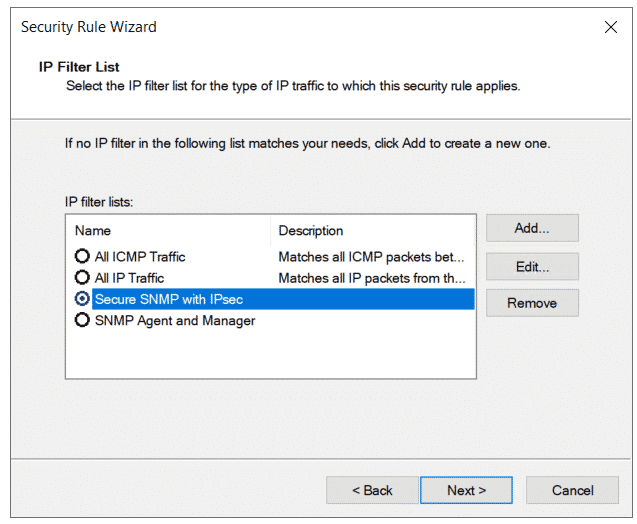
- Select created IP Filter List and click Next.
- Under Welcome to the IP Security Filter Action Wizard and click Next. A filter action sets the security requirements for a data transfer.
- Define the name of the filter action and click Next.
- Select Negotiate security under Filter Action General Options and click Next.

- Select Do not allow unsecured communication and click Next.

- Select Integrity and encryption to encrypt the data and click Next.

- You have successfully completed the IP Security Filter Action Wizard. Click Finish to close the wizard.
- Select the Filter Action you created and then click Next.

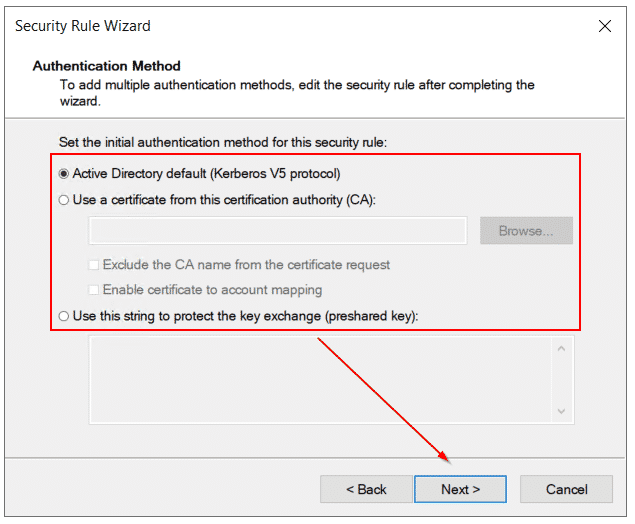
- Under Authentifcation method you can use one three methods including Active Directory default (Kerberos v5 protocl), certificate from the CA and pre-shared key. It is recommended to first use CA (if possible) and then Kerberos and pre-shared key. Click Next.
- You have successfully completed specifying the properties for your new rule. Click Finish to close the wizard.
- Click Apply and then OK.

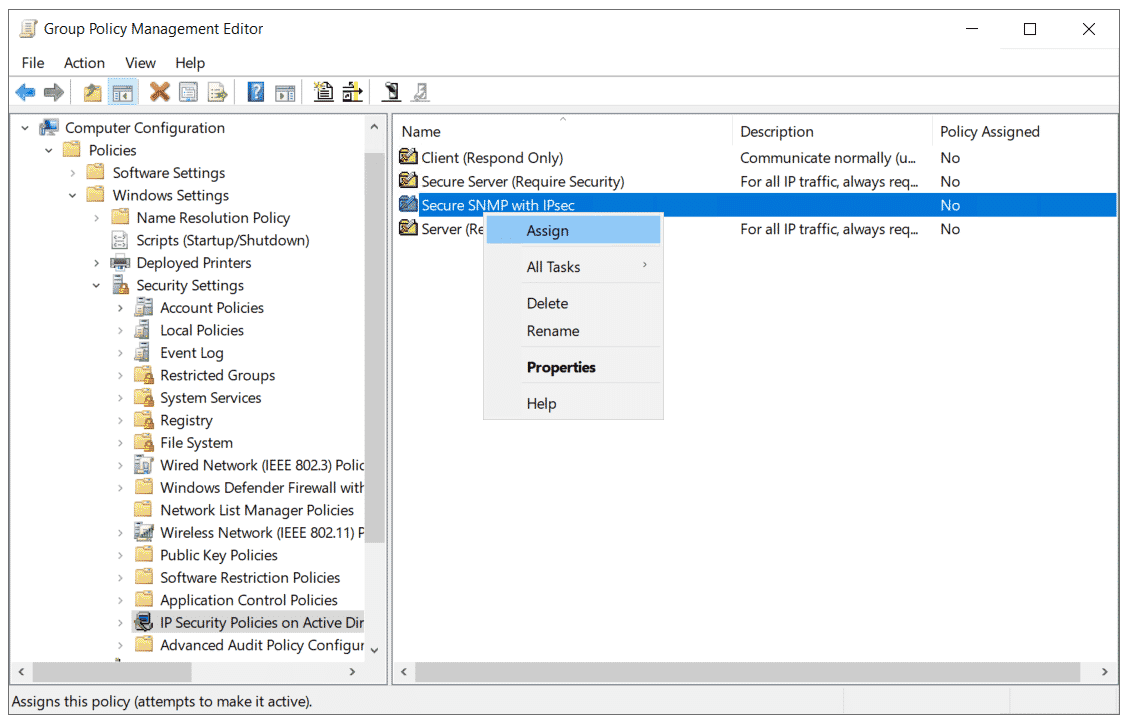
- Right click on IP security rule and click Assign.
- Run PowerShell as Administrator and type the following command to force group policy update.
gpupdate /force
- The policy will be applied on Windows client or Windows server machines after the next log-on. You can force it by signing out and signing in again, or by login into your target Windows machine and executing the same command in PowerShell or Command Prompt.
gpupdate /force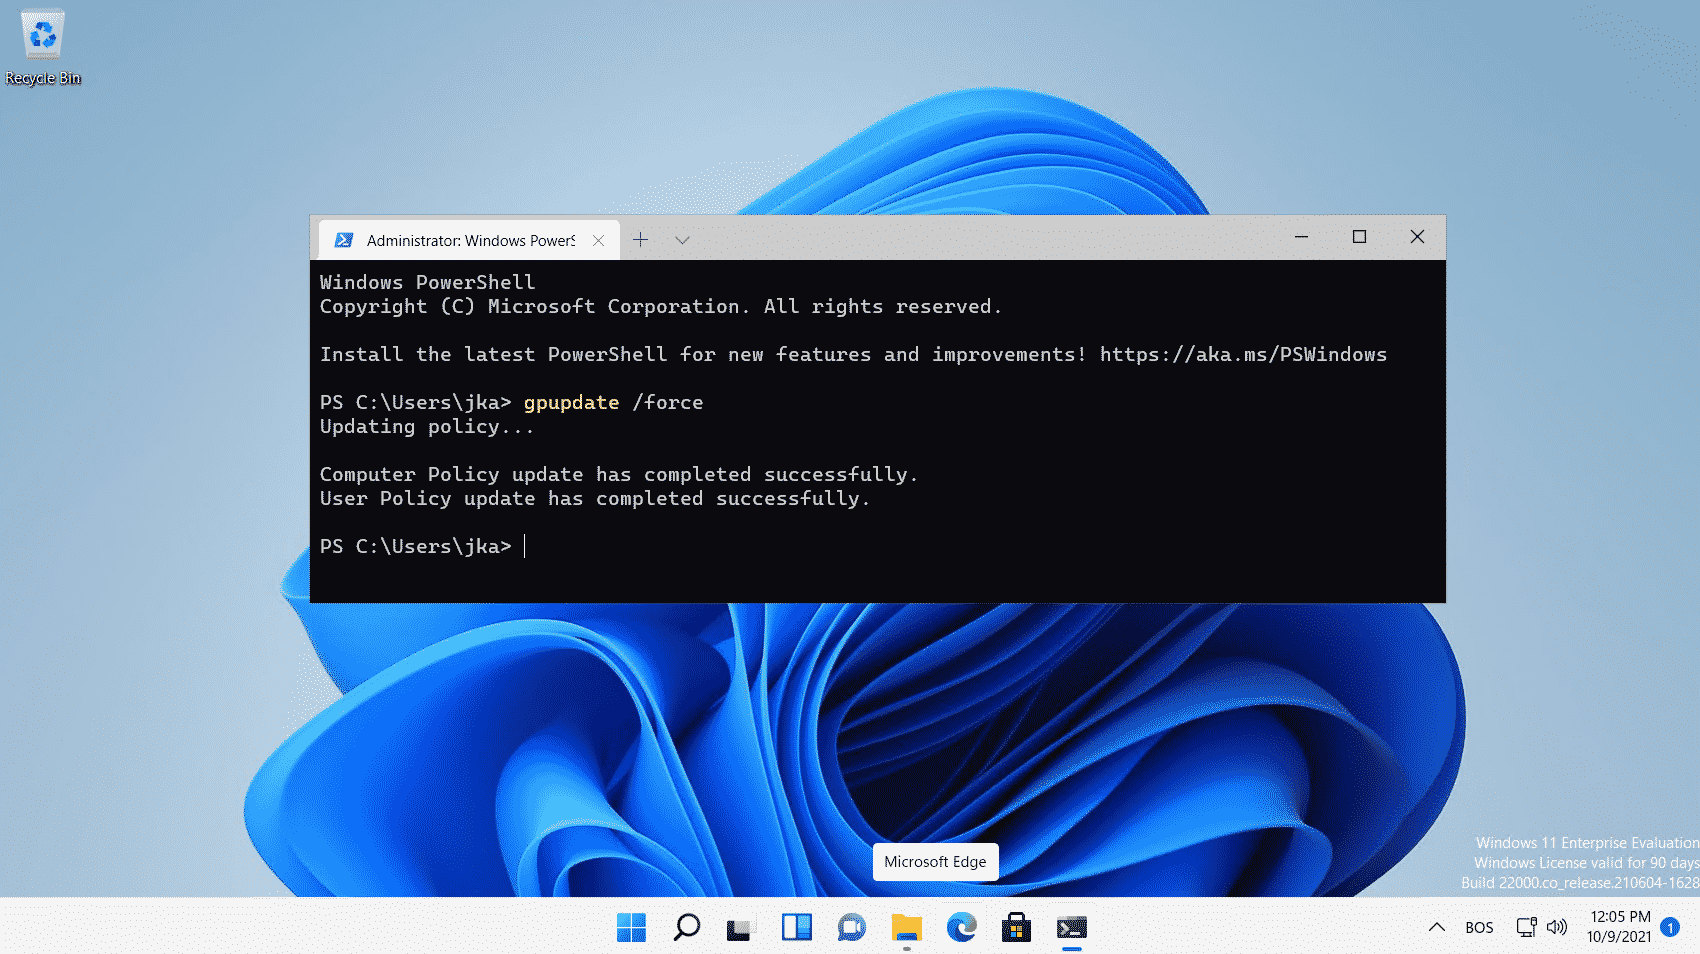
- Congratulations. You have encrypted unencrypted SNMP v1 and SNMP v2c communication with IPsec. What happens when someone intercepts the SNMP v1 and SNMP v3 traffic? Here it is.

I hope you find this article useful. If you would like to share it with your friends and your virtual network, please do it by clicking on the social media button below.

Eric
November 15, 2021 at 23:58
Will this work if I am trying to encrypt SNMP traffic within the same subnet to a Lexmark network printer?
Jasmin Kahriman
November 17, 2021 at 21:46
Hi Eric – In this case, group policy objects are only applied to Windows machines. However, there are ways to encrypt SNMP v1 and SNMP v2c communication with other devices as well. Do your monitoring solution and Lexmark support SNMP v3?