
Windows Server Backup doesn’t natively support SMTP notifications and this title might sound a bit confusing. By combining Windows Server Backup and Task Scheduler we can overcome this challenge and get notified if backup jobs succeed or fail. This can be done by executing a PowerShell script that will send an email on a specific event ID (e.g. ID 4 for successful backup, ID 49 for failed backup).
If you have ever worked with Task Scheduler, you have probably noticed that the feature for sending an email is still there, but it´s deprecated and it doesn´t work. I vote for removing it, as it is useless and it looks confusing.
Considering that you have already installed and configured your Windows Server Backup and that you have backup jobs in place, we can directly jump into Task Scheduler and proceed with the configuration. This article is not focused on the pros and cons of using Windows Server Backup, but it is specific to email notification.
STEP 1: PREPARE POWERSHELL SCRIPT
This is a simple script already tested and published on TechNet. In order to send an email, we need to authenticate to our SMTP server by adding a username and password. Adding credentials in plain text is not something we want to do, so we´ll first encrypt it by using the PowerShell command below. In my example, the password “MyPassword” will be encrypted and saved to file EmailPassword.txt at C:\.
"myPassword" | ConvertTo-SecureString -AsPlainText -Force | ConvertFrom-SecureString | Out-File "C:\EmailPassword.txt"The encrypted password MyPassword looks like: 01000000d08c9ddf0115d1118c7a00c04fc297eb0100000088495ae0509a444dab7b61eeee49e42600000000020000000000106600000001000020000000944bc00c447ce81fe6311147c1163a5a007d162b09a593b3f87fd88129846fe5000000000e8000000002000020000000ab37fb3f9975dd9a5fb03532c1c7c569daa3493f7221647d0c15e3c7fbc75efe200000007374f1aba4f7af17a507143a711e23dc391f894fb991c9f5c47c60c596cc10004000000091fb2caed6f813b807a3c0c6f8a6cdbd2864710b4733a38d9eaec962a67128819bcbc6daa26dcfde53239ce11feb5f441af7644e3a6a792f7c681a1328e9ba33
The file “C:\EmailPassword.txt” will be loaded in the 2nd line in the script below.
$User = "[email protected]"
$File = "C:\EmailPassword.txt"
$cred=New-Object -TypeName System.Management.Automation.PSCredential -ArgumentList $User, (Get-Content $File | ConvertTo-SecureString)
$EmailTo = "[email protected]"
$EmailFrom = "[email protected]"
$Subject = "Successful Backup Job"
$Body = "The backup operation has finished successfully."
$SMTPServer ="smtp.mailserver.com"
$SMTPMessage = New-Object System.Net.Mail.MailMessage($EmailFrom,$EmailTo,$Subject,$Body)
$attachment = New-Object System.Net.Mail.Attachment($filenameAndPath)
$SMTPMessage.Attachments.Add($attachment)
$SMTPClient = New-Object Net.Mail.SmtpClient($SmtpServer, 587)
$SMTPClient.EnableSsl = $true
$SMTPClient.Credentials = New-Object System.Net.NetworkCredential($cred.UserName, $cred.Password);
$SMTPClient.Send($SMTPMessage)
You should modify the following parameters:
- $User = – what email will be used for sending email notifications
- $File = – location of encrpyted password
- $EmailTo = – where you want to send email notifications
- $EmailFrom = what email will be used for sending notifications
- $Subject = – Email subject
- $Body = – Email content
- $SMTPServer = – SMTP server
As the Task Scheduler will need to access your script, you need to save your script to the location per your choice. In my case script “Email.ps1” is saved to C:\.
STEP 2: CREATE ACTION IN TASK SCHEDULER
In the second step, we´ll create a task that will trigger a notification on an event related to the successful or failed backup job. The trigger will execute the PowerShell script which will send an email to the defined email address and notify the IT Admin of backup jobs status. Open Task Scheduler and follow the procedure.
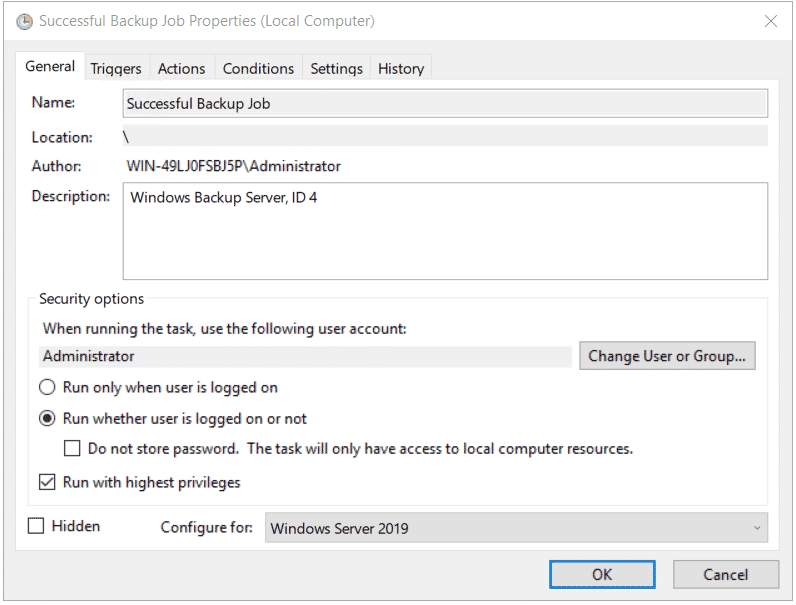
- Click on Create Task under the Actions pane
- Under the General tab type the name and add a description (optional). I´d also recommend selecting Run whether user is logged on or not and Run with highest privileges
- Click on the Triggers tab and click on New to create a new trigger
- Under Begin the task choose On an event and then choose Application as a Log file name, Backup as s Source and add 4 as an event ID.

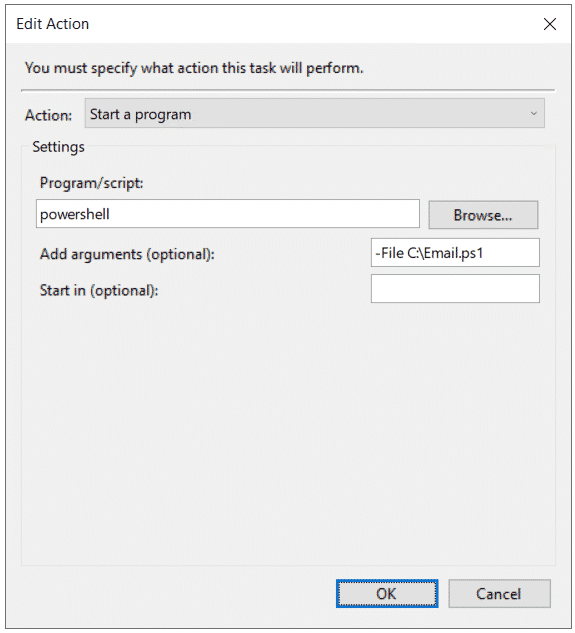
- Click on Actions and then click New to create a new action
- Under Action choose Start a program
- Under Program/script type powershell and then add the location of the script we created in step 1 in the Add arguments (optional) field. In my case, the location is –File C:\Email.ps1.
- Leave all other settings by default and click OK to create your task. You´ll need to authenticate in order to create or modify the task.
You can also verify the history and log entries for this particular task. This can help you to troubleshoot if task is not working as expected.
STEP 3: TEST, TEST, TEST!
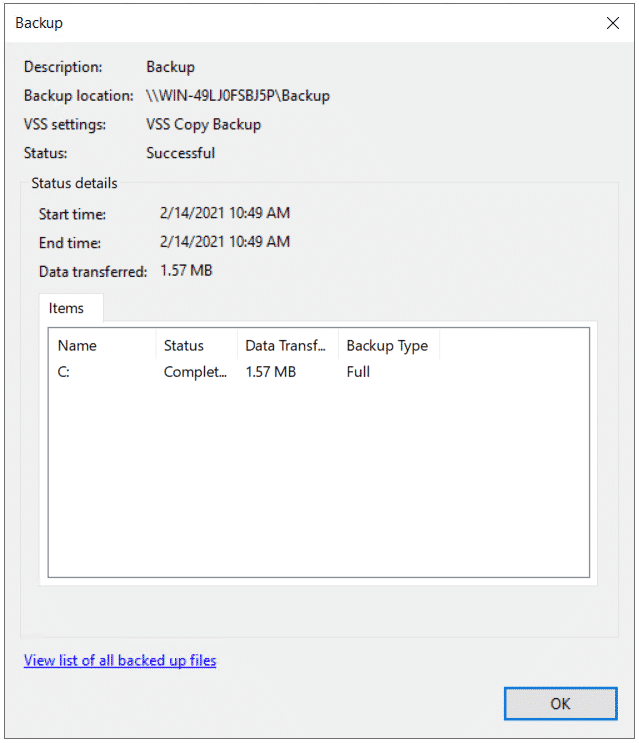
Before waiting for the event to be generated by Windows Server Backup, we should verify if everything we have done in the first two steps is working fine. We can do it by executing the backup job manually. In the first step, once the backup is finished, we will get information in Windows Server Backup.
…and then Windows Server Backup will generate ID in the Application log file, i.e. ID 4 – successfully operation.

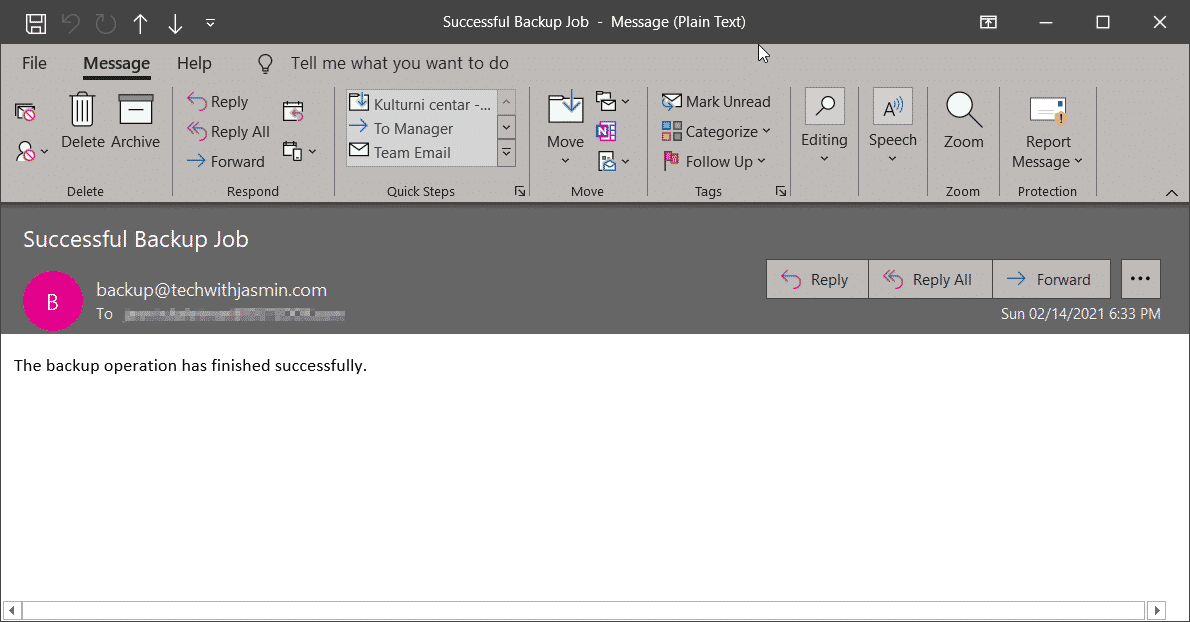
…and after a few seconds we will get an email with confirmation.
We did it. Thank you for reading this article. In case of any questions, feel free to comment or contact me.


Janis
October 13, 2023 at 10:31
Hello!
Please give me information, how to make script for sending message trough gmail.com
I am not sure that this script will work as gmail asks for authentification.
Jasmin Kahriman
October 24, 2023 at 10:23
Hi Janis, the process is the same. All you need to do is use the Gmail SMTP server smtp.gmail.com.
Denis Felipe
November 25, 2023 at 23:39
Hi bro, thanks for sharing.
Is this script compatible to powershell from Windows Server 2012 R2?
Jasmin Kahriman
September 24, 2024 at 22:46
Hi Denis,
Yes, it is compatible with Windows Server R2 as well.
Best regards
Jasmin