Picture this: You spin up a new VM for testing, assign it a network adapter, and…nothing. No internet. No DHCP. No communication with your host. Sound familiar?
The issue? Your virtual switch configuration. Most admins don’t realize that Hyper-V’s three virtual switch types, External, Internal, and Private, serve completely different purposes. Use the wrong one, and you’re stuck troubleshooting for hours.
This guide breaks down each switch type with real-world examples, shows you exactly when to use which, and walks you through configuration step-by-step.
What is the virtual switch?
A virtual switch in Hyper-V is a software-based network switch that allows virtual machines to communicate with each other, with the host computer, and with external networks. It acts like a physical network switch but exists entirely in software, managing network traffic for your VMs.
Hyper-V provides three types of virtual switches; Private, Internal, and External, each designed for different networking scenarios depending on whether you want the VM to communicate only with the host, other VMs, or the outside network.
External
The External virtual switch allows virtual machines to connect to the rest of the network, including the Internet. If you have a DHCP server in your network and your VM uses an External switch, it will automatically receive an IP address from the DHCP server.
This means a VM that is using an external virtual switch can communicate with other VMs with the same settings, with the Hyper-V host, and with the rest of the network.
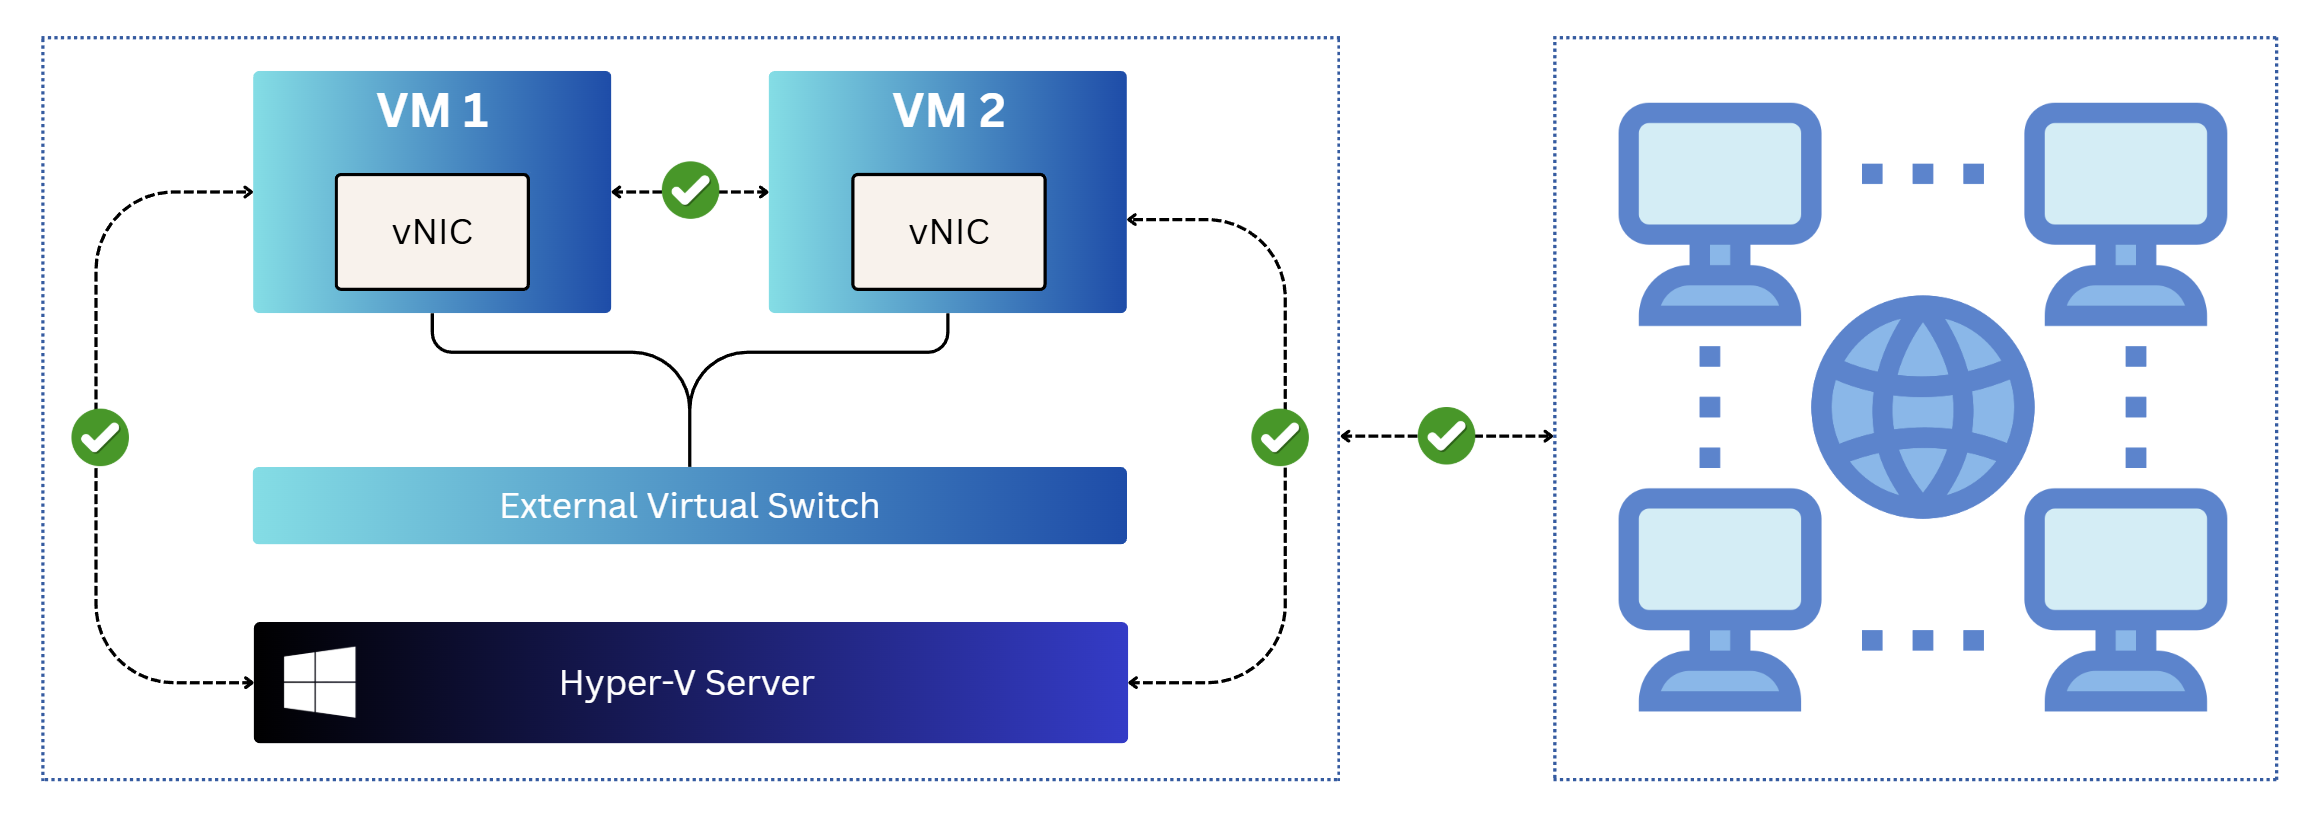
This is the most commonly used virtual switch.
If you are running a home lab, it is recommended that your host has at least two physical network cards: one dedicated to the External switch and another for your regular network traffic.
If you only have one physical network card and use it for both the External switch and your regular network, you may encounter connectivity issues.
Internal
The internal switch is relevant when you want VMs to communicate with each other and with the Hyper-V host. They cannot communicate with the rest of your network.
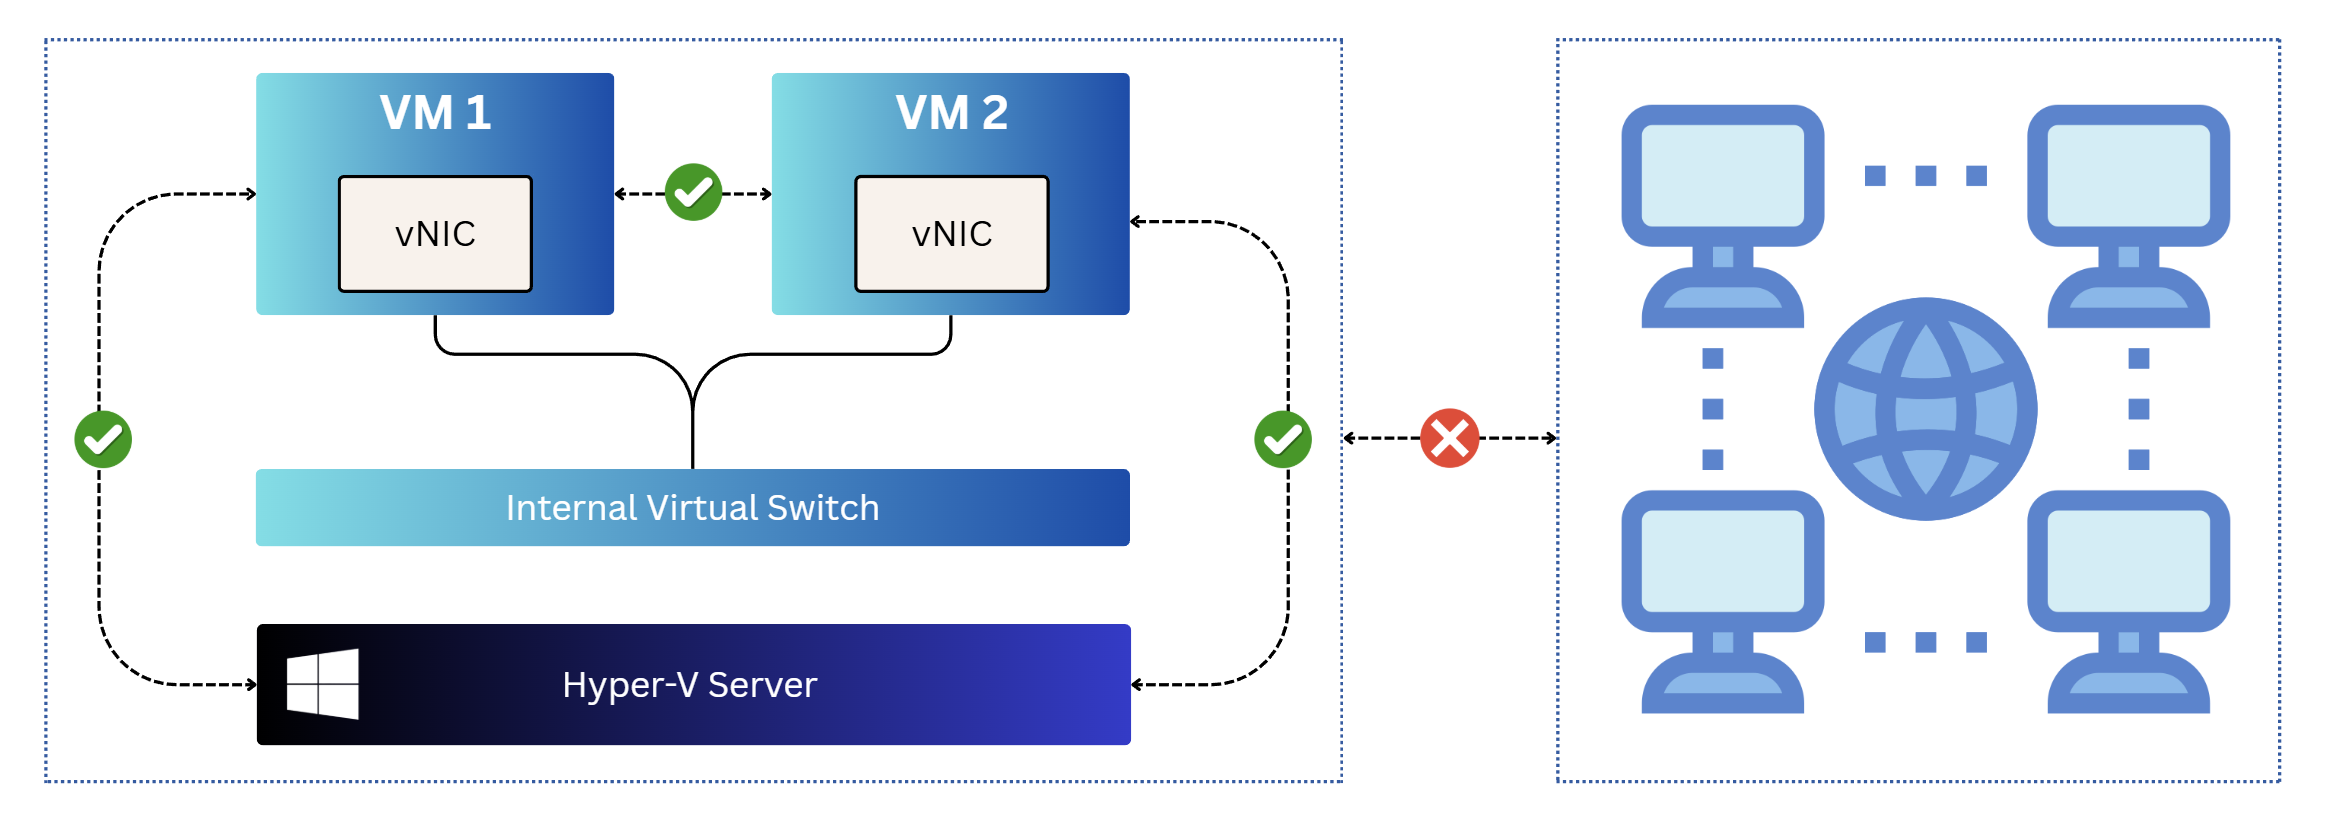
If you assign an internal virtual switch to your VM, both the VM and the host will be given virtual network adapters that must be configured with static IP addresses.
Without this configuration, the Hyper-V host and the VM will not be able to communicate with each other.
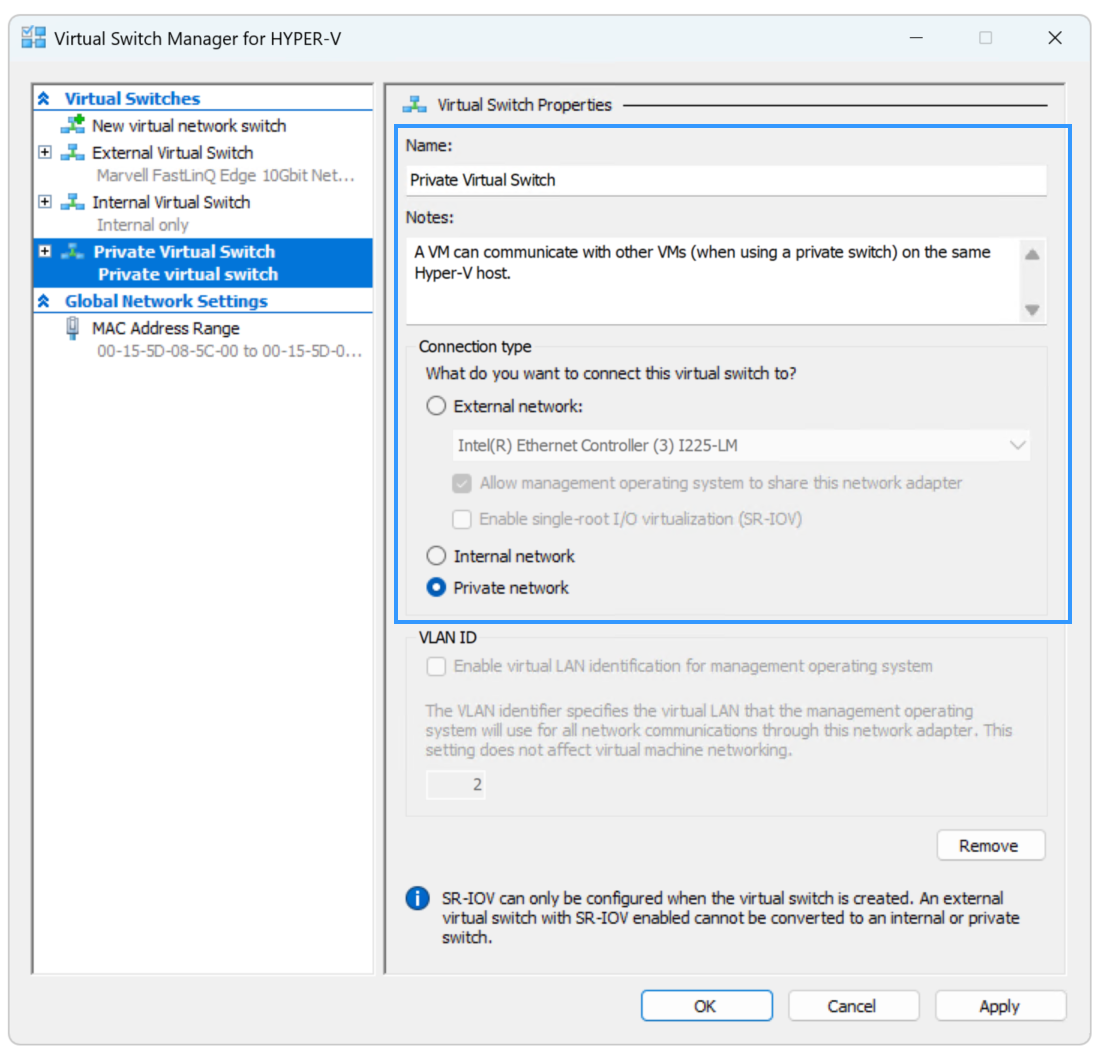
Private
The private virtual switch allows communication only between virtual machines. The Hyper-V host cannot see this communication, nor can the VMs see the rest of the network. This is the main difference compared to the internal virtual switch.
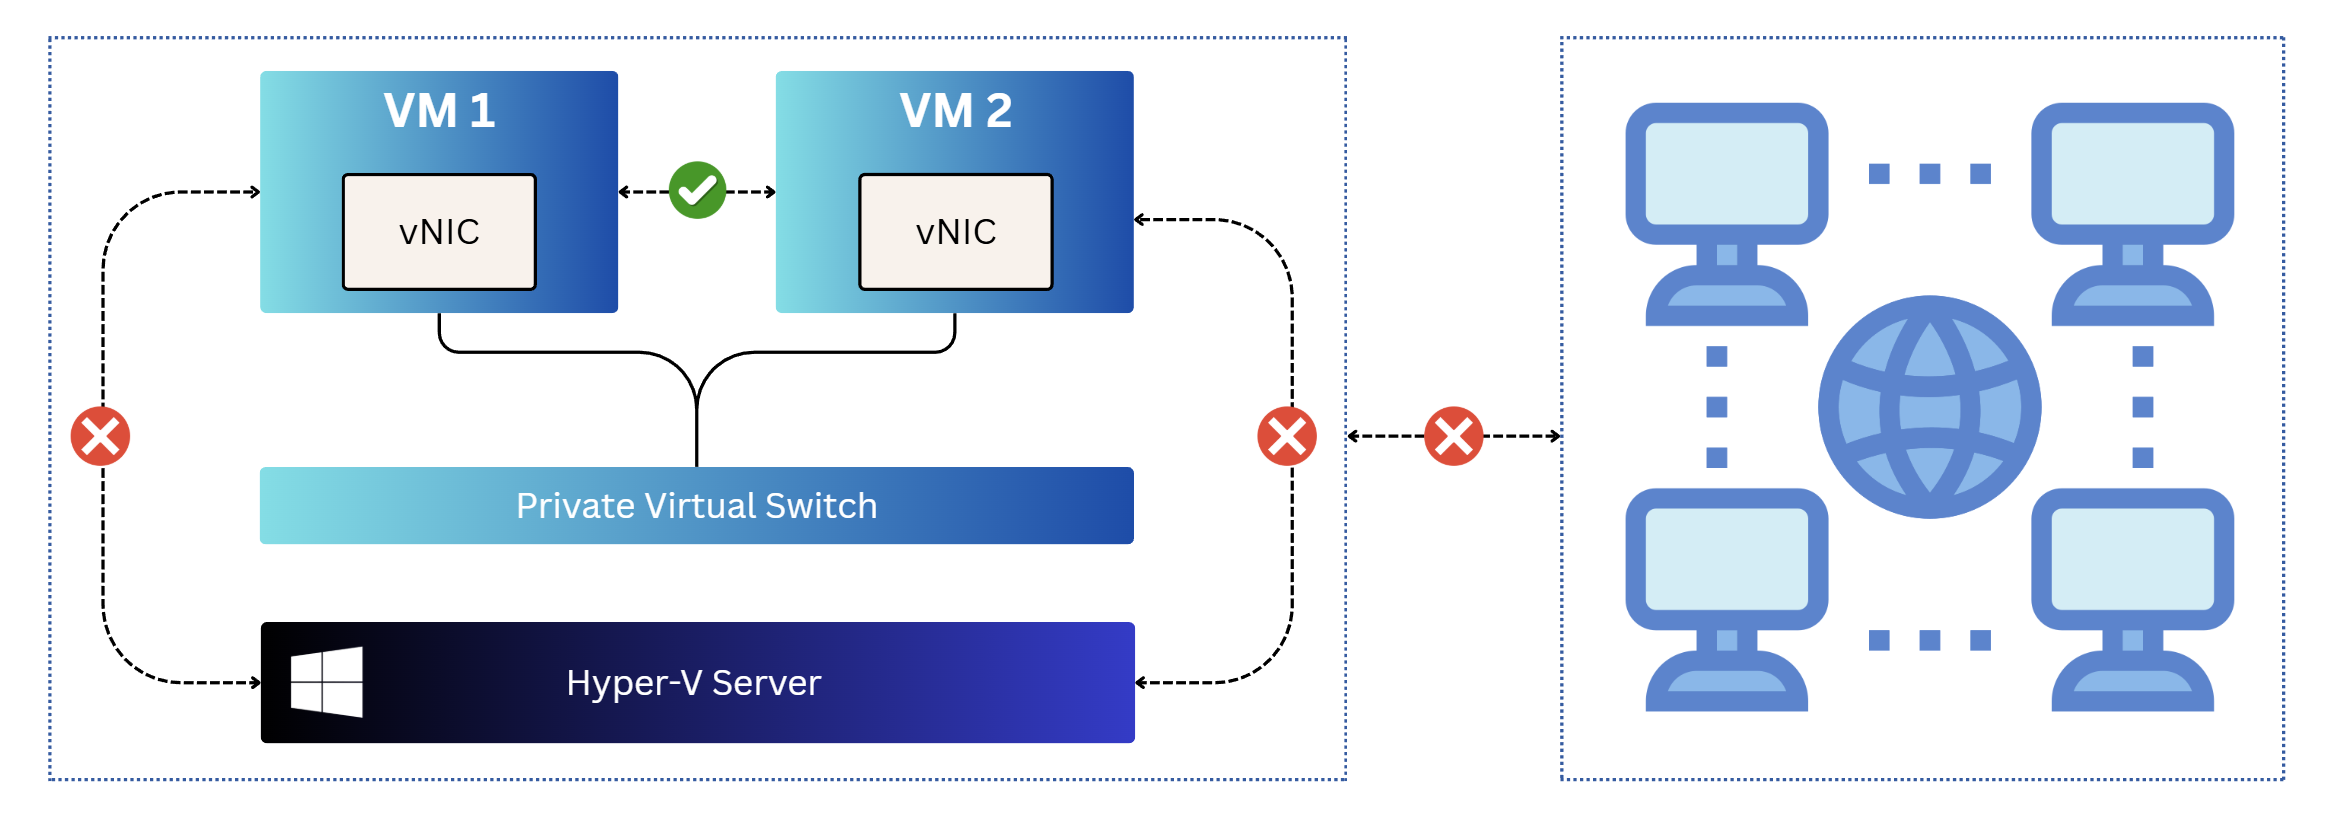
You will need to configure the network adapters and IP settings on all VMs that are using a private virtual switch.
How to create a virtual switch?
The procedure of creating virtual switches is straightforward.
I’ll show you how to do it on Windows Server 2025 with the Hyper-V role installed, but the same procedure is compatible with all previous Hyper-V versions.
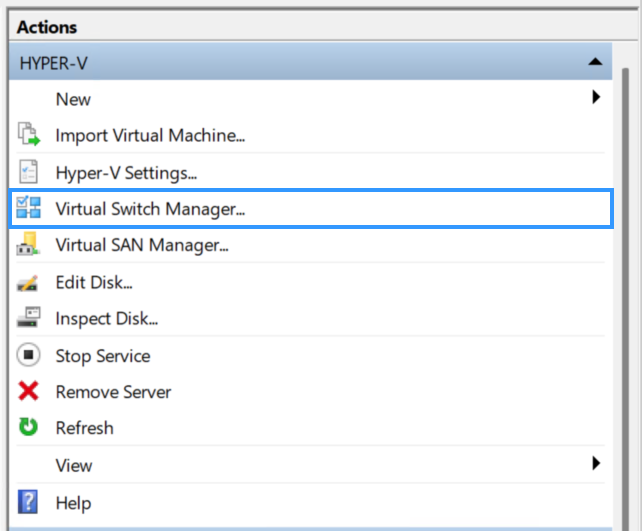
- Open Hyper-V Manager and select your Hyper-V host.
- Click Virtual Switch Manager on the right side of the pane. You can also do this by right-clicking the Hyper-V host and selecting Virtual Switch Manager.
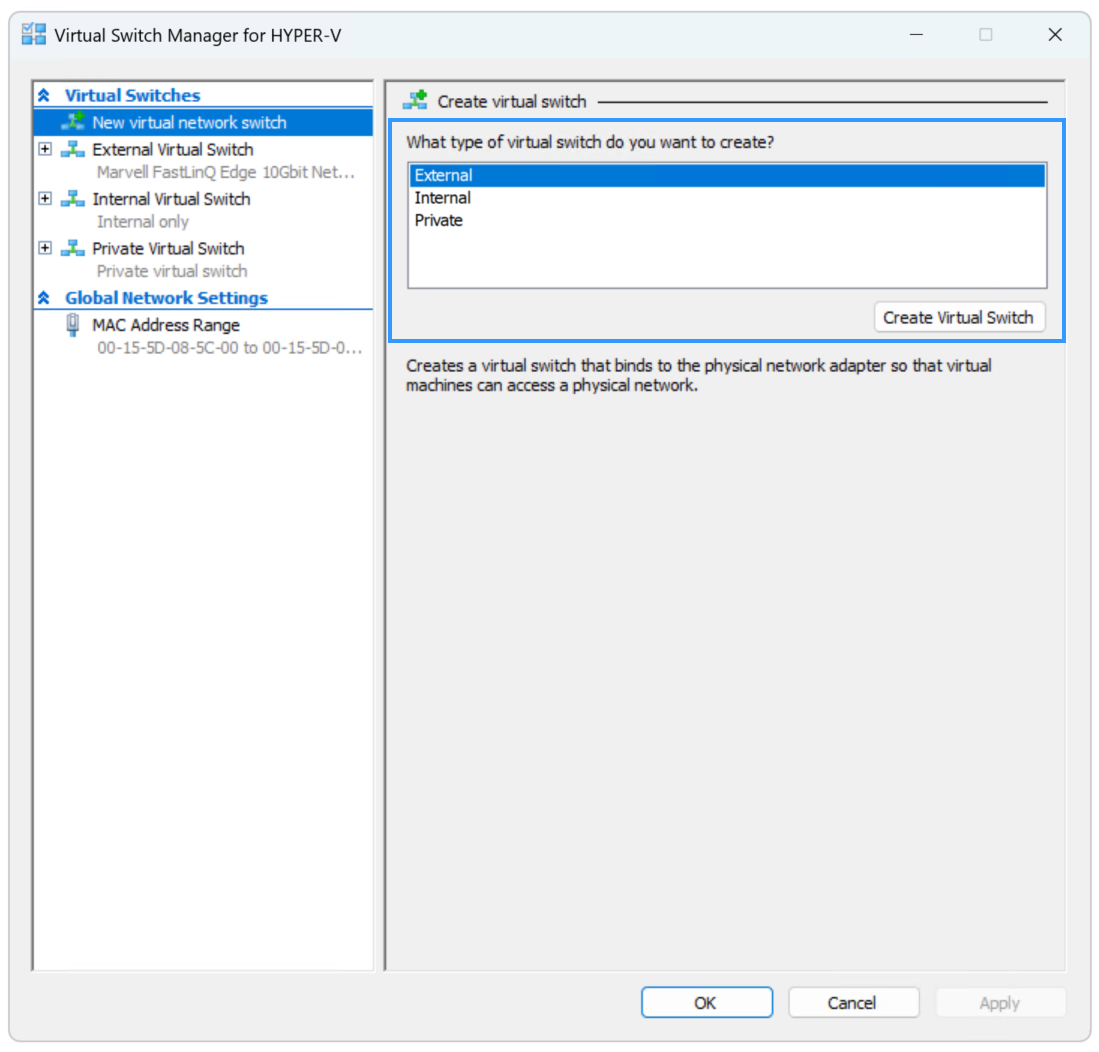
- Select the type of virtual switch, and then click Create Virtual Switch.
- Enter the name and notes for your virtual switch.
If you are creating an external virtual switch, you will need to select External network and then choose one of the available network adapters. It is best to have at least two physical network adapters.
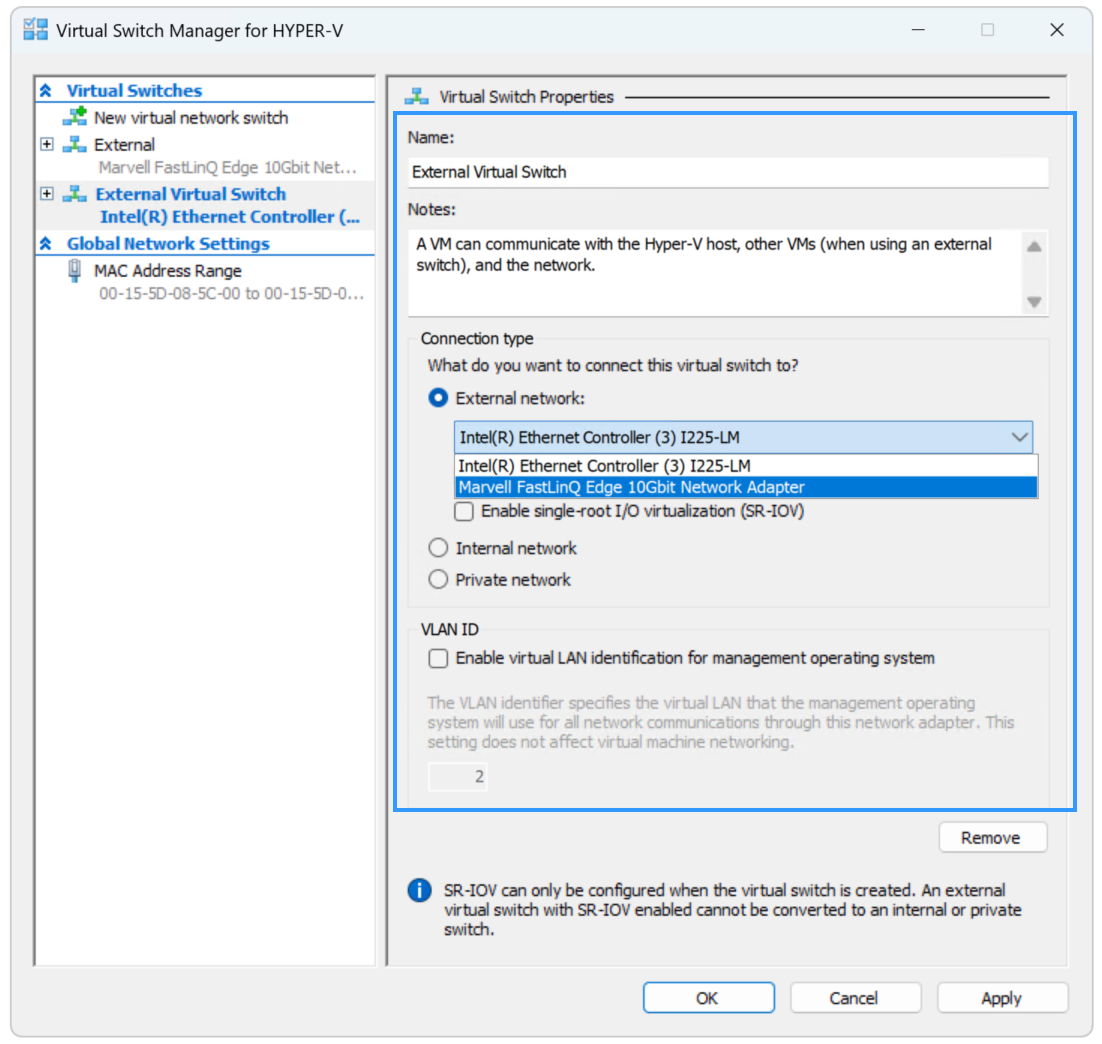
Furthermore, for an external virtual switch, you can enable Single-Root I/O Virtualization (SR-IOV). SR-IOV allows a physical network adapter to present itself as multiple virtual network adapters, giving VMs direct access to the physical NIC hardware and bypassing the Hyper-V virtual switch.
This is used in scenarios where low network latency (<1 ms) is required, for example, when running high-performance databases, video streaming, and similar workloads.
You can also enable a VLAN ID for an external virtual switch. VLAN tagging allows you to segment network traffic into separate logical networks on the same physical infrastructure—for example, to isolate traffic for security, organization, or compliance.
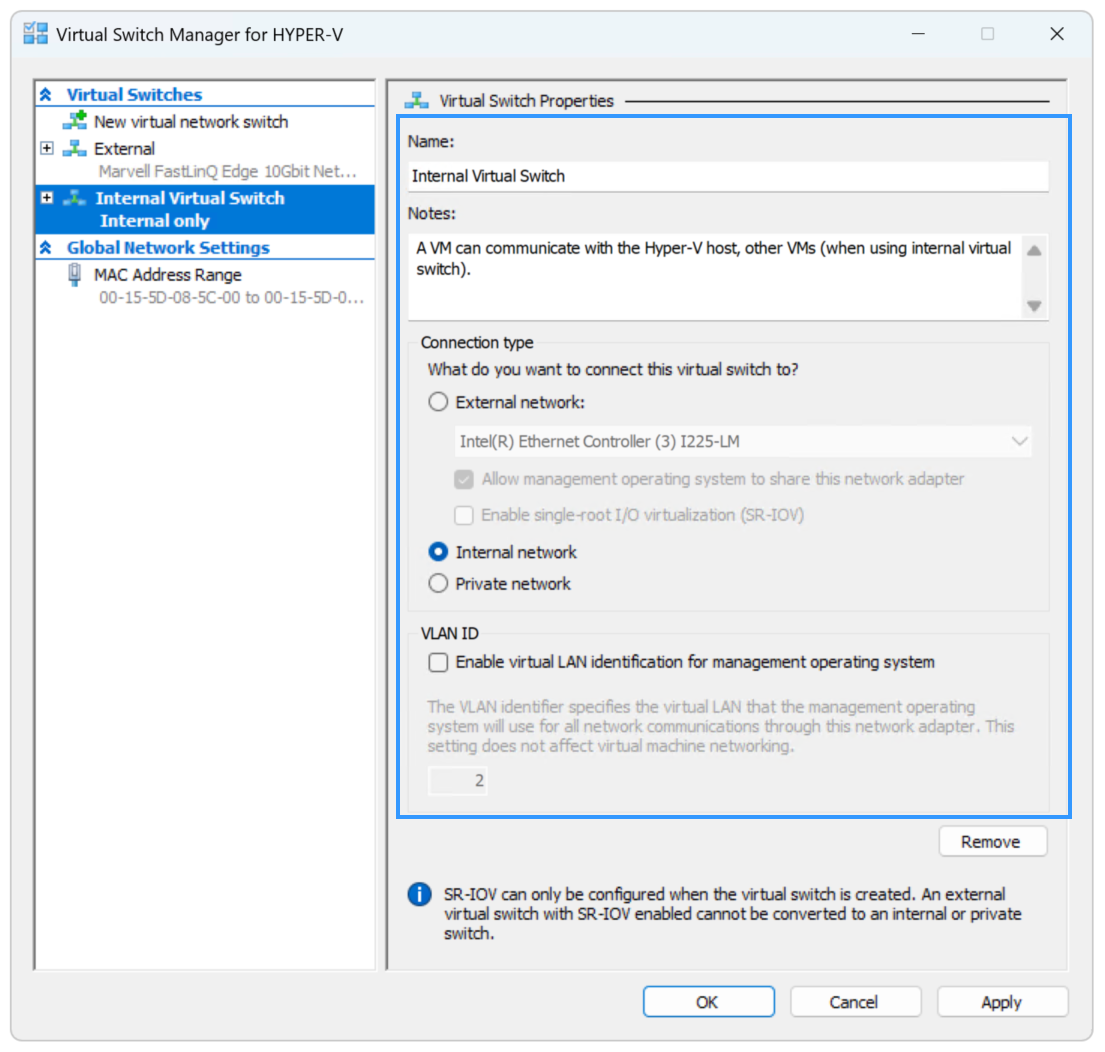
If you are creating an internal virtual switch, you only need to select Internal network. You can also enable a VLAN ID, just like with an external virtual switch.
If you are creating a private virtual switch, you only need to select Private network. There are no additional settings to configure.
- Click Apply, and then OK.
- Navigate to your VM, right-click it, and then click Settings.
- Click on Network Adapter and then select your virtual switch. You can change the network settings of your VM without shutting it down.

Furthermore, when you select a virtual switch adapter, you can additionally enable a VLAN ID and Bandwidth Management. Bandwidth Management allows you to define how a selected virtual switch adapter utilizes bandwidth. If enabled, you must specify the minimum and maximum bandwidth.
- Click Apply, and then OK.
Got questions about virtual switch configuration?
Drop a comment below, I read and respond to every one. And if this guide helped you, share it with your team!
Joshua
June 30, 2021 at 19:08
Nice overview. Do you configure virtual switches in the same way for Hyper-V Server Core?
Jasmin Kahriman
July 1, 2021 at 17:03
Thanks, Joshua. Yes, you can do it via Hyper-V Manager or PowerShell.