
Synology recently released the CC400W, an AI-powered webcam. I’ve tested it for a couple of days, and this is the first blog article in a series I’ll be publishing. I want to kick it off by showing you how to set it up before we dive deeper into its functionalities.
Prerequisites
To set up the CC400W camera, make sure you meet the following requirements and can follow along with this blog article:
- Your Synology NAS is powered on and connected to the local network (LAN).
- You have already created a storage pool or volume where recordings will be saved.
- The CC400W Wi-Fi camera is powered on.
- You have an iOS or Android phone with the DS Cam app installed.
- Bluetooth is enabled on your mobile device.
If You’re Starting from Scratch, Read This First
If you’re starting from scratch, just got your Synology NAS and CC400W out of the box, or maybe you have a Synology handed down but can’t get access, I’d first suggest doing a soft reset on both devices by popping a pin into the reset hole. Hold it for 5 seconds, and you’re done.
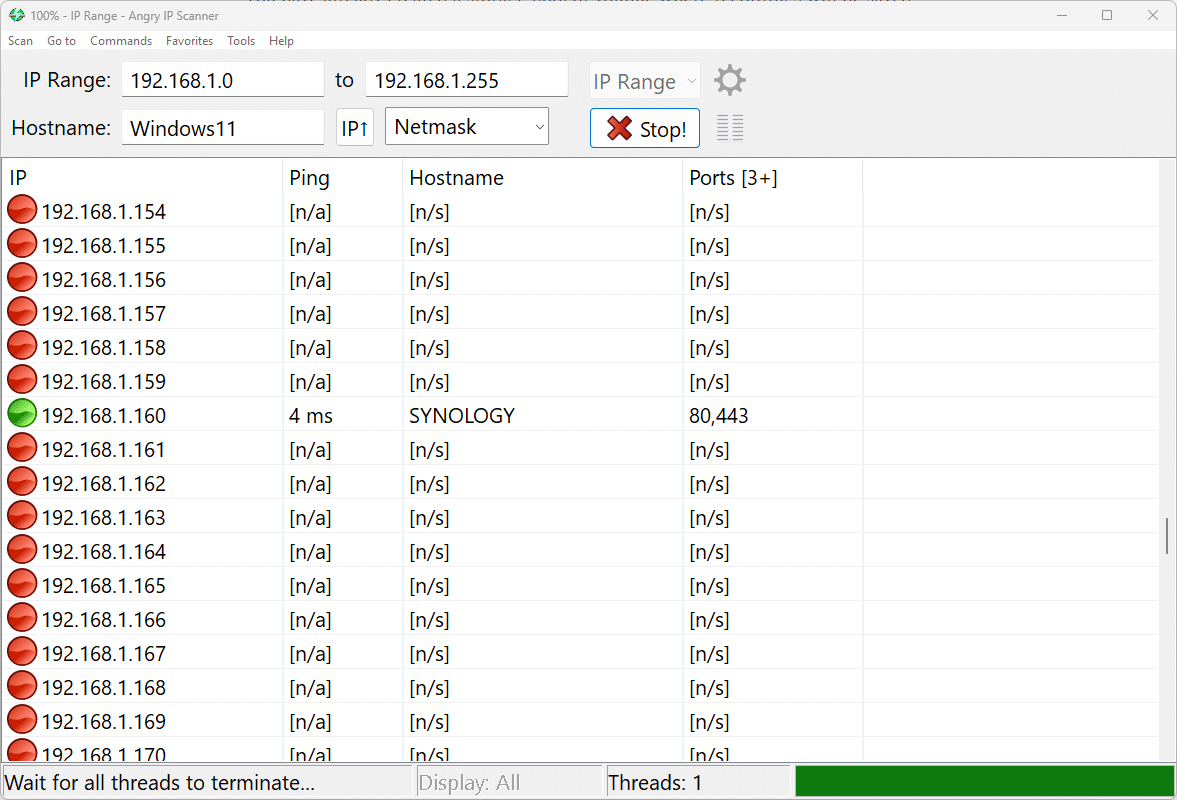
If you’re starting from scratch and don’t know the IP address, you can find your Synology NAS using the Web Assistant tool or any other IP scanner tool. Once you’ve located the IP address, navigate to it in your browser to access the web interface. In my case, I am using Angry IP Scanner, and I can see that in my lab, the Synology device is located at 192.168.1.160.
Step 1: Install Surveillance Station on Your Synology NAS
Synology has a native surveillance management platform called Surveillance Station. It is used for managing cameras, monitoring, backup, and working with footage. So, in the first step, you will install Surveillance Station.
- Log in to DSM (DiskStation Manager) via your web browser.
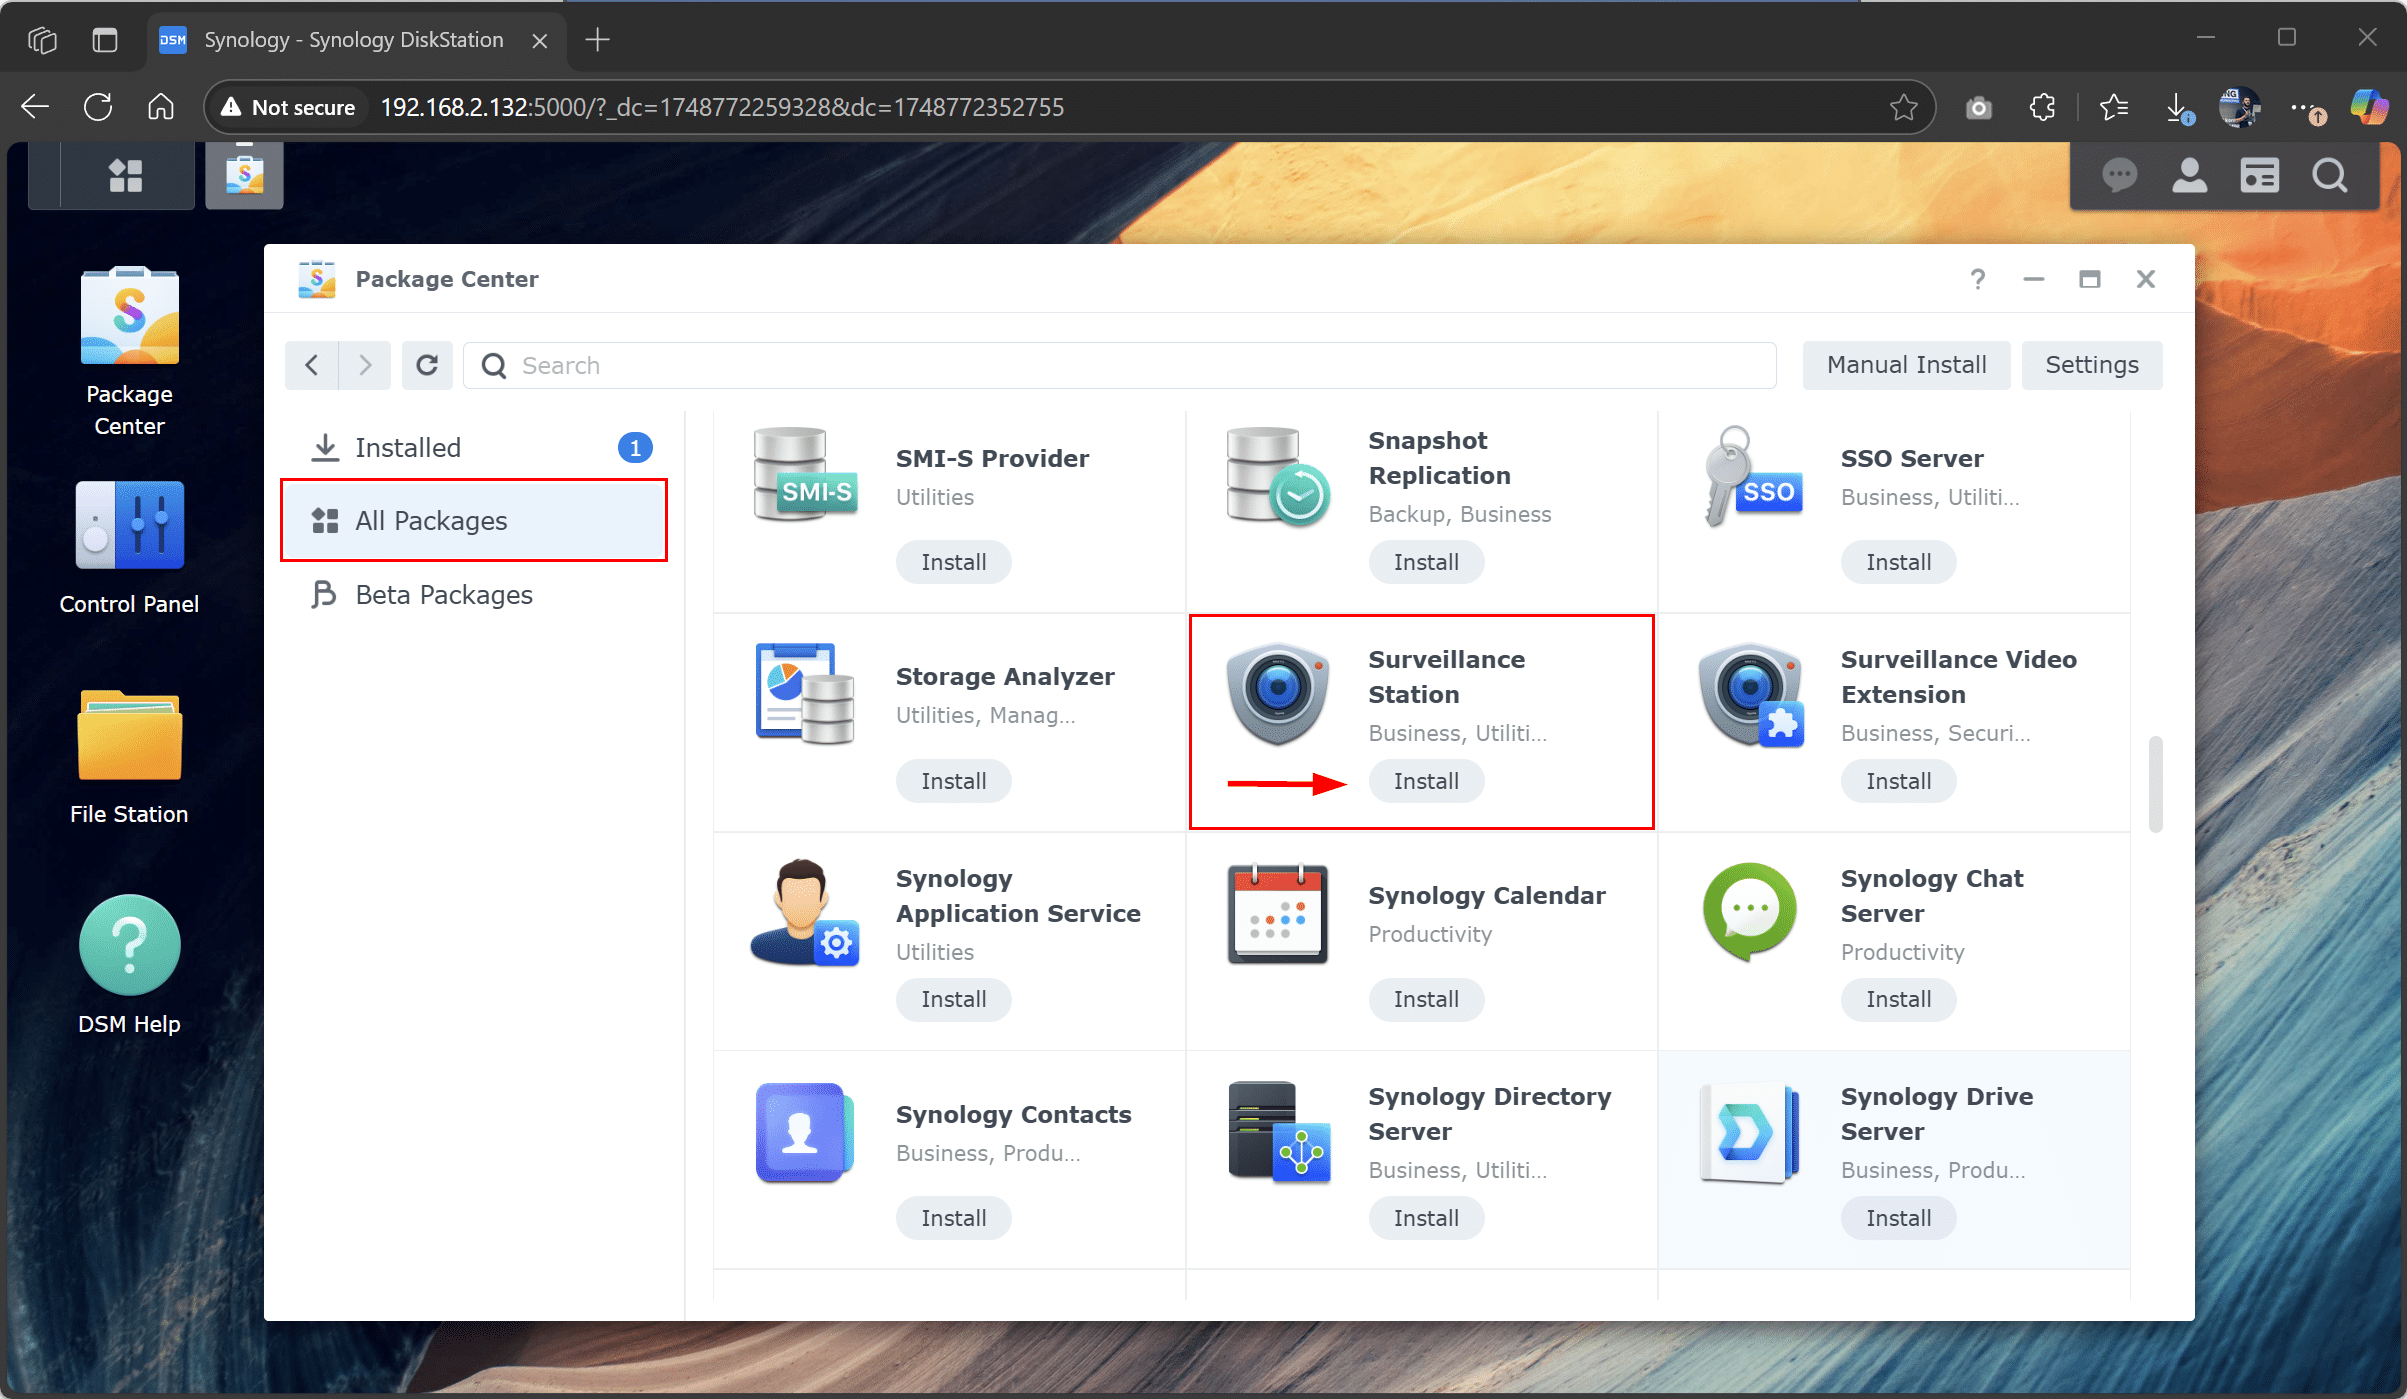
- Open the Package Center from the desktop.
- Search for Surveillance Station by browsing the list or typing it into the search field.
- Click Install and wait for the installation to complete. If Surveillance Station is already installed, click Open.
- Click Yes to confirm the installation.

- Wait until Surveillance Station finishes downloading and installing. It took me about a minute.

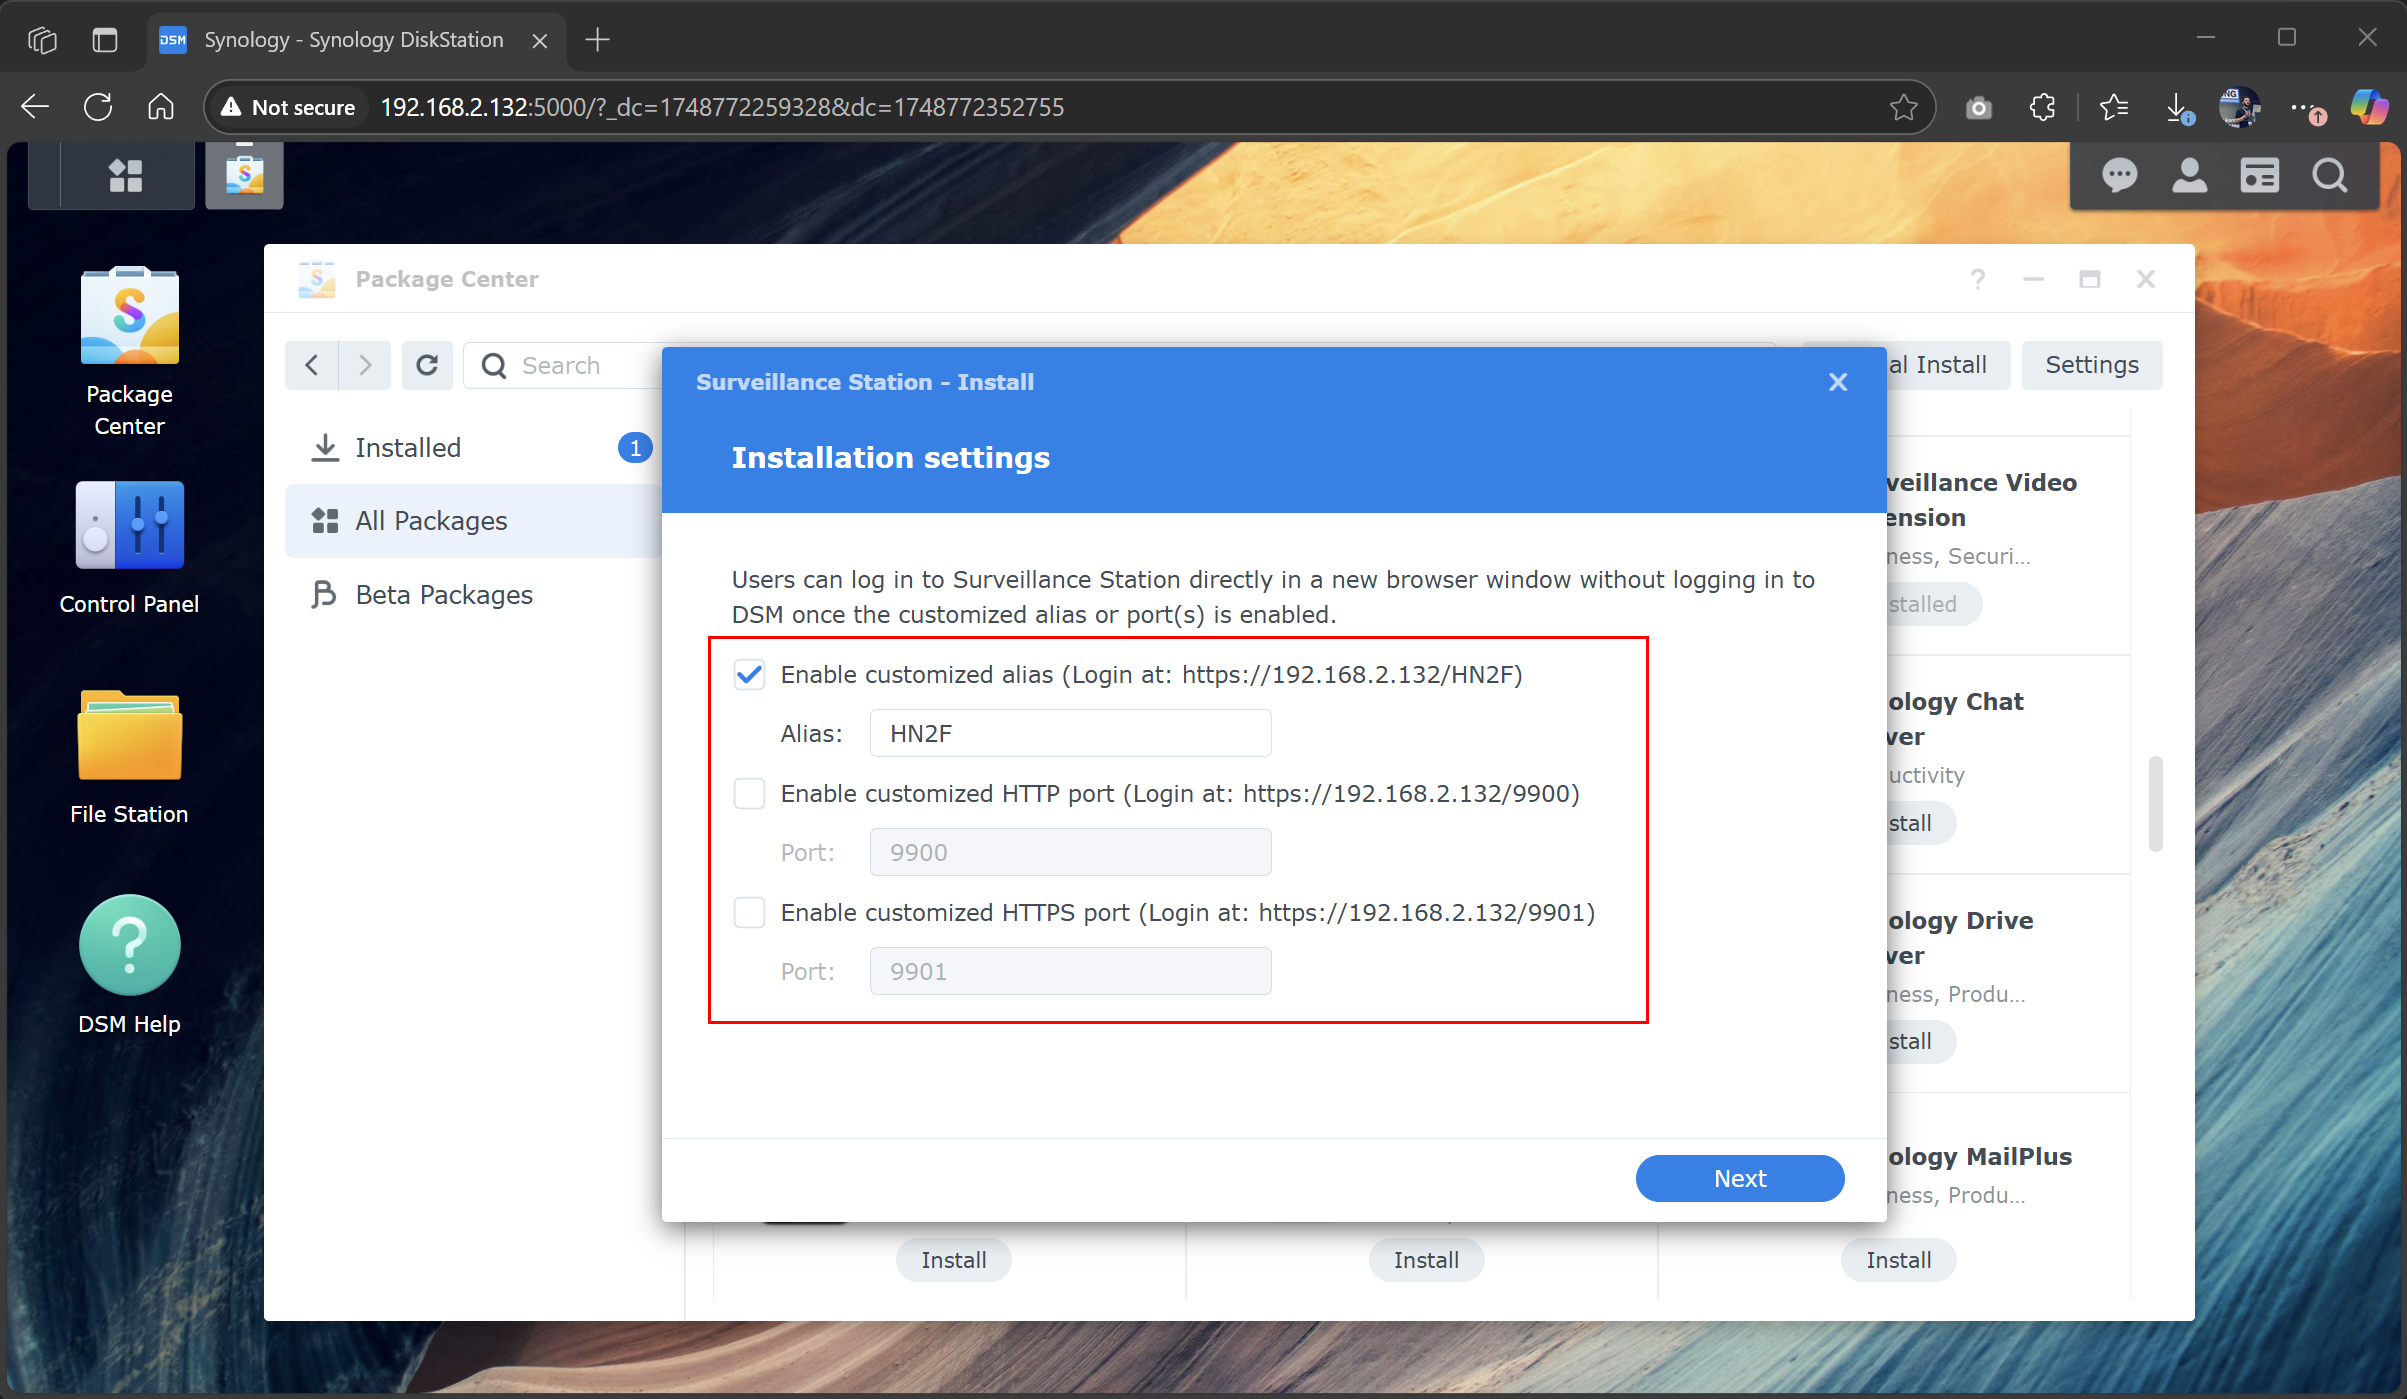
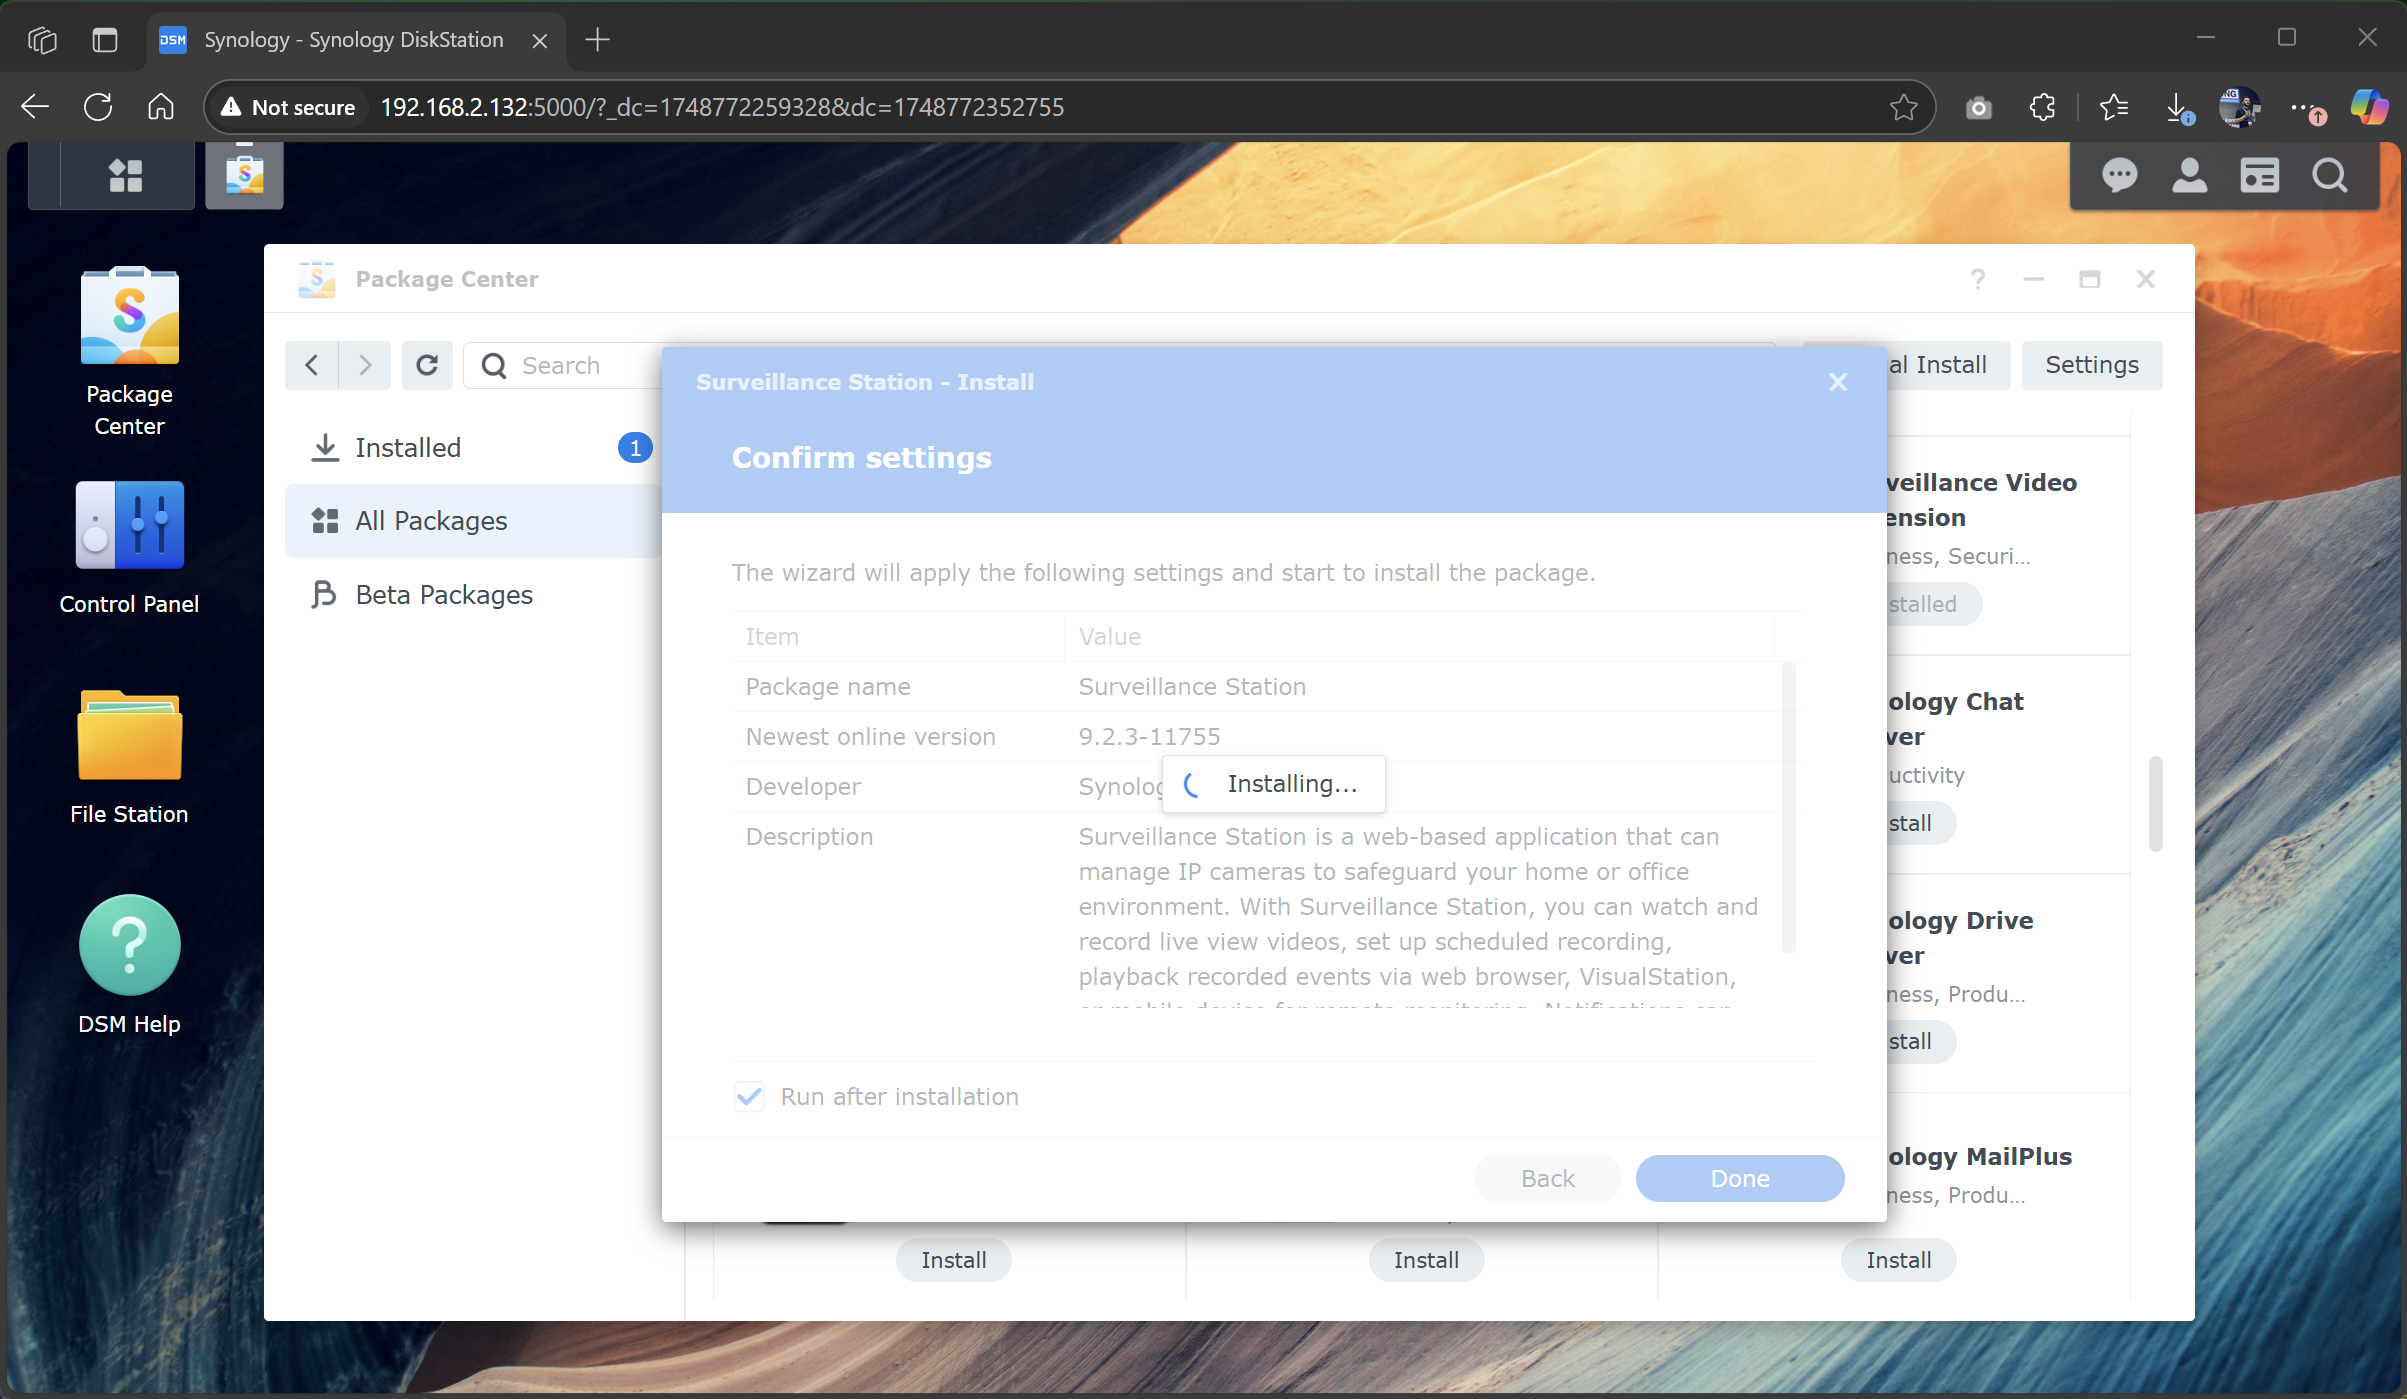
- Configure aliases or ports, then click Next. Once your custom alias or port is enabled, you can log in to Surveillance Station directly through a new browser window; no need to log into DSM first. You can choose one or more options.
For example, in my case, my camera is accessible via the IP address and the alias HN2F, which describes its exact location. You can also create HTTP and HTTPS ports as needed.
- Click Done to confirm your settings.
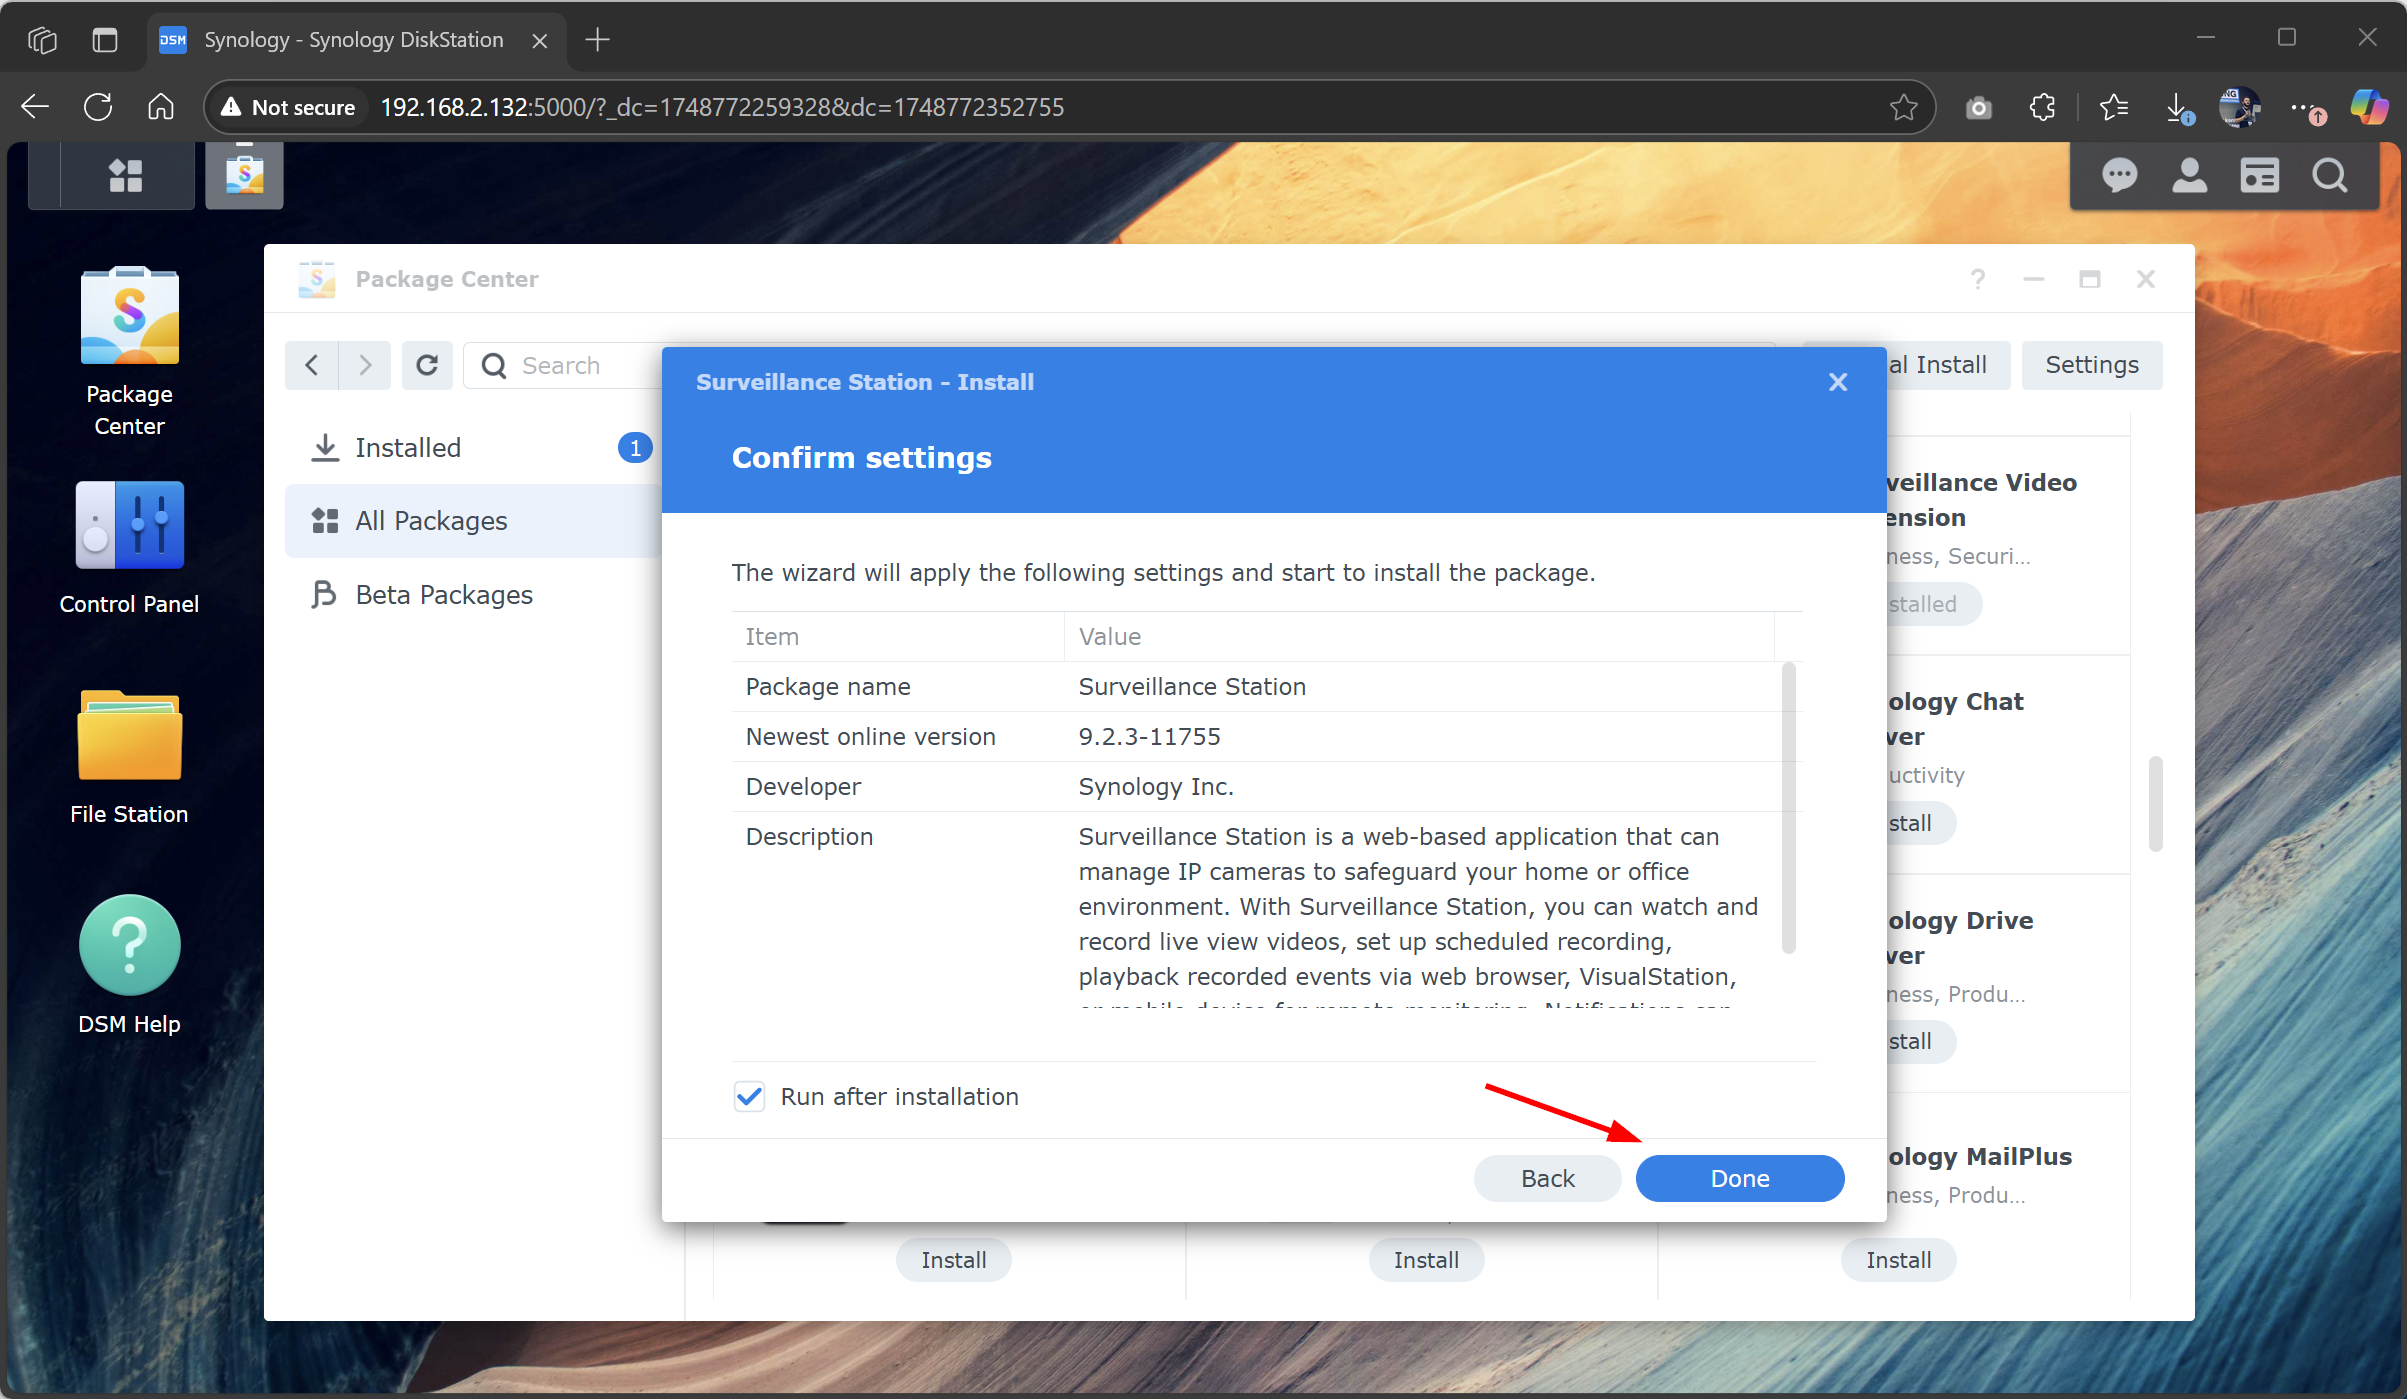
- Wait until the installation is complete. It took me about 3 to 5 minutes.
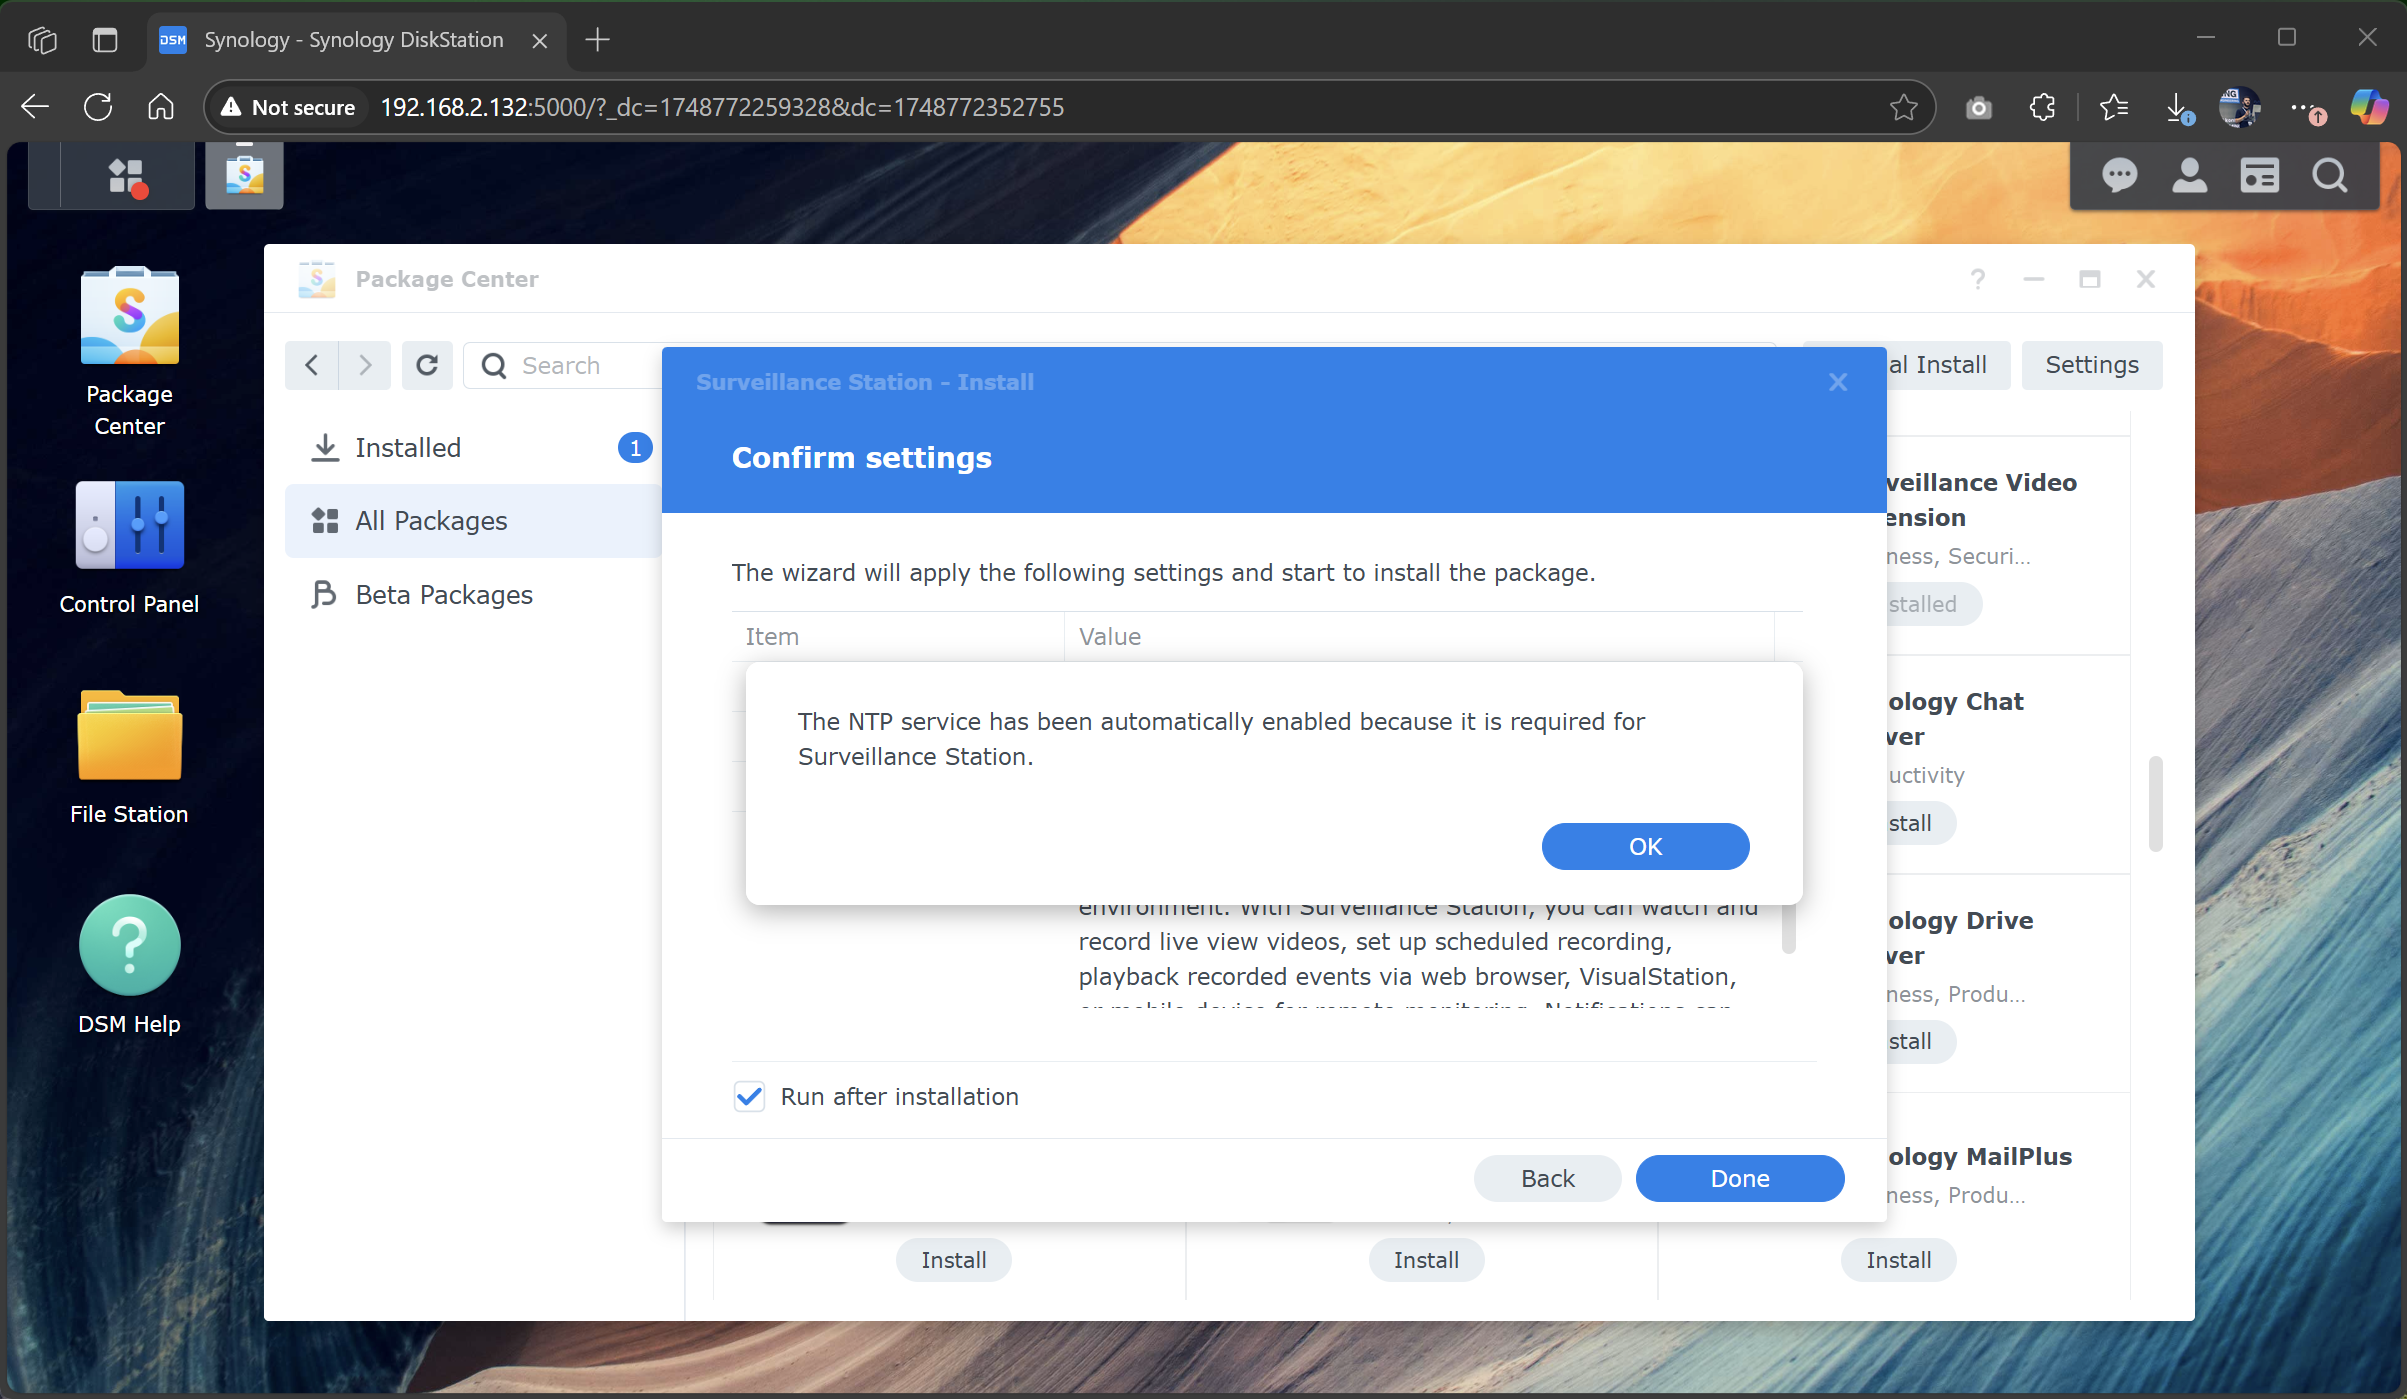
- During installation, Synology will enable NTP servers to ensure accurate timestamps for recordings.
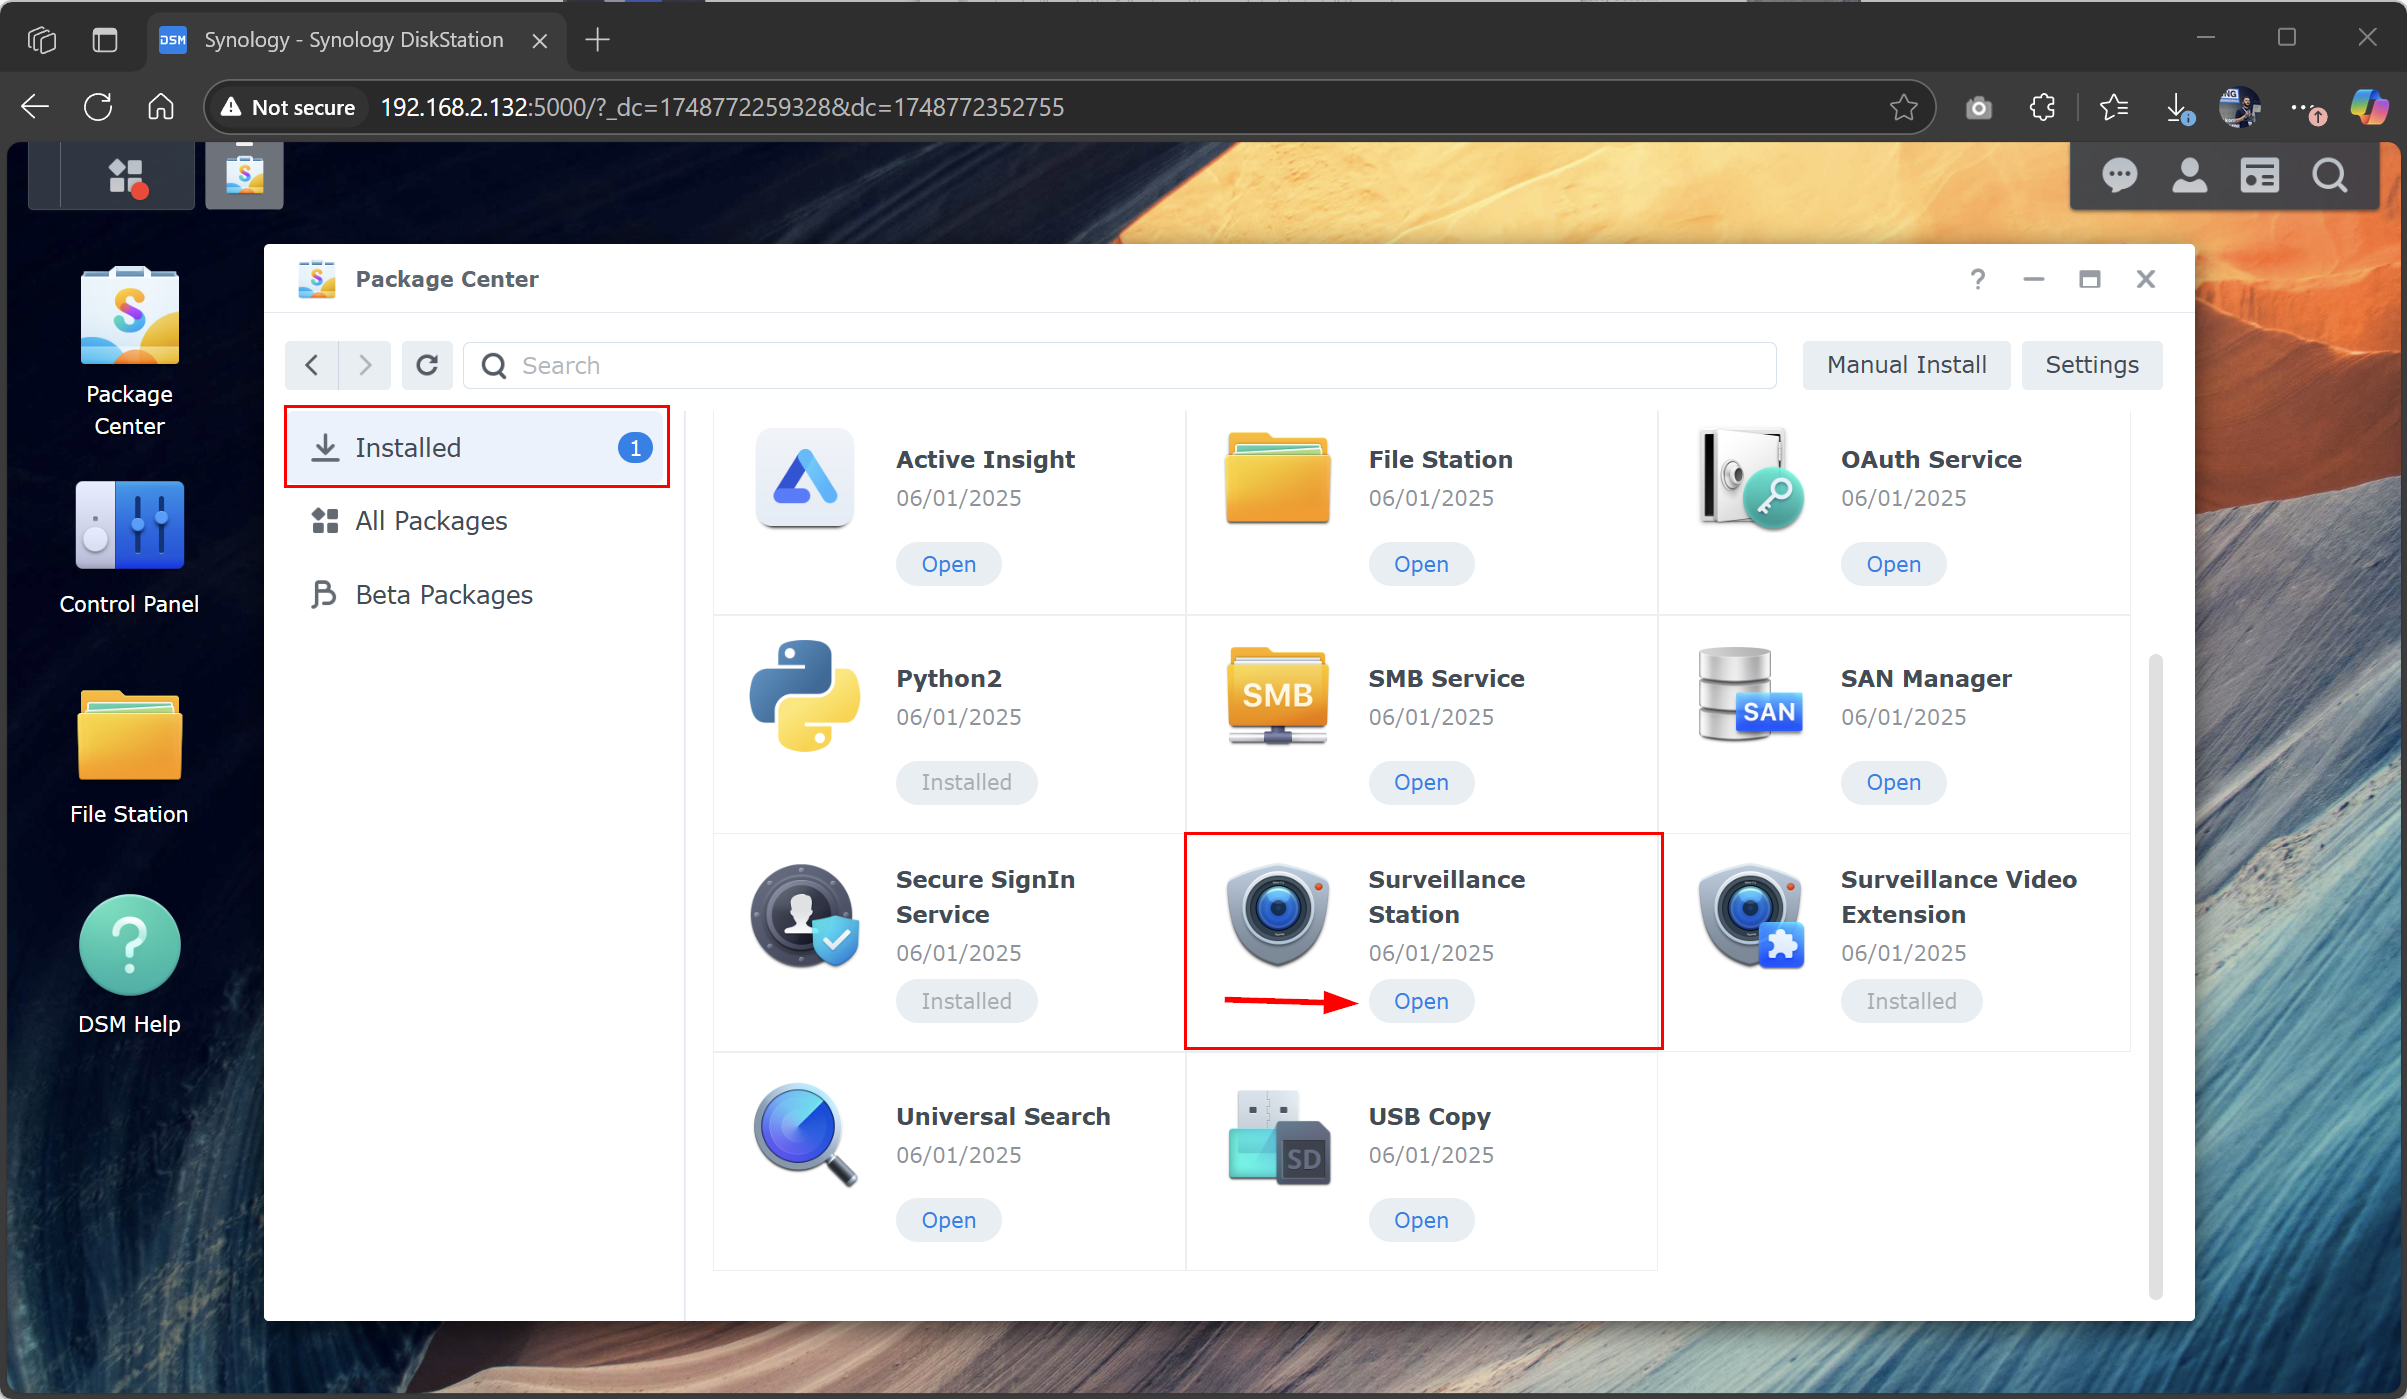
- In Package Center, click Installed, locate Surveillance Station, and then click Open.
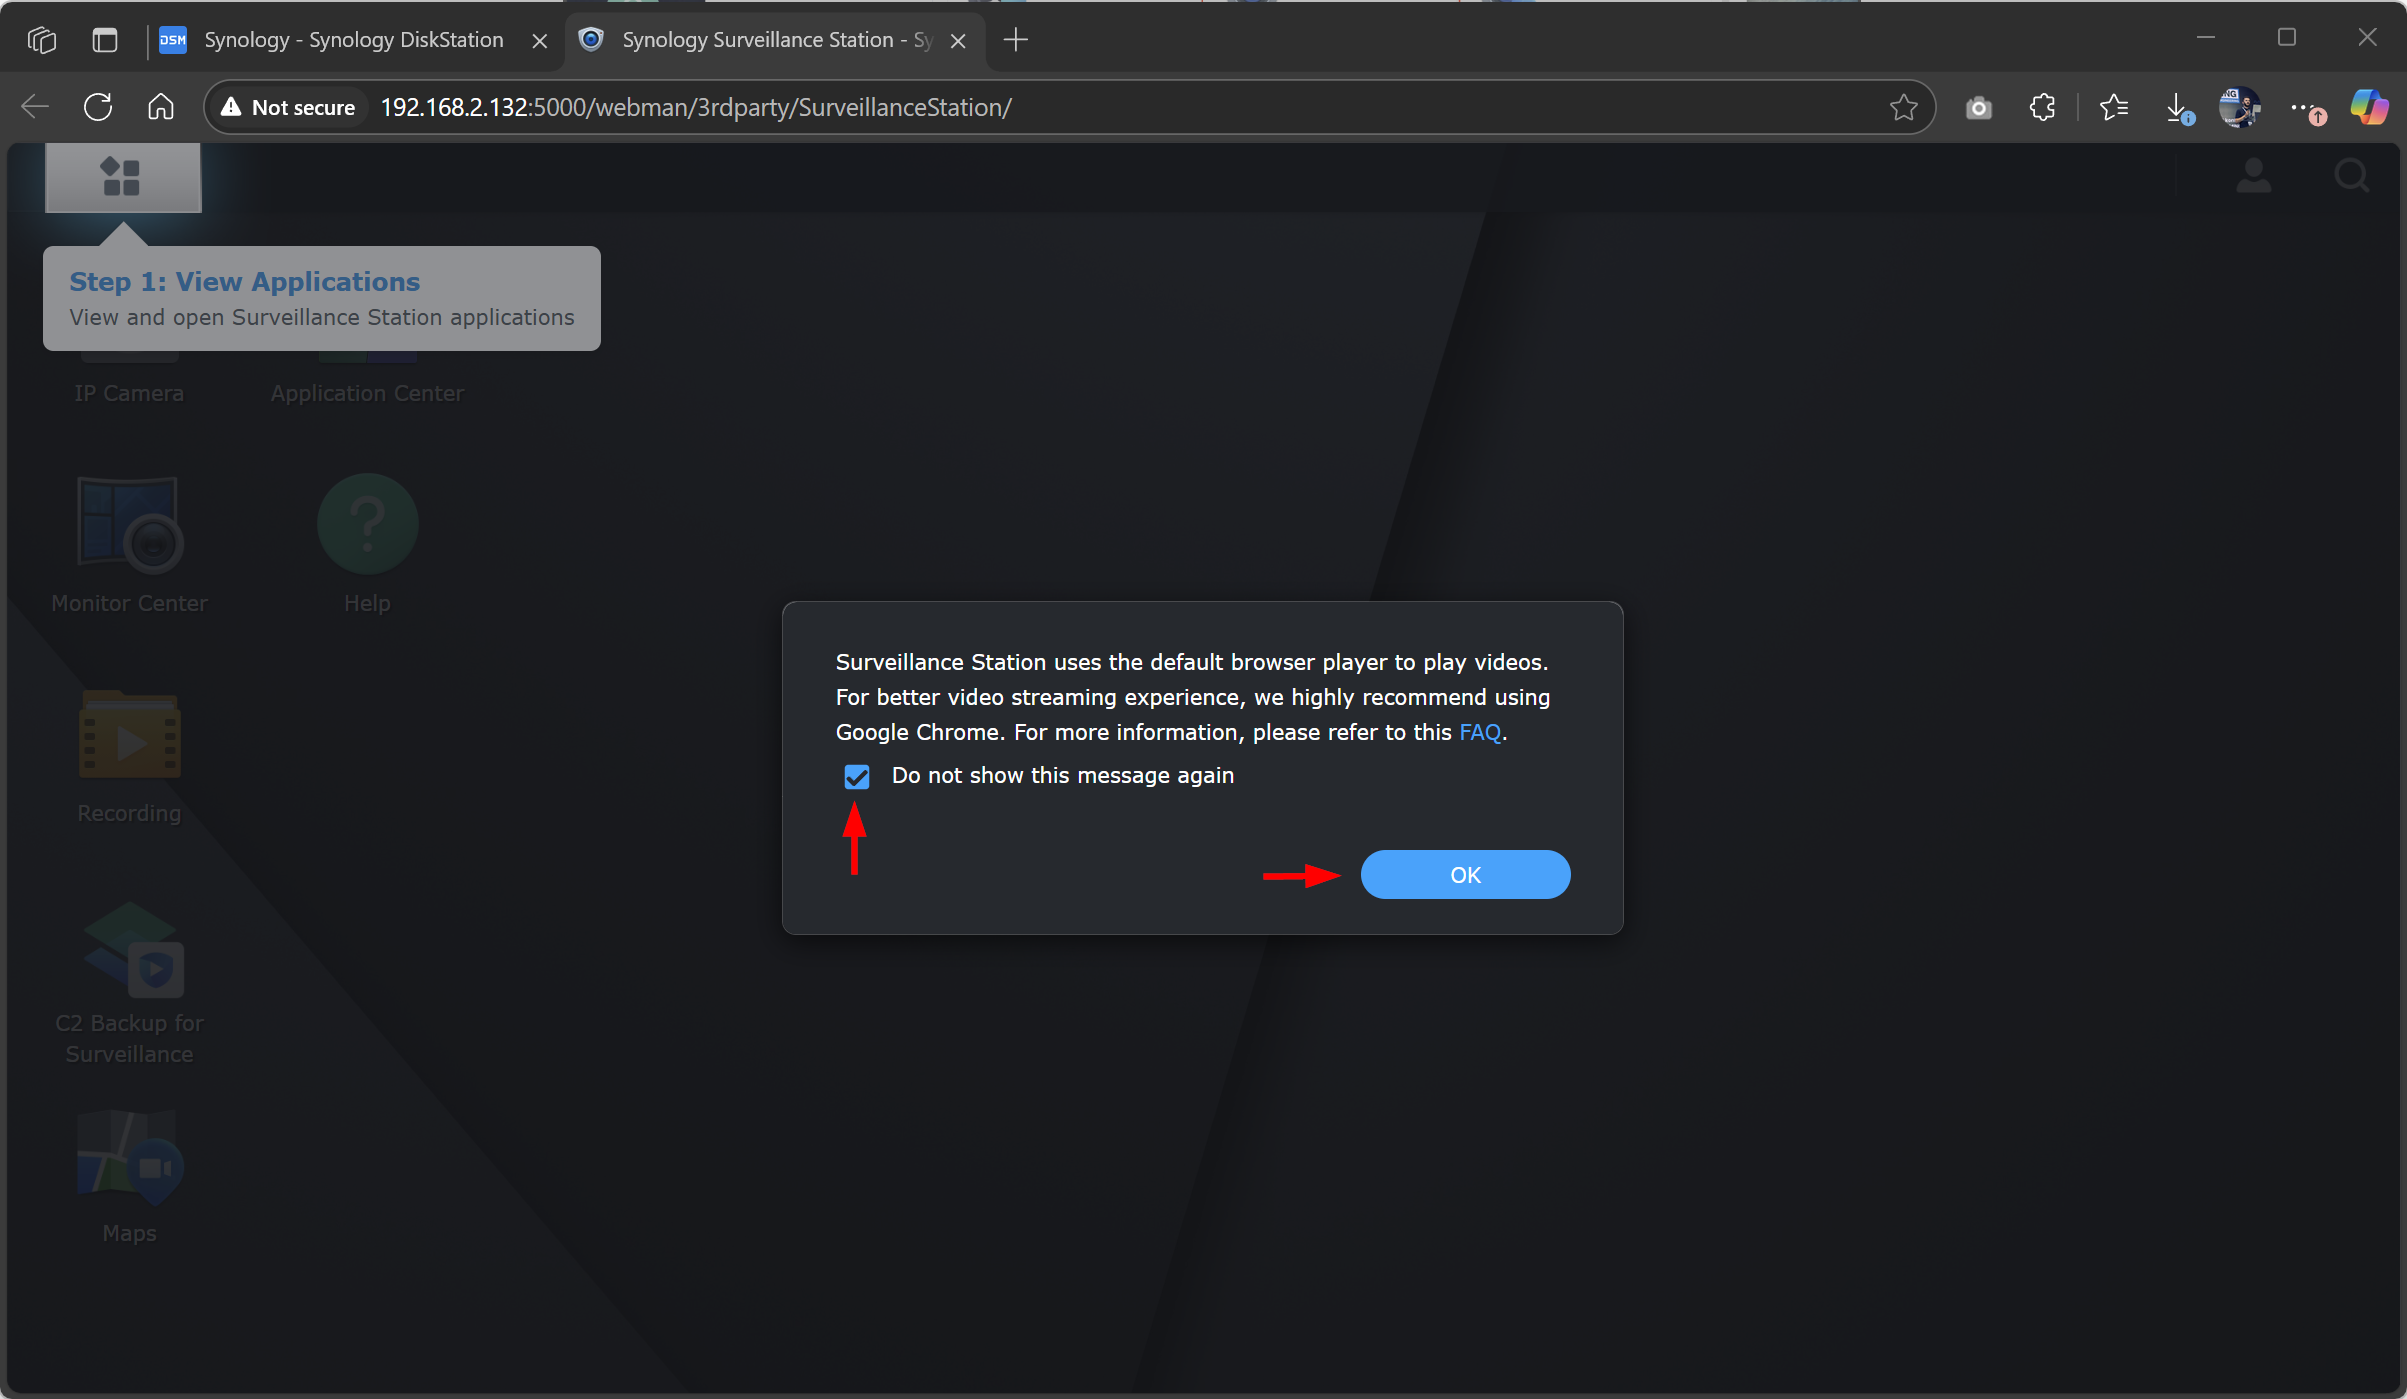
- Synology will open a dedicated link to access Surveillance Station. It is recommended to stream video using Chrome or Edge, as both are based on the same engine. Click OK to continue.
Surveillance Station has been installed and is now ready to manage your cameras.
Step 2: Install the DS cam app on your smartphone
In the second step, install the DS cam app on your smartphone. This app will allow you to add your CC400W camera to Synology and manage it from there. It cannot be installed directly through Synology, so please use your phone to complete this step.
You can scan the QR code to install the app on your iOS or Android.


Step 3: Add the CC400W camera to DS Cam and Surveillance Station
In the third step, use DS Cam on your phone to add the CC400W camera, and use Synology Surveillance Station to manage and configure it. Once you open the app, follow the next steps.
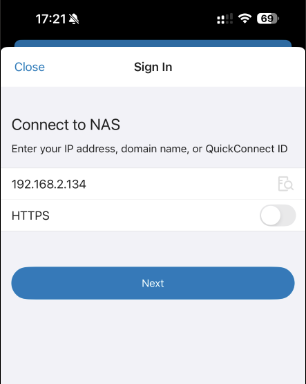
- Enter the Synology NAS IP address, choose HTTP or HTTPS, and then click Next.
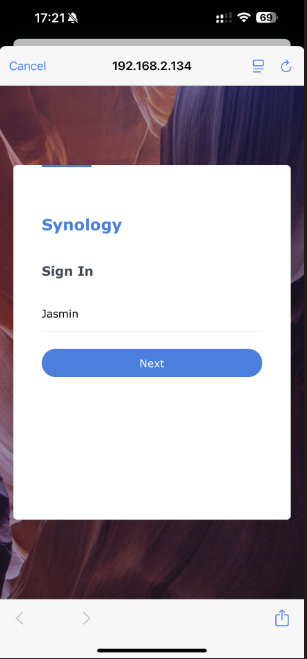
- DS Cam will redirect you to the sign-in screen. Tap Continue.

- Enter your username and click Next. Then enter your password and click Login.
- DS Cam will prompt you to allow it to find Bluetooth devices. Tap Allow. In this step, DS Cam uses Bluetooth to initialize the camera and connect it to your Wi-Fi network.

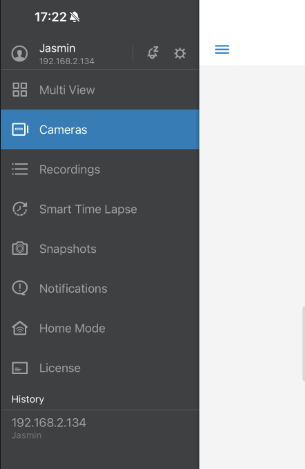
- Tap the hamburger menu in the top-left corner, then select Cameras.
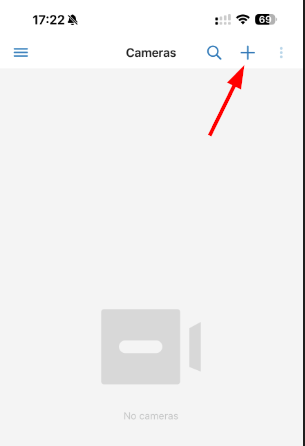
- Tap the + symbol in the top-right corner to add a camera.
- Tap Wireless Cameras.
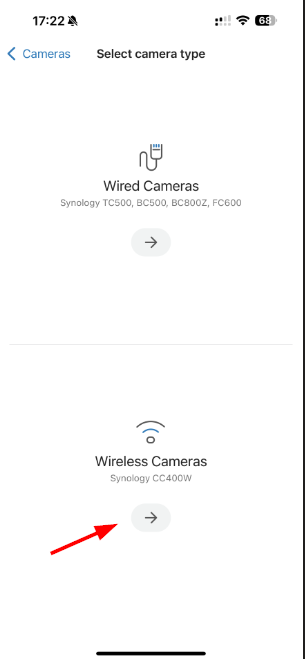
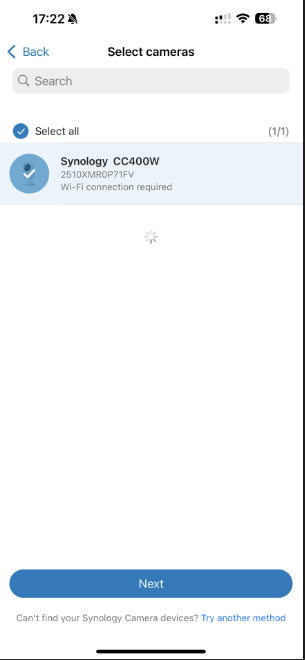
- Select the Synology CC400W camera and tap Next.
- Select the Wi-Fi network that your Synology NAS is already using. The CC400W will detect all available networks nearby, but be sure to choose your own network.
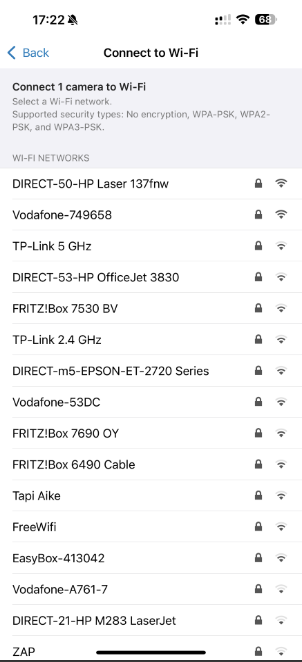
- Enter the password to connect your camera to your wireless network. You will hear two audio messages from the camera: “Connecting to Wi-Fi” followed by “Connected.” This indicates that you can proceed to the next step.
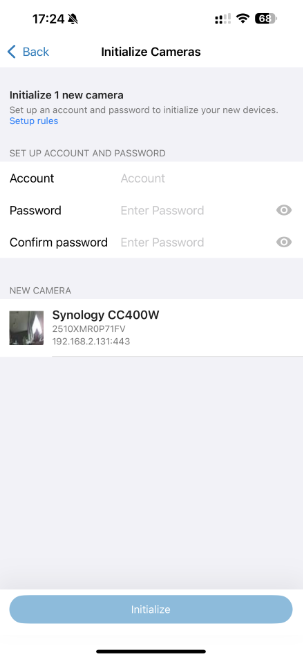
- Set up a username and password to initialize the new camera. These credentials will be used to connect to your camera.
- Configure the camera settings and tap Done.
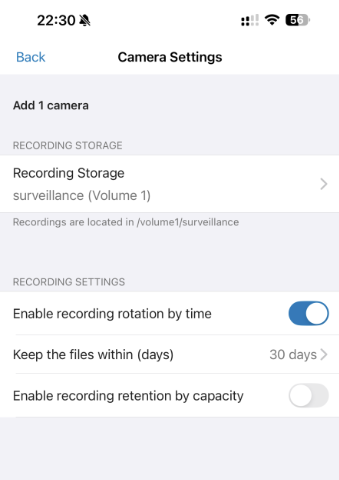
- The camera will enter activation mode and then be ready for use
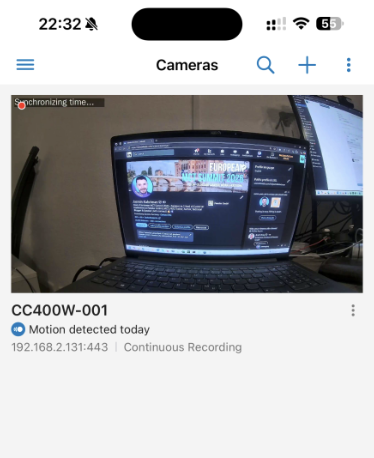
- Navigate to your Synology NAS and open IP Camera.
- Tap the media thumbnail to view the camera in full screen
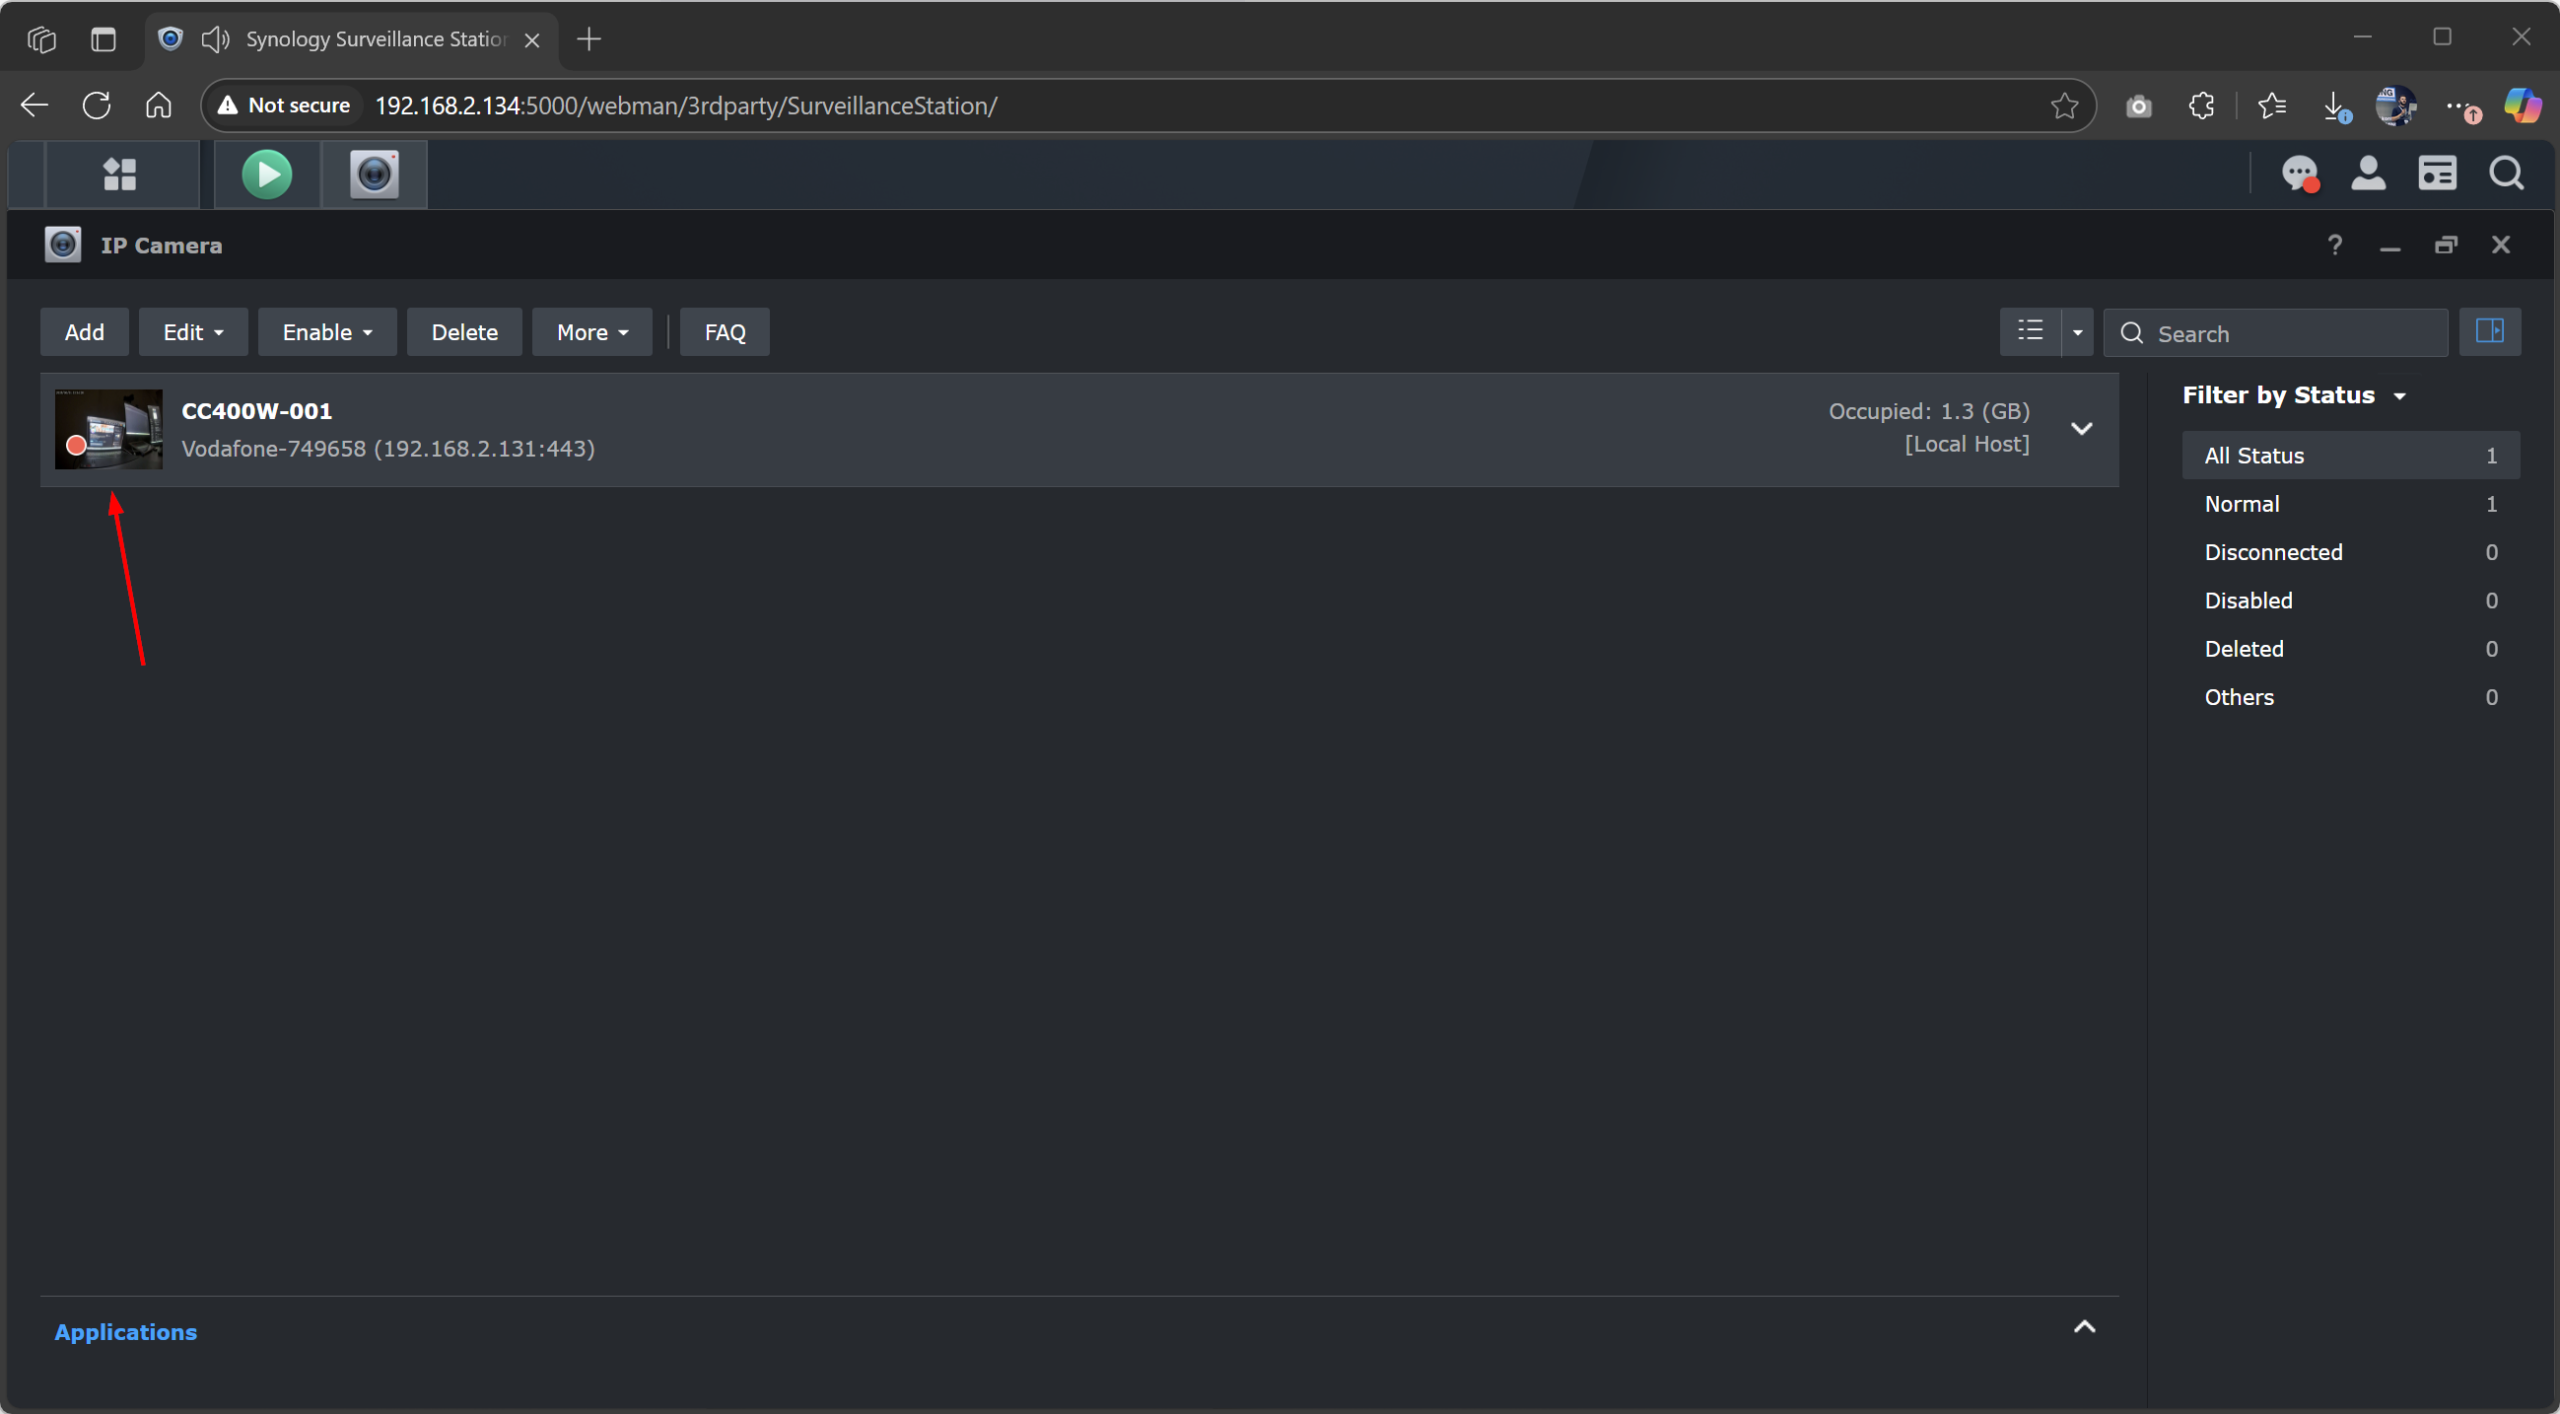
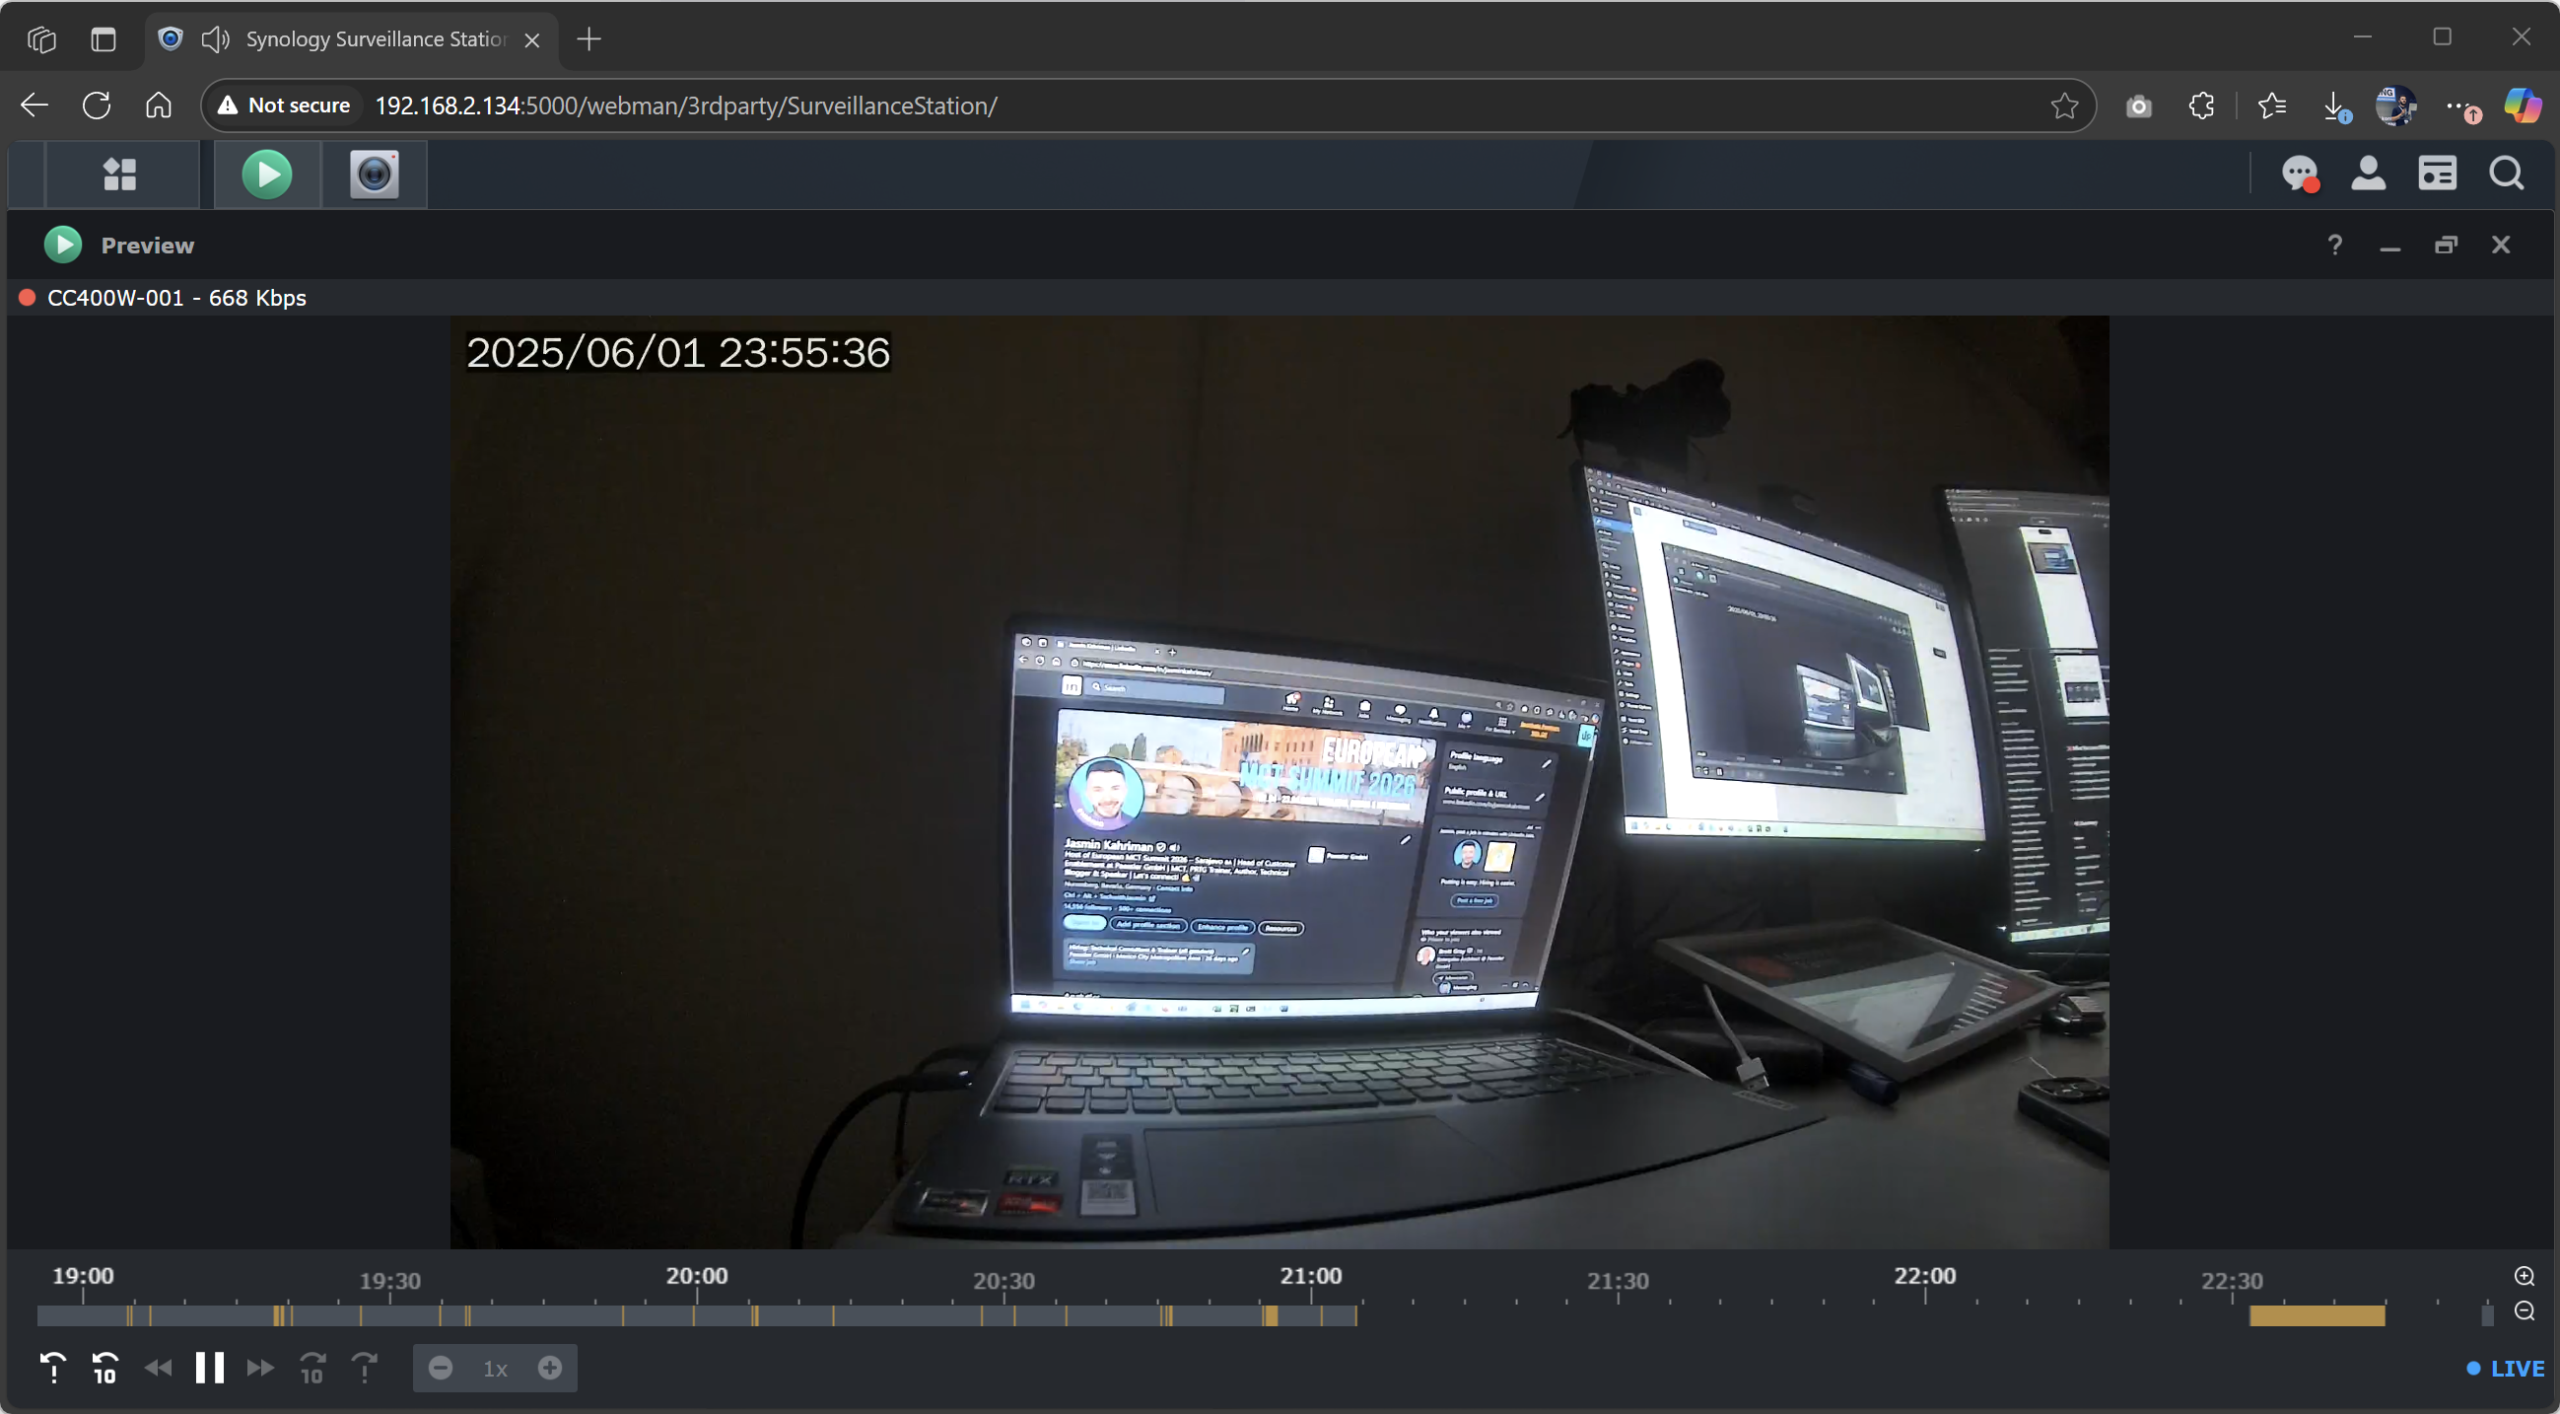
The camera is activated and ready for recording as configured. You can now access it via Synology Surveillance Station on your Synology NAS or via DS Cam on your iOS or Android device.
I put a lot of time into this article, and I’m happy if it helps you.
How was your experience with the integration? Share your feedback below!

