
A successful backup is one that is not compromised and can be easily restored. We don’t want to get into a scenario where the system goes down, and we have a backup – but it is corrupted. This is the same as not having any backups.
Altaro VM Backup has a native feature to test and verify backup in an isolated sandbox before we say: “It’s working.”
The feature is called Test & Verify Backup and can be accessed in the menu device tree.
For writing this article, I run my workloads on powerful mini PC - Intel NUC powered with the CPU i7 the latest generation, 64 GB RAM DDR4, 256 M.2 SSD. Intel® NUC Mini PCs are fully complete and ready to work out of the box. You can learn more here Intel® NUC Products.In this article, I´ll walk you through the feature.
How to get started?
Firstly, you need to connect to your Altaro VM Backup using the Altaro console, and then navigate to Sandbox & Verification – Test & Verify Backups.
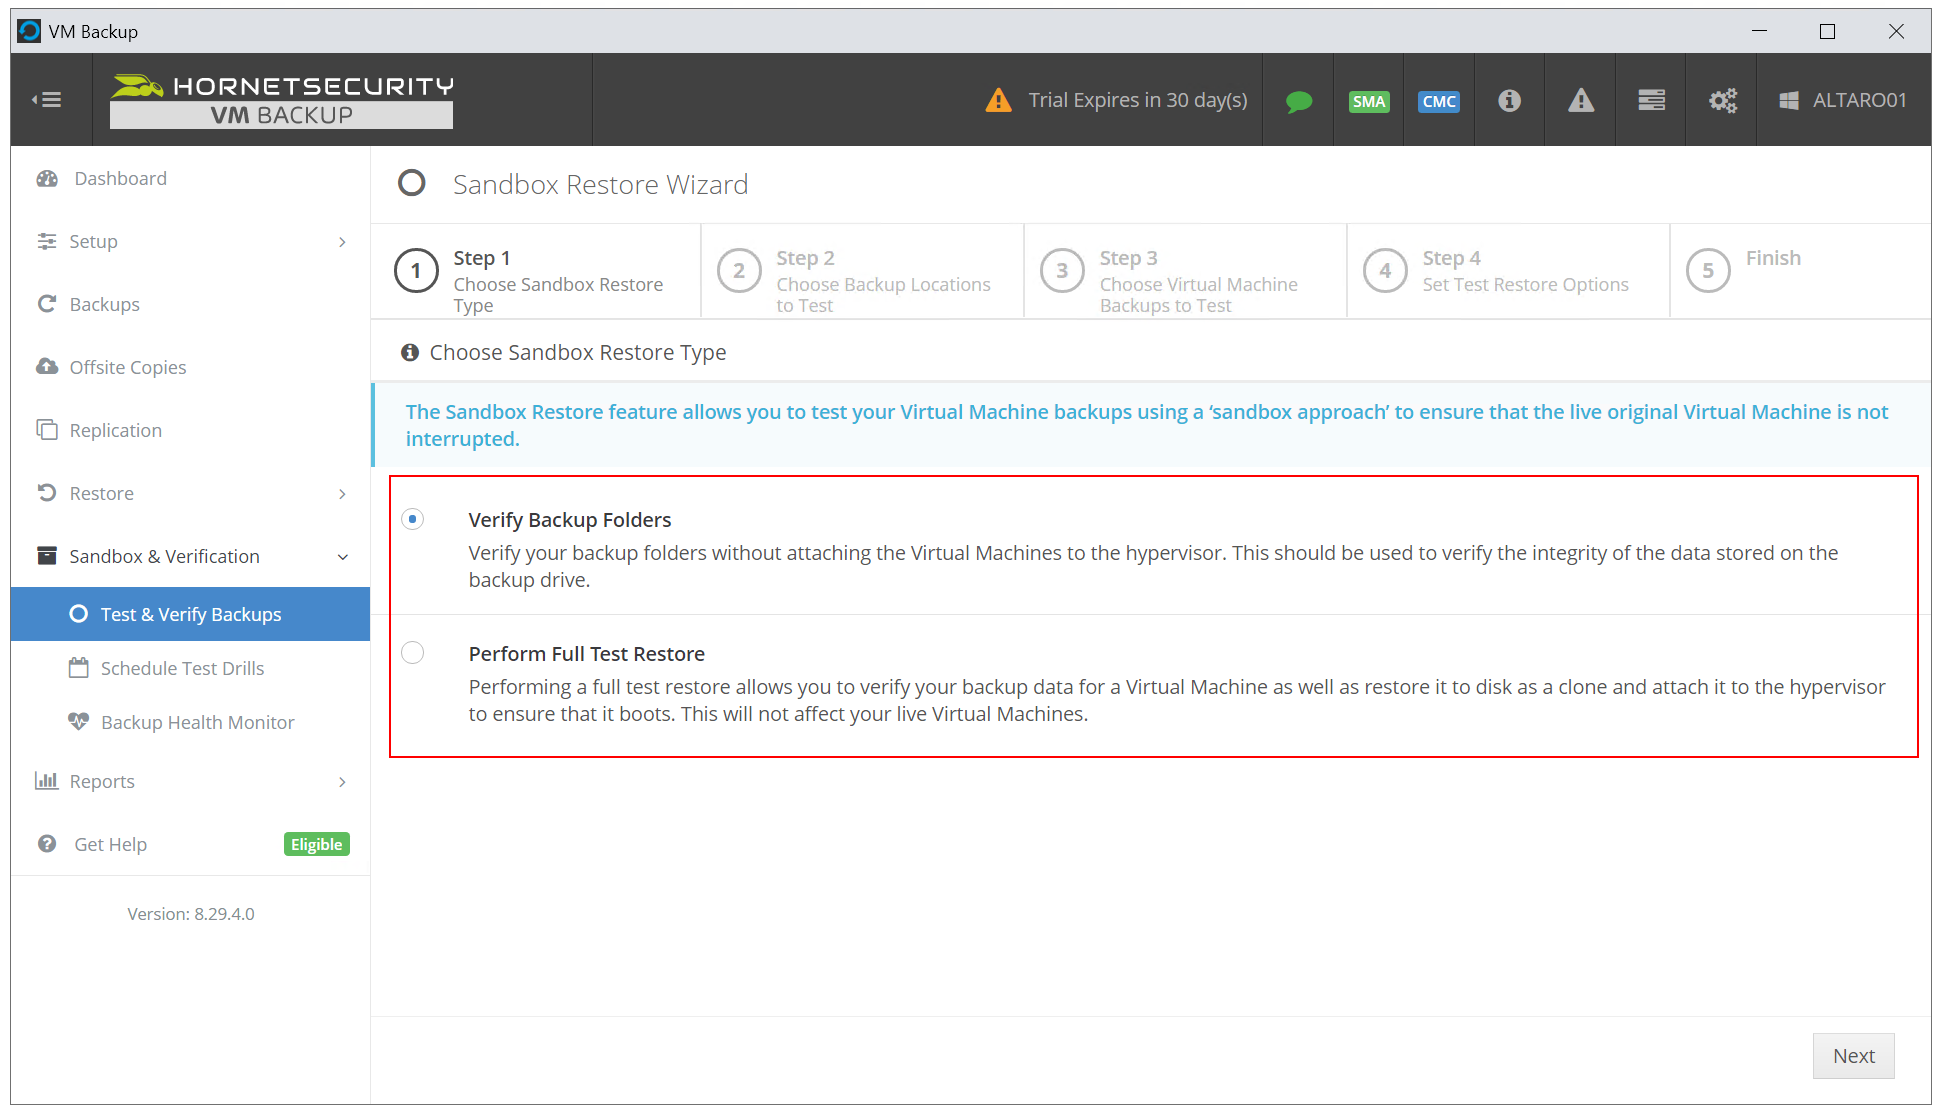
Once you are there, you can choose between the following options:
- Verify Backup Folders – verify the integrity of your backup without attaching VM to the hypervisor.
- Perform Full Test Restore – verify the integrity of your backup by attaching VM as a copy to your hypervisor. The original live VM will not be affected.
In this article, I´ll show you both options. First, let’s start with Verify Backup Folders.
Verify Backup Folders
- Select Verify Backup Folders and then click Next.
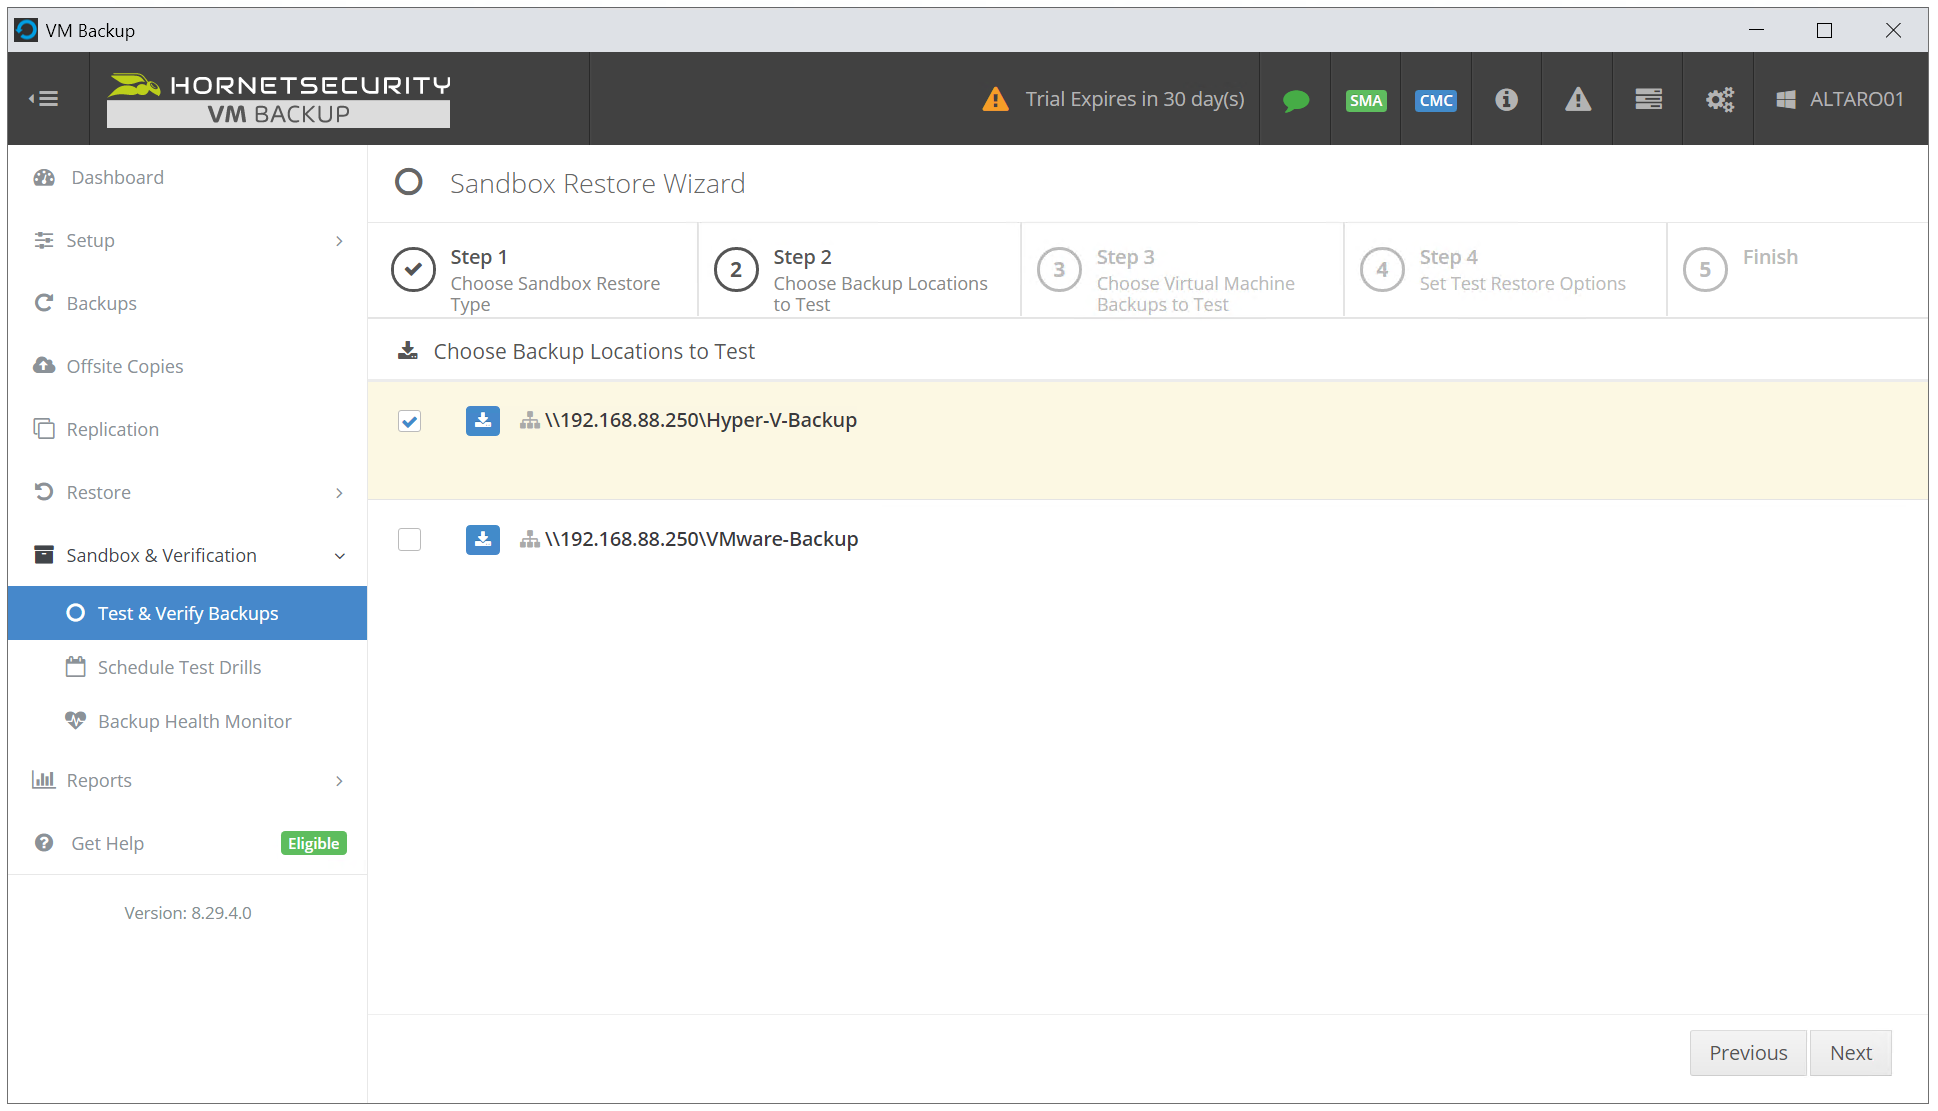
- Choose a backup location to test and click Next.
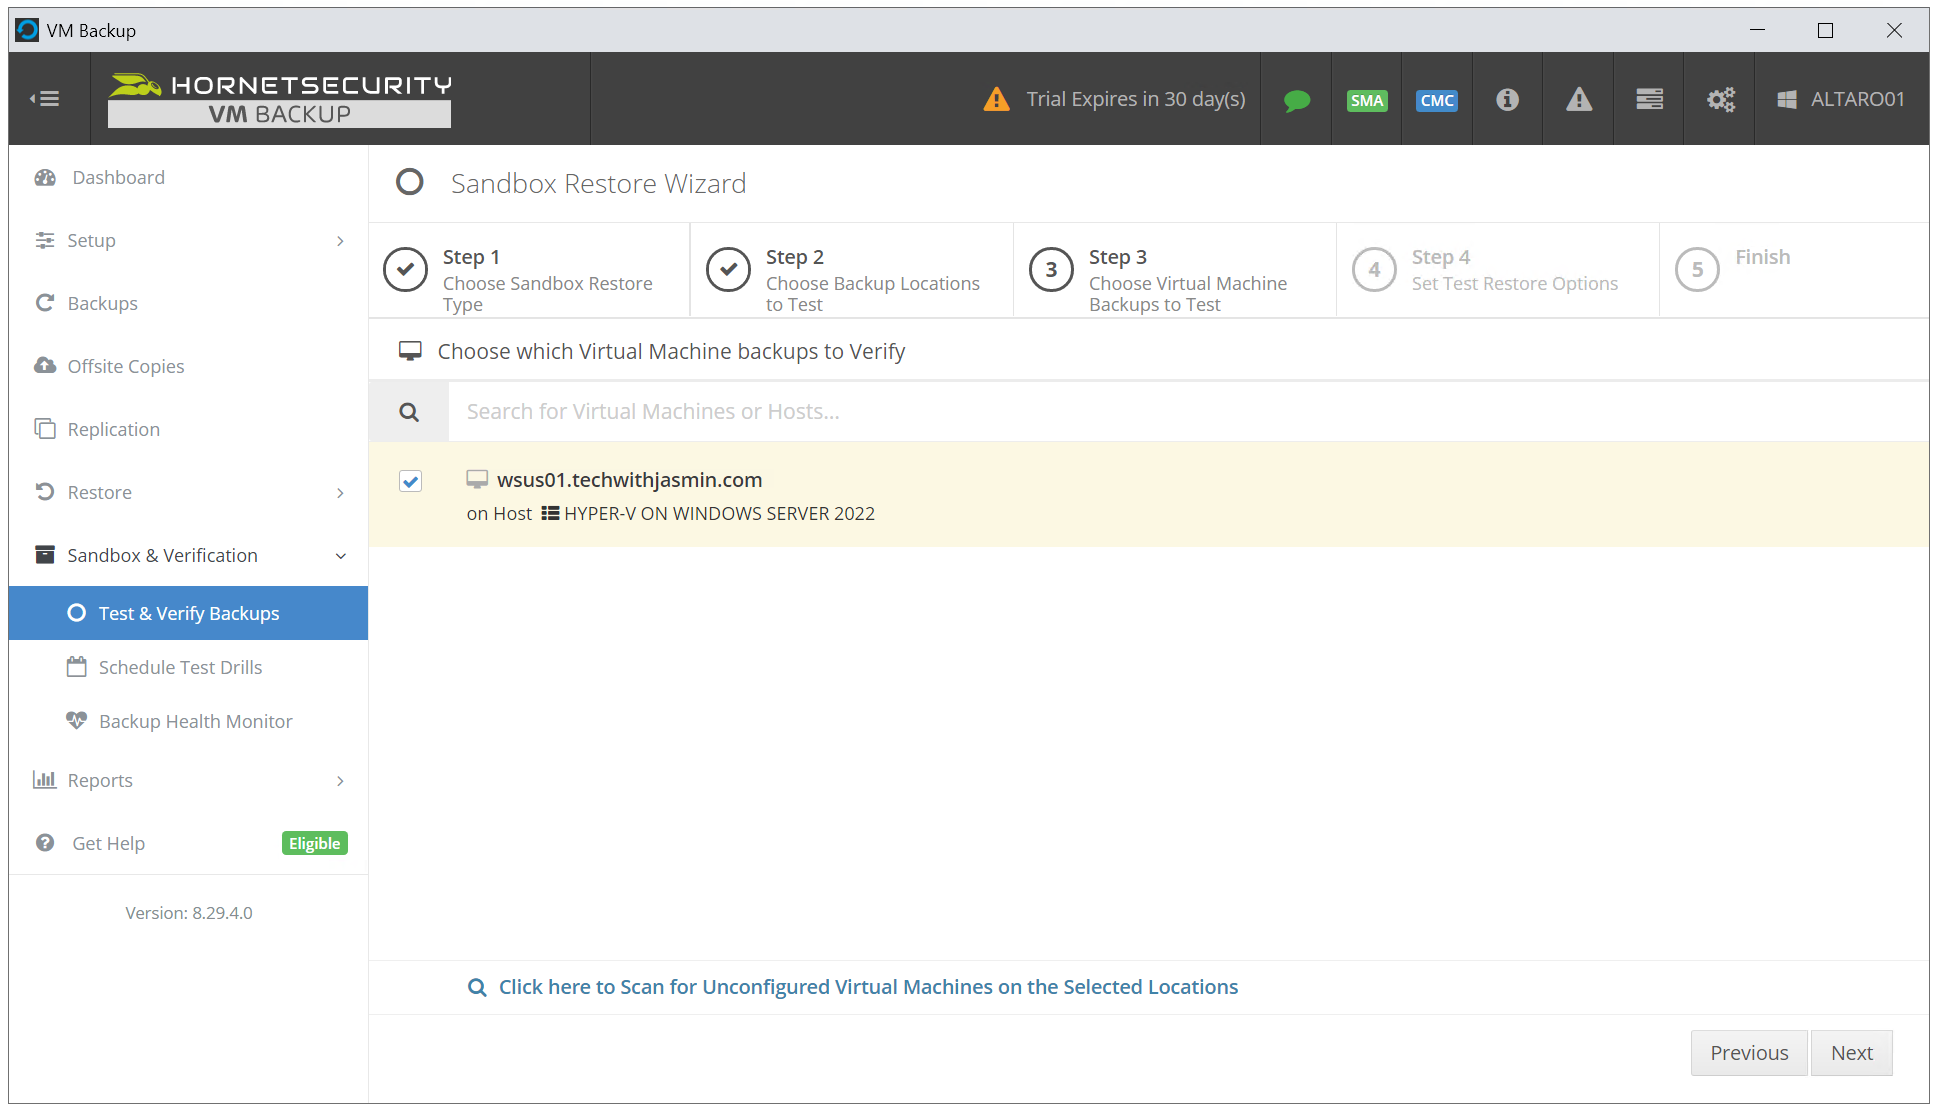
- Choose which virtual machine backups to verify and click Next.
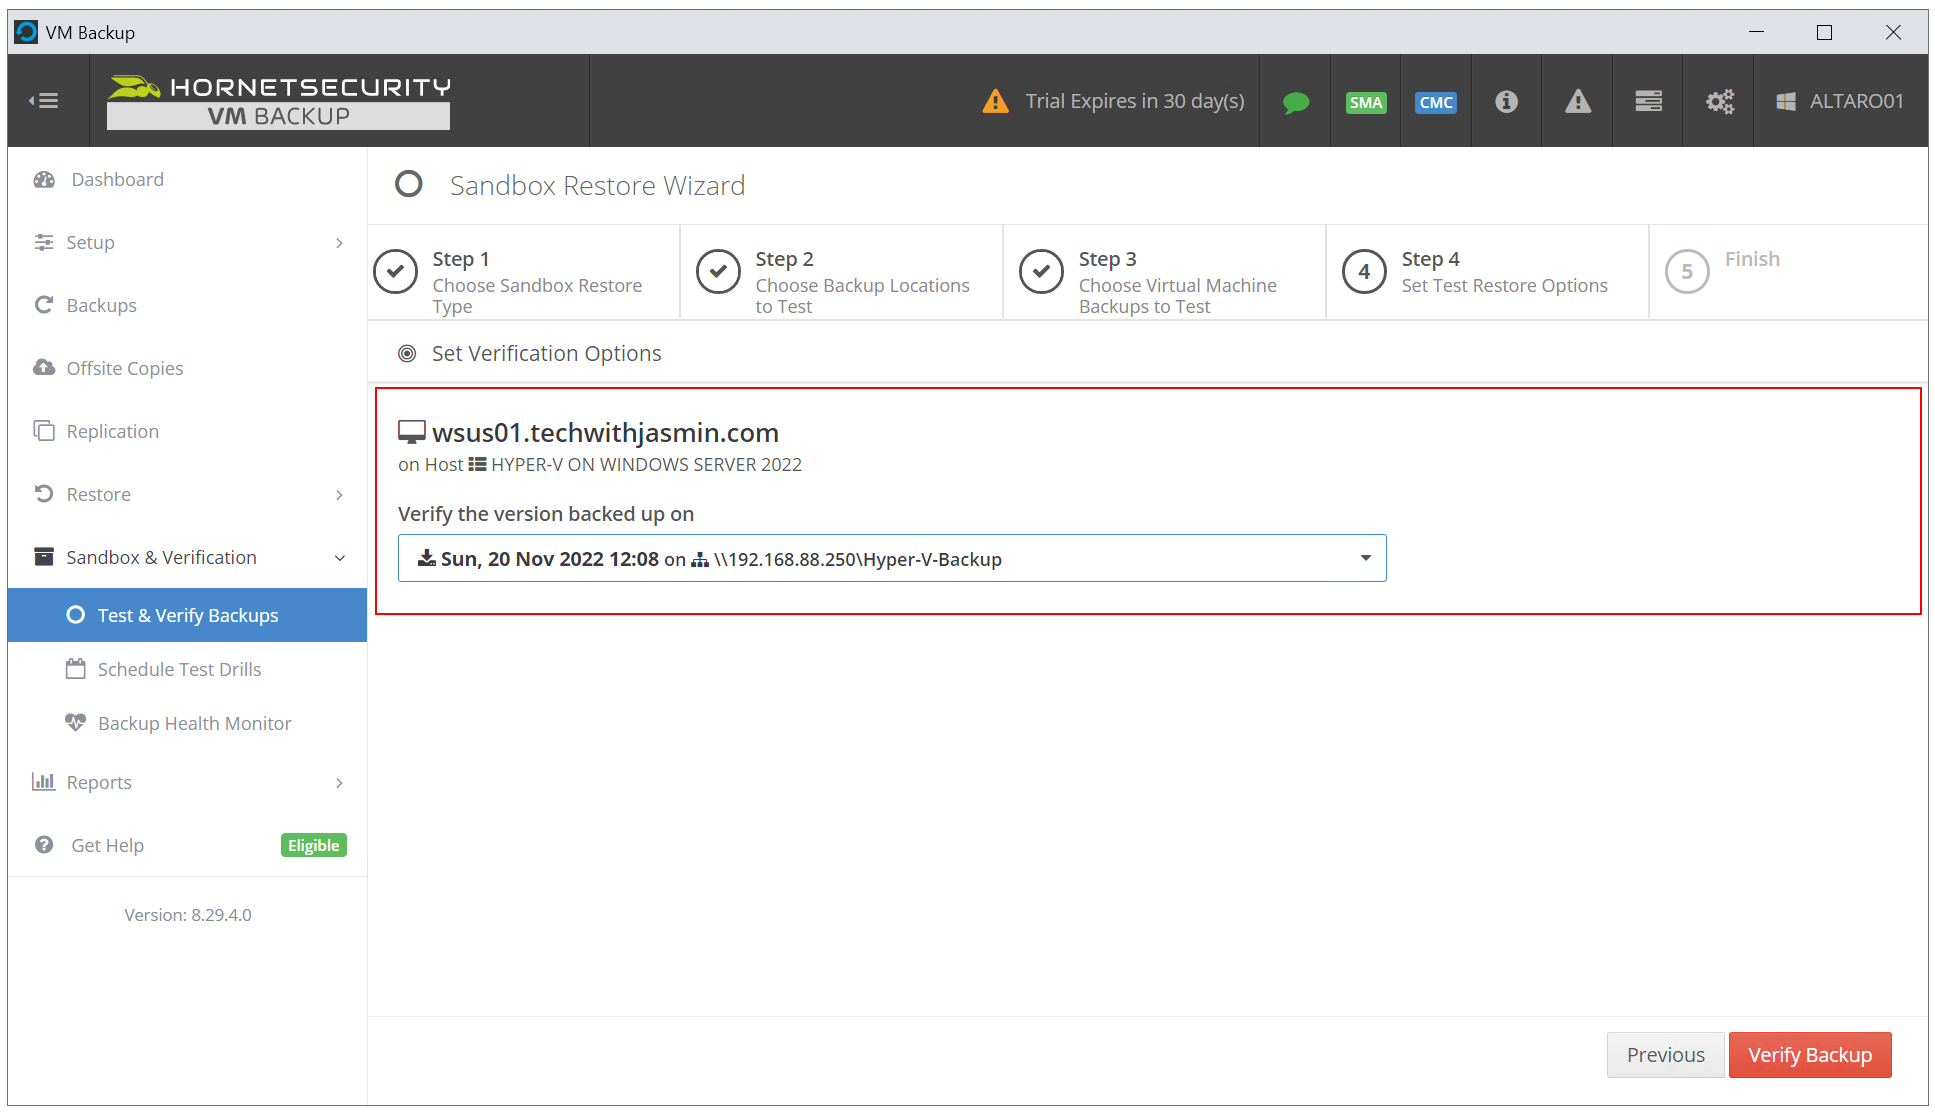
- Choose the backup version to verify and click Verify Backup.
- The verification operations have been queued and will be performed shortly. Click on Go to Dashboard to monitor progress.

Verification is in progress, and no errors detected.

Perform Full Test Restore
If you would choose to Perform Full Test Restore, then there are a few other options you need to configure.
- Select Perform Full Test Restore.

- Select the backup version, backup location, and destination hypervisor and click Perform Test Restore.
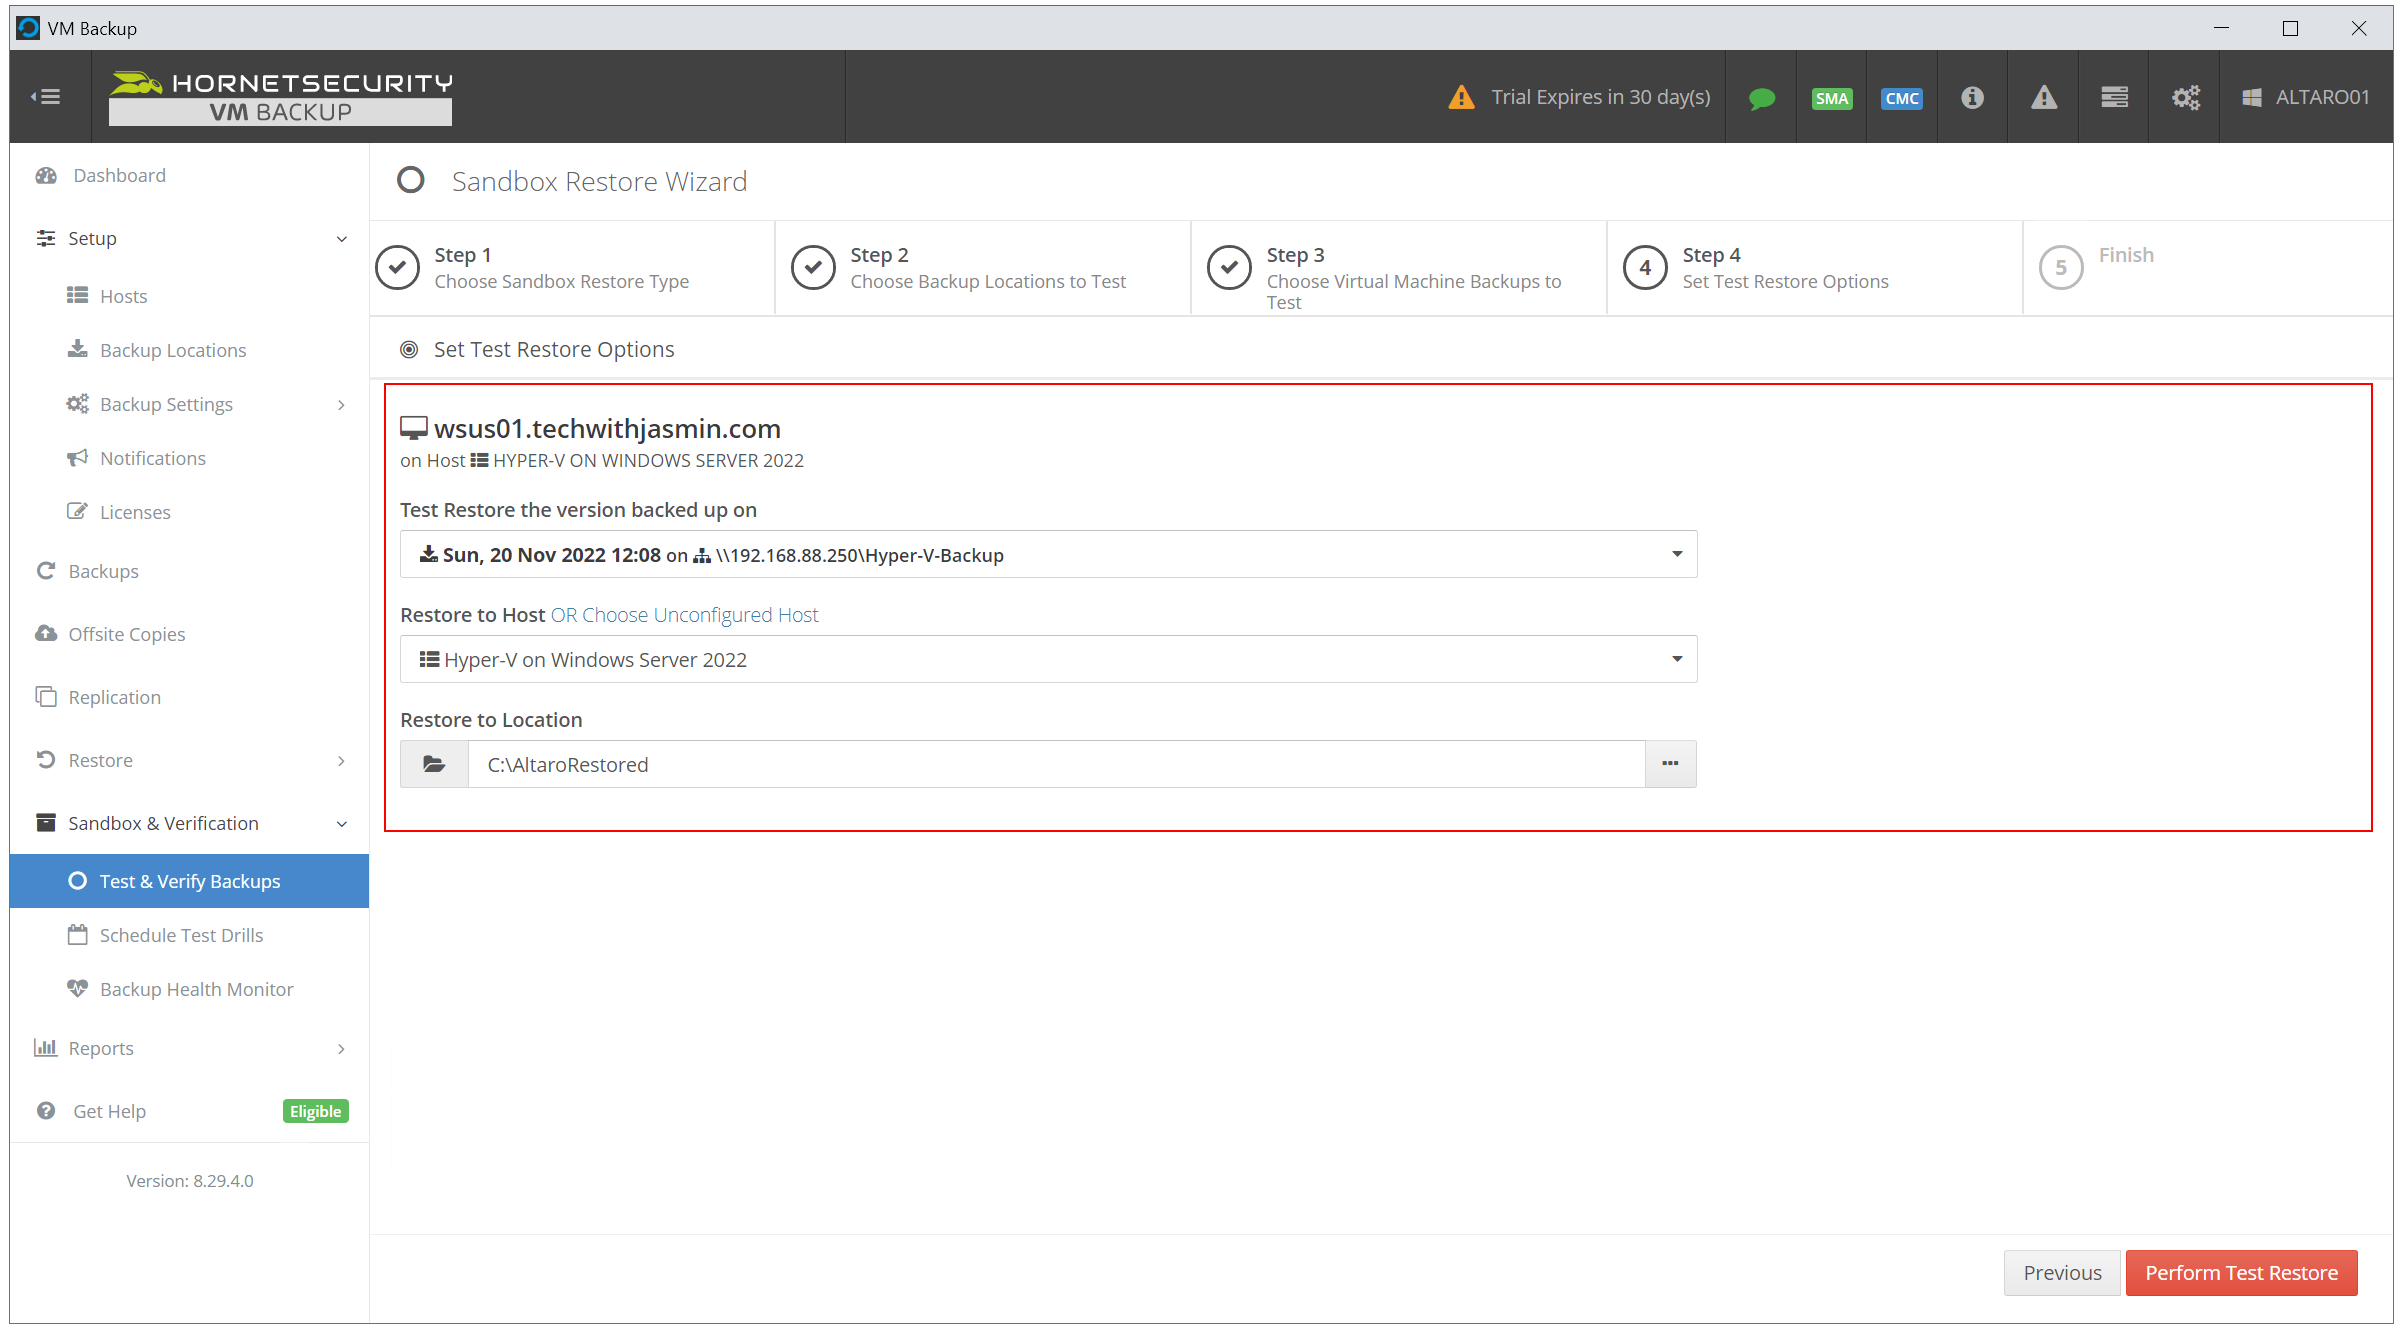
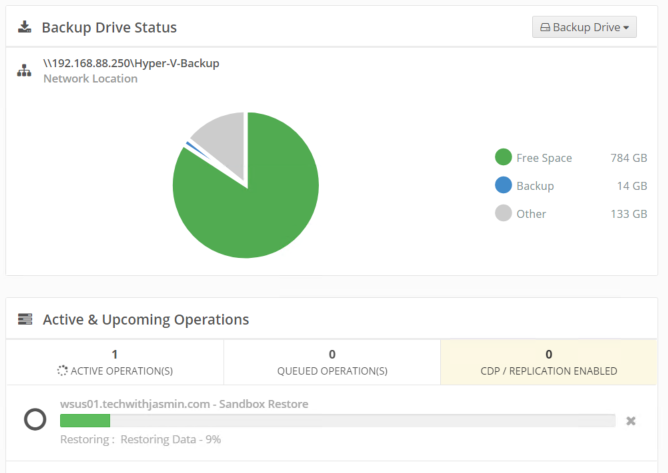
- Click on Go to Dashboard to monitor progress.
You can see the verification status.
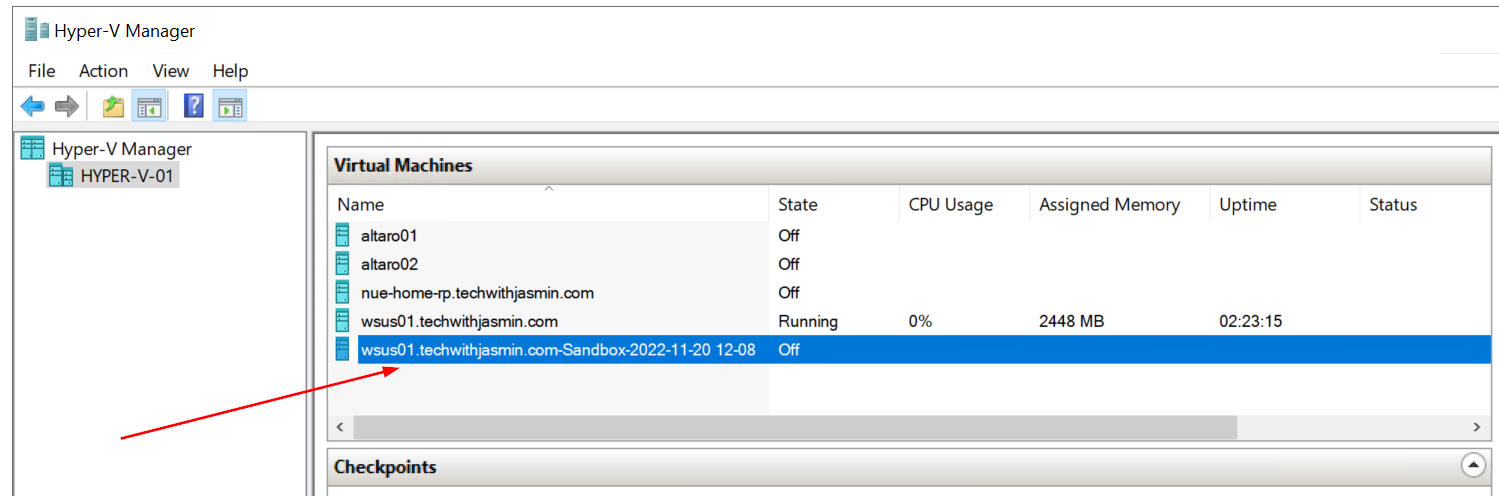
- Once verification is done, Altaro VM will mount a copy of the VM (from backup) to your Hypervisor. Click start and verify if everything works as expected.
That’s all for today. I hope you enjoyed it.
If so, feel free to share the article with your network.

