
SNMP v1 and SNMP vc2 are available in Windows since Windows 2000 and Windows Server 2000, but Microsoft has never implemented SNMP v3. The advantage of SNMP v3 comparing to the first two versions is related to security, it supports authentication and encryption which is not supported in SNMP v1 and SNMP v2c. For the sake of sharing information, Microsoft has deprecated SNMP since Windows 10 1803 and Windows Server 2012 R2, but it is still available and can be installed via PowerShell.
When it comes to the secured monitoring, one of the questions that regularly popped out is how to achieve SNMPv3 compliance in Windows or Windows Server?!
As it isn’t possible to achieve it due to the lack of native SNMP v3 functionalities in Windows and Windows Server, the alternative is to install and use third-party SNMP v3 agents. I´ve had a chance to evaluate SNMP v3 agent developed by the company NuDesign Technologies. The NuDesign SNMPv3 Agent Service is a drop-in replacement for the Microsoft SNMP Agent Service. It automatically installs and enables the Microsoft Extension DDL subagents that come with your Windows OS.
The latest NuDesign SNMP v3 agent is compatible with x84 and x64 client machines from Windows Vista to Windows 10, but also with x84 and x64 Windows Server from Windows Server 2008 to Windows Server 2019. I strongly recommend running the latest Windows and Windows Server in productive environments, as Microsoft has stopped mainstream and extended support for most of the older operating systems. The agent can also work on Linux editions.
It supports IPv4 and IPv6 and mass deployment which is from my perspective very important for a domain-based environment.
The NuDesign SNMPv3 Service supports the following security protocols:
- Authorization: MD5, SHA , SHA224, SHA256, SHA384 and SHA512
- Privacy: DES, AES, AES128, AES192, AES256, AES128, 3DES
These protocols are provided by Windows underlying encryption libraries (with the exception of SHA224 protocol which requires that the user installs the libeay32, an OpenSSL library dll).
INSTALLATION & CONFIGURATION
NuDesign provides 30 days full-featured trial version. If you are running a native SNMP service in Windows, NuDesign SNMPv3 will automatically disable it upon installation. Its Startup type will be set to Manual. To run it again, please go to the Services applet, stop this NuDesign Service and restart the Microsoft SNMP Service.
If you´re running other third-party SNMP agents, such as Net-SNMP agents, you’ll need to stop it manually, otherwise, the NuDesign SNMPv3 agent will not work.
- Download NuDesign on this LINK. The installer is less than 7 MB big.
- Install it by accepting default settings. It might take a few minutes while all components are added. By default, it will be installed at C:\Program Files\NuDesign Tools Eval.
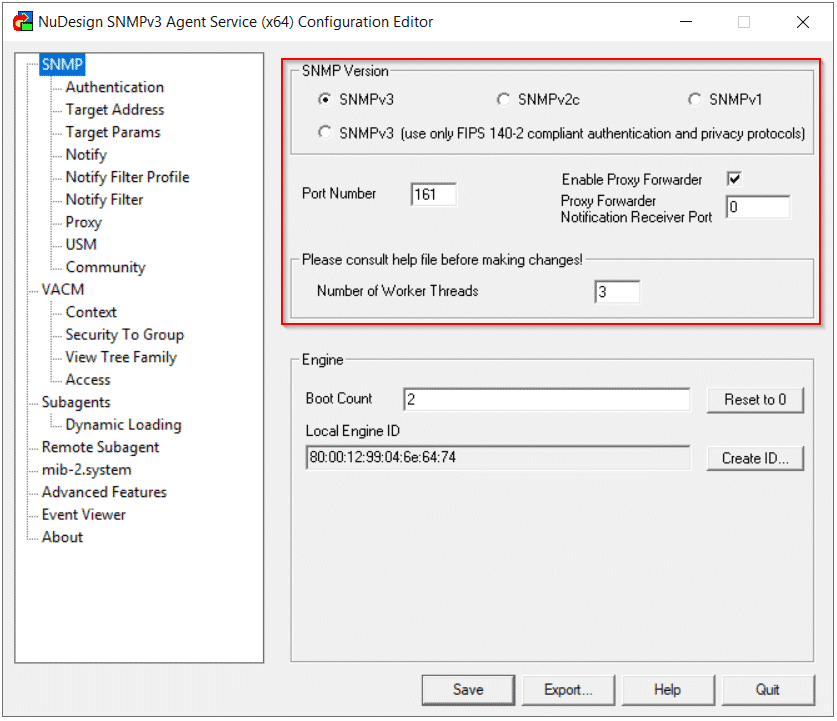
- Run NuDesign SNMP v3 agent by navigating to the Start menu or default installation directory (C:\Program Files\NuDesign Tools Eval\NDT Eval SNMPv3 Agent Service x64).
- Click on SNMP and choose select SNMPv3 and configure port number (161 is default port number).
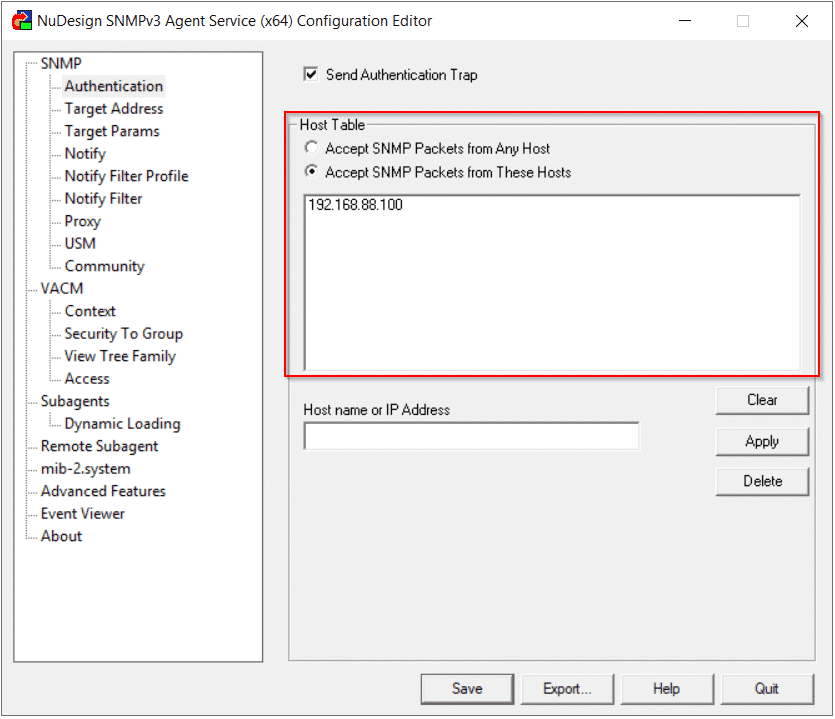
- Click on Authentification, select Accept SNMP Packets from These Hosts and then add the IP address of your network monitoring solution. In my case, I added IP 192.168.88.100 which is the IP of PRTG Network Monitor. It is also possible to send SNMP Traps via SNMP v3. Please check if your NMS supports encrypted SNMP Traps.
- Click on USM (User Security Management) to configure credentials that will be used to access the SNMP v3 agent from NMS. By default, NuDesign SNMP v3 agents use the following credentials shaaes (username), shaaesauth (password) and shaaespriv (encryption key). It’s strongly recommended to create your own credentials and disable the default one. In my case, username is nms, passwords are hidden.

- Click Apply and then click Save
- Click Quit. That will restart your NuDesign Agent Service to apply changes.
CONFIGURE YOUR NMS
In the last step, you´ll need to configure your NMS, in my case PRTG Network Monitor. You can configure SNMP on any level in your device tree.
Navigate to the level you want, click Settings and unselect Credentials for SNMP Devices. Choose SNMP v3, SHA and configure username, password and encryption key. If the default SNMP port differs from the port you use, please change it accordingly.

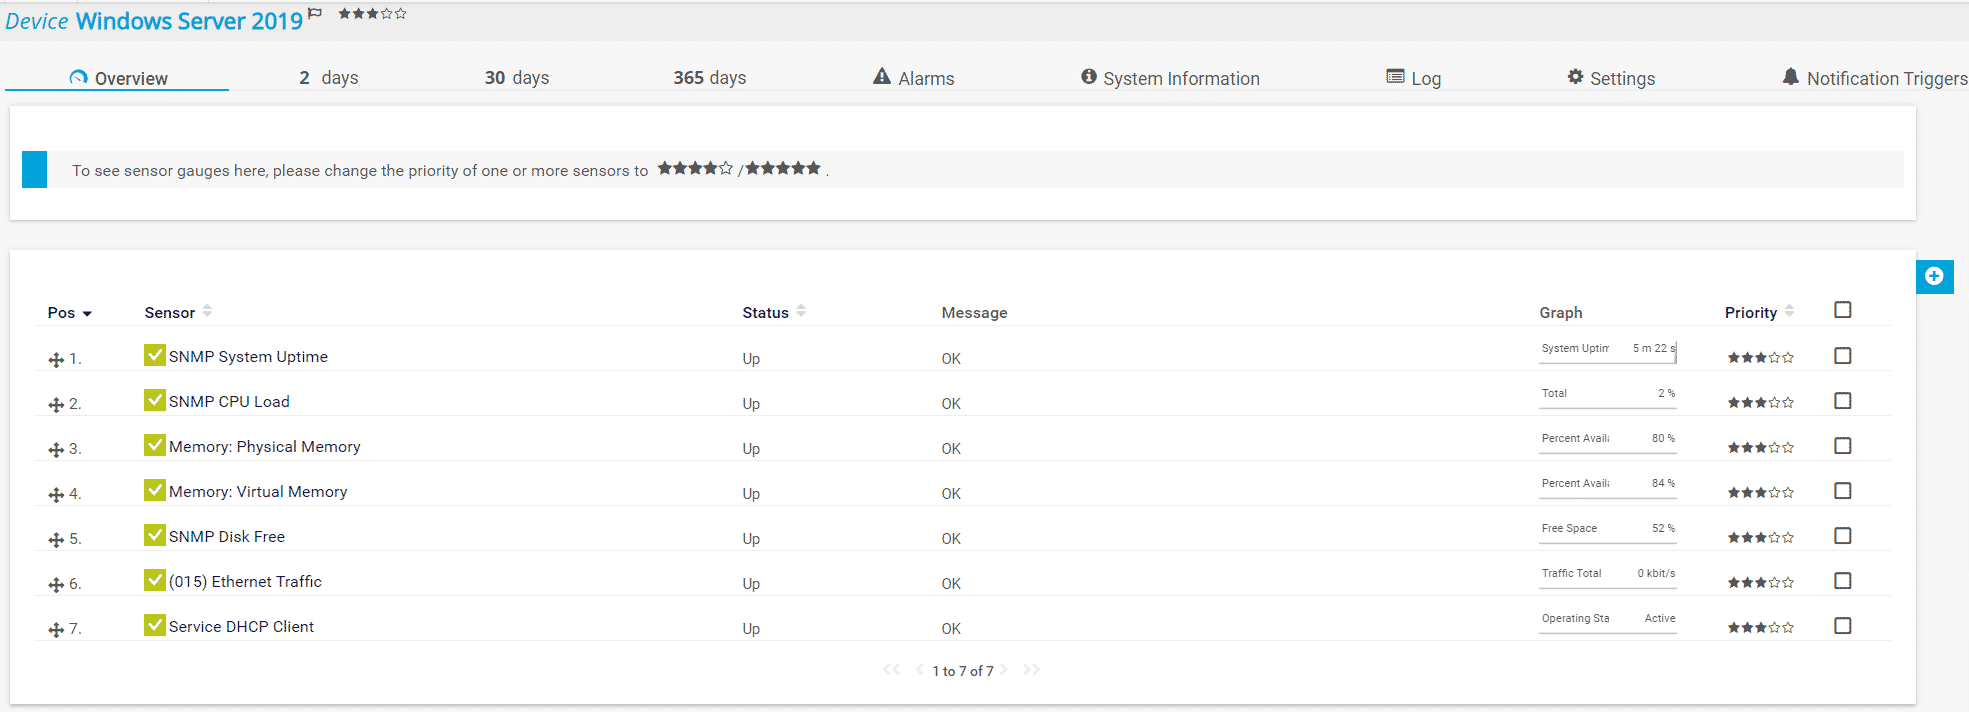
Add SNMP sensors and monitor your Windows client or Windows Server machines.
Thank you for reading this article. In case of any questions, feel free to comment or contact me.

Eric
November 16, 2021 at 00:01
Will this third party tool work for the purpose of having Windows use SNMPv3 to communicate with a local network printer?
Jasmin Kahriman
November 17, 2021 at 21:39
Hi Eric – It will work as long as the network printer supports SNMP v3.
Jasmin Kahriman
November 19, 2021 at 19:04
Hi Jaroslaw – Linux natively supports SNMP v3.