
Microsoft used to call them snapshots, but starting with Windows Server 2012 R2, the name was changed to checkpoints. Whatever we call them, it’s important to manage them properly and keep full control over them.
What are checkpoints?
For anyone not familiar with snapshots (VMware, XenServer) or checkpoints (Hyper-V), they let you capture and preserve the current state of a virtual machine.
This can be very helpful when deploying system changes or app updates. In case of a failure, we can easily revert to the previous state in a second. Once a checkpoint is no longer needed, it should be deleted. I’ve had countless moments where snapshots or checkpoints truly saved my day.
The Problem
The problem starts when checkpoints are left sitting for too long, taking up valuable disk space, or when they’re mistaken for a proper backup, a big mistake many admins make.
Hyper-V checkpoints are NOT alternative for a backup!
I’ve also experienced this situation during the training courses I deliver and while working with IT teams. Some people simply forget to delete snapshots, and many would agree with the statement that checkpoints are not backups. We’re all human; it’s easy to forget during busy days!

The Solution
One option is to apply policies that automatically delete checkpoints after a certain number of days, although this can be tricky with some hypervisors. The alternative, which I recommend, is to monitor checkpoints on your servers and trigger notifications if they exceed a threshold you consider too high.
Today, I will show you how to monitor your checkpoints using Paessler PRTG. We want to track if a certain number of checkpoints have been created and not deleted. If that happens, PRTG will trigger an alert to the IT admins so they can take action … and delete them!
You can use this method if you’re already a PRTG user, or you can download the freeware version, which allows monitoring of up to 100 sensors, enough to cover your full Hyper-V server with all critical components.
How To
To successfully monitor the number of checkpoints on your Hyper-V server, there are five small steps you need to follow to set it up completely.
Prerequisites:
- Installed PRTG
- WinRM enabled on the Hyper-V Server
# On Hyper-V Server:
Enable-PSRemoting -Force
Enable-NetFirewallRule -DisplayName "Windows Remote Management (HTTP-In)"
1: Prepare the PowerShell script
In the first step, you will create a PowerShell script and store it on the PRTG server so that PRTG can use it to monitor your Hyper-V environment.
Open Notepad++ or any other text editor and copy the following script:
# Monitor Hyper-V Checkpoints for PRTG
# Returns checkpoint count - use PRTG limits to define thresholds
# by tehcwithasmin.com

try {
    $result = Invoke-Command -ComputerName 'FQDN' -ScriptBlock {
        Get-VMSnapshot -VMName * | Measure-Object
    } -ErrorAction Stop

    $count = $result.Count

    write-host "$count`:OK"
    exit 0
}
catch {
    write-host "0:Error - Cannot connect to Hyper-V server"
    exit 2
}
In the script, you must change the following parameters:
- ComputerName– Enter the
FQDNof your Hyper-V server and keep it within quotation marks (”). - -VMName * -This parameter queries the total number of checkpoints on your Hyper-V server for all virtual machines. If you want to monitor a specific VM, define its name in the script (e.g.,
-VMName dc01.company.local). In this example,dc01.company.local
Save the file as HyperV_checkpoints.ps1, and make sure to select All Files under Save as type.
Once your PowerShell script is ready, copy it to your PRTG server in the following location:
C:\Program Files (x86)\PRTG Network Monitor\Custom Sensors\EXE2. Add the Hyper-V Server in PRTG
In the second step, add your Hyper-V server as a target in PRTG. You can use either its FQDN or IP address.
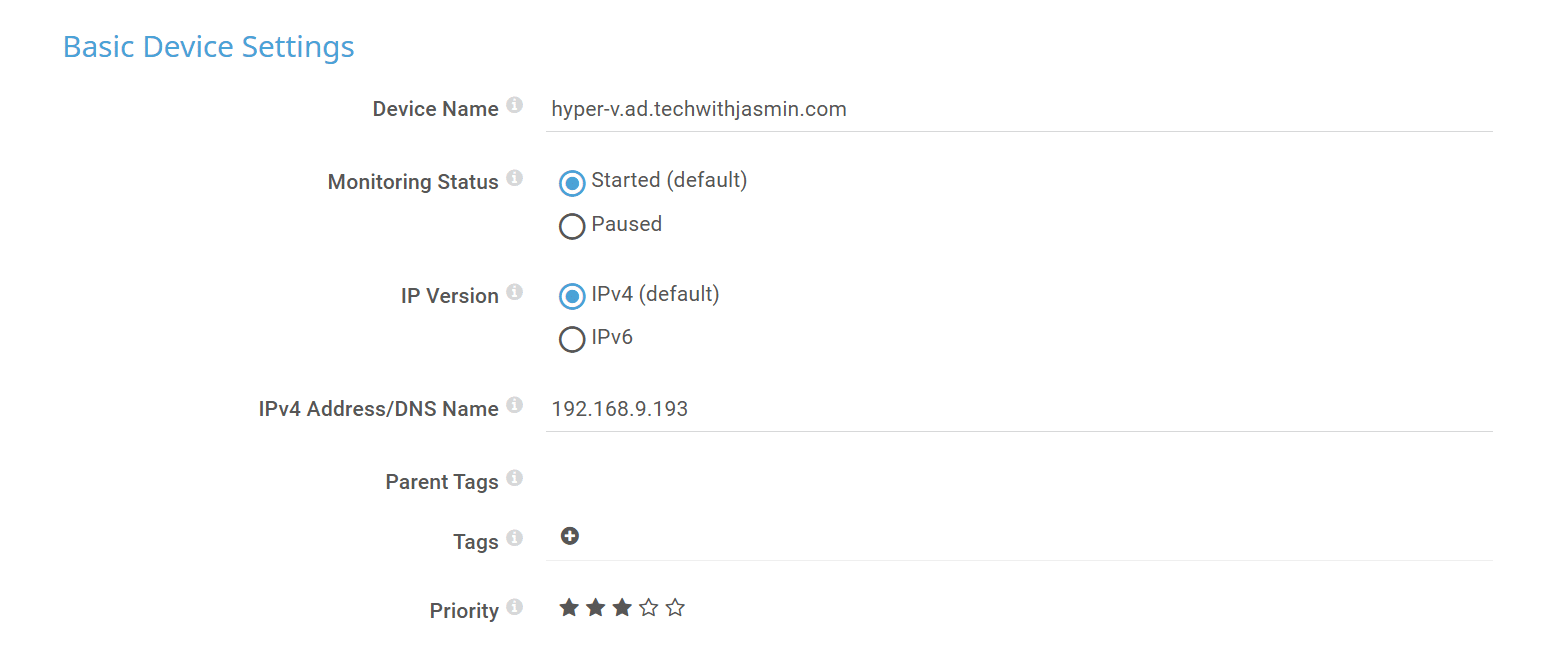
Once added, it’s important to specify the correct Windows credentials in the device properties so that PRTG has administrative rights to query the Hyper-V server using PowerShell.

3: Add the sensor
In this step, you will add an EXE/Script Sensor to your PRTG device. The EXE/Script sensor runs an executable file (.exe) or a script (batch file, VBScript, PowerShell) on the probe system. This option is available as part of the PRTG API.
During the creation process, configure the following settings:
- Sensor Name: Enter
Hyper-V Checkpoints - EXE/Script: Select the
HyperV_Checkpoints.ps1script - Parameters: Only if you want to monitor a specific VM.
- Security Context: Select Use Windows credentials from parent device
- Channel Name: Enter
No of checkpoints
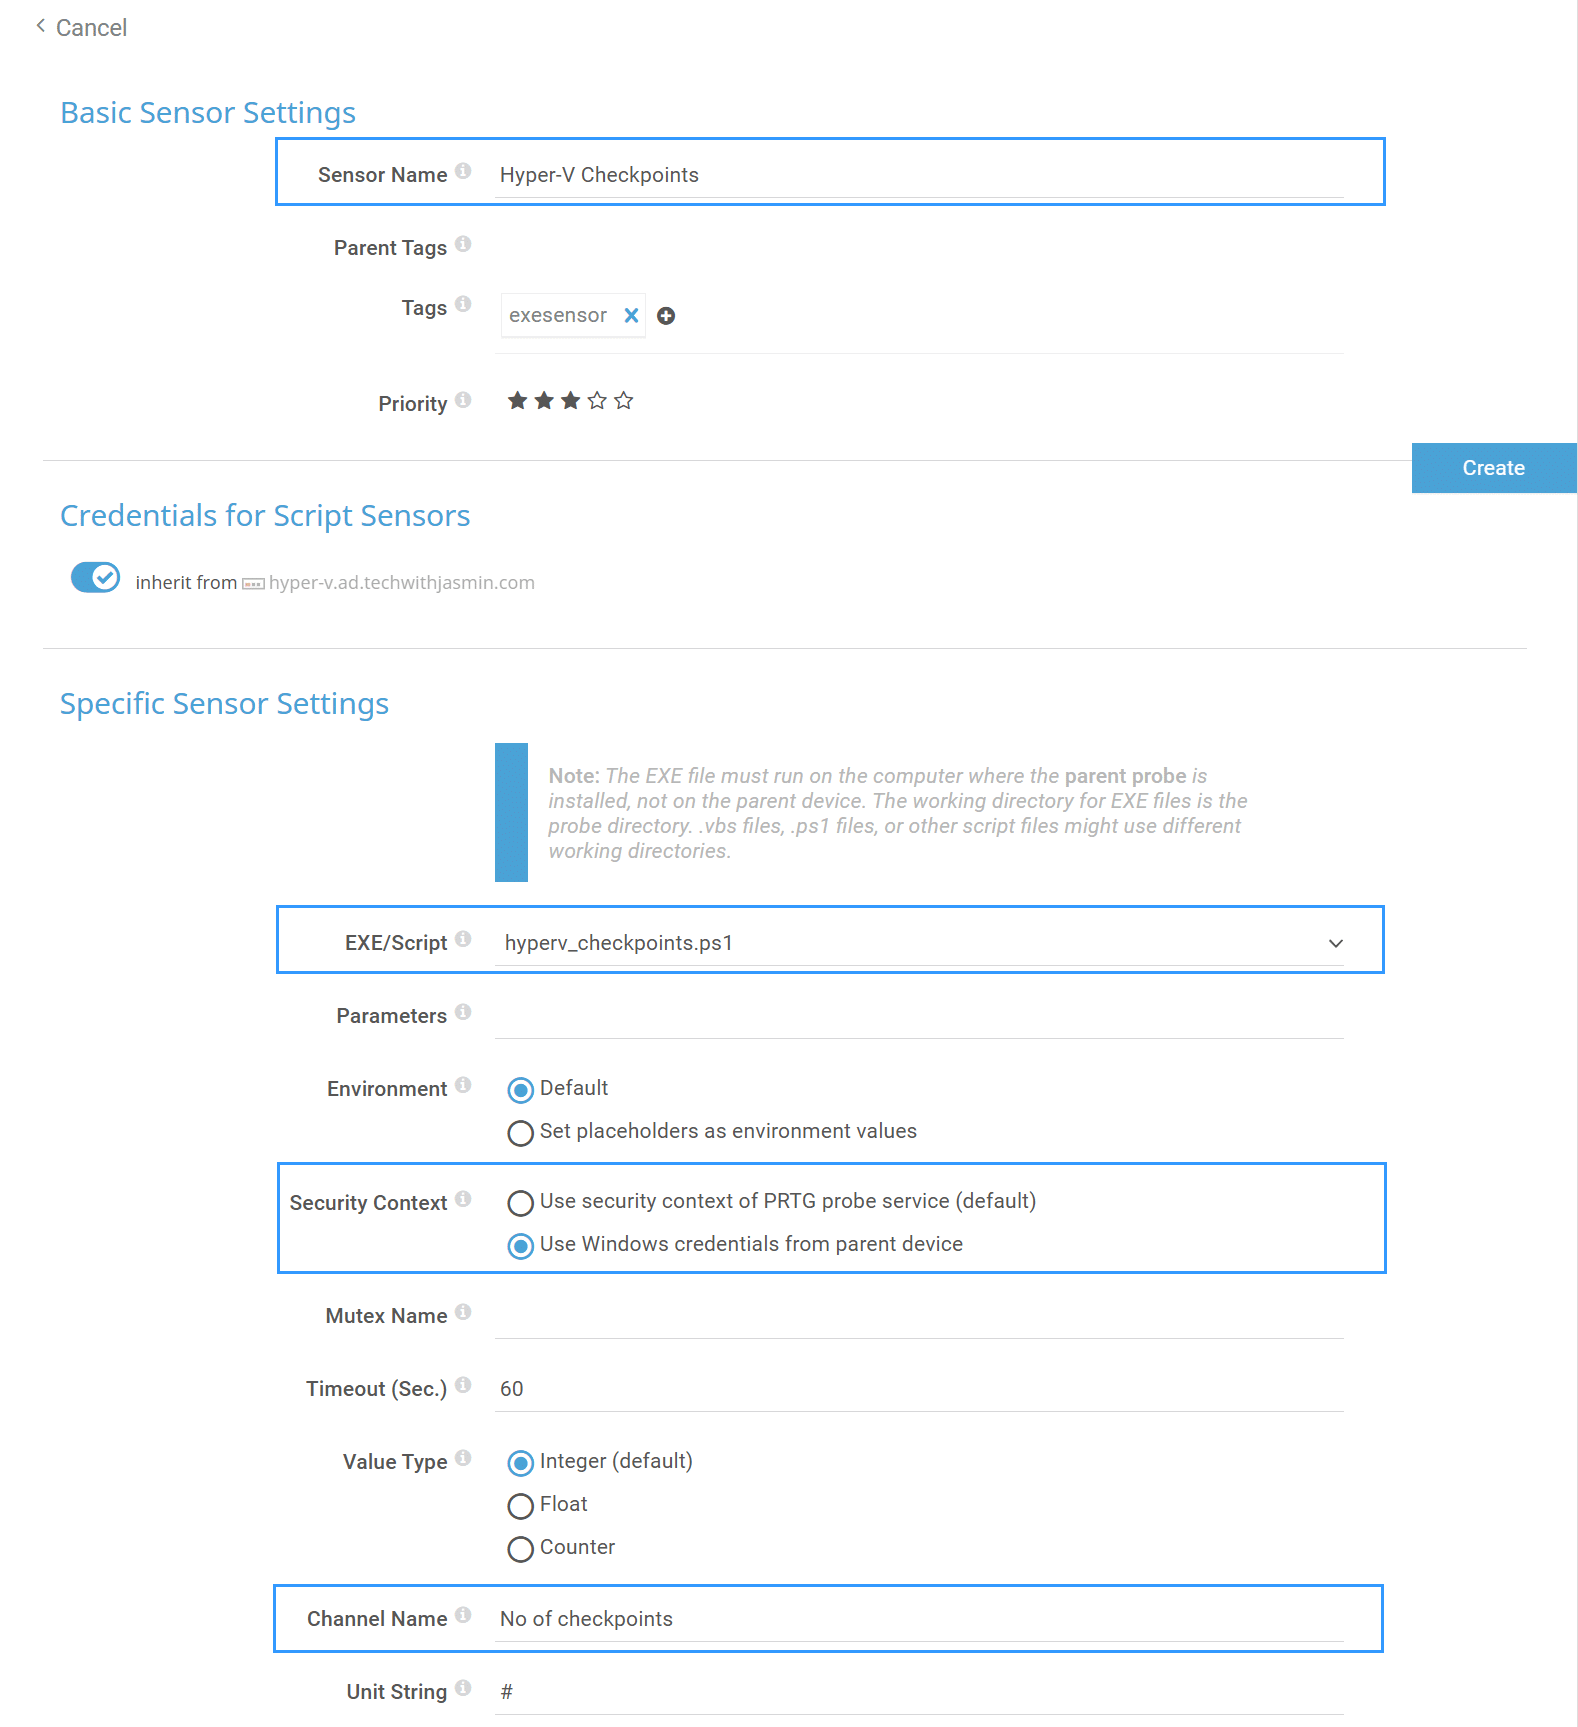
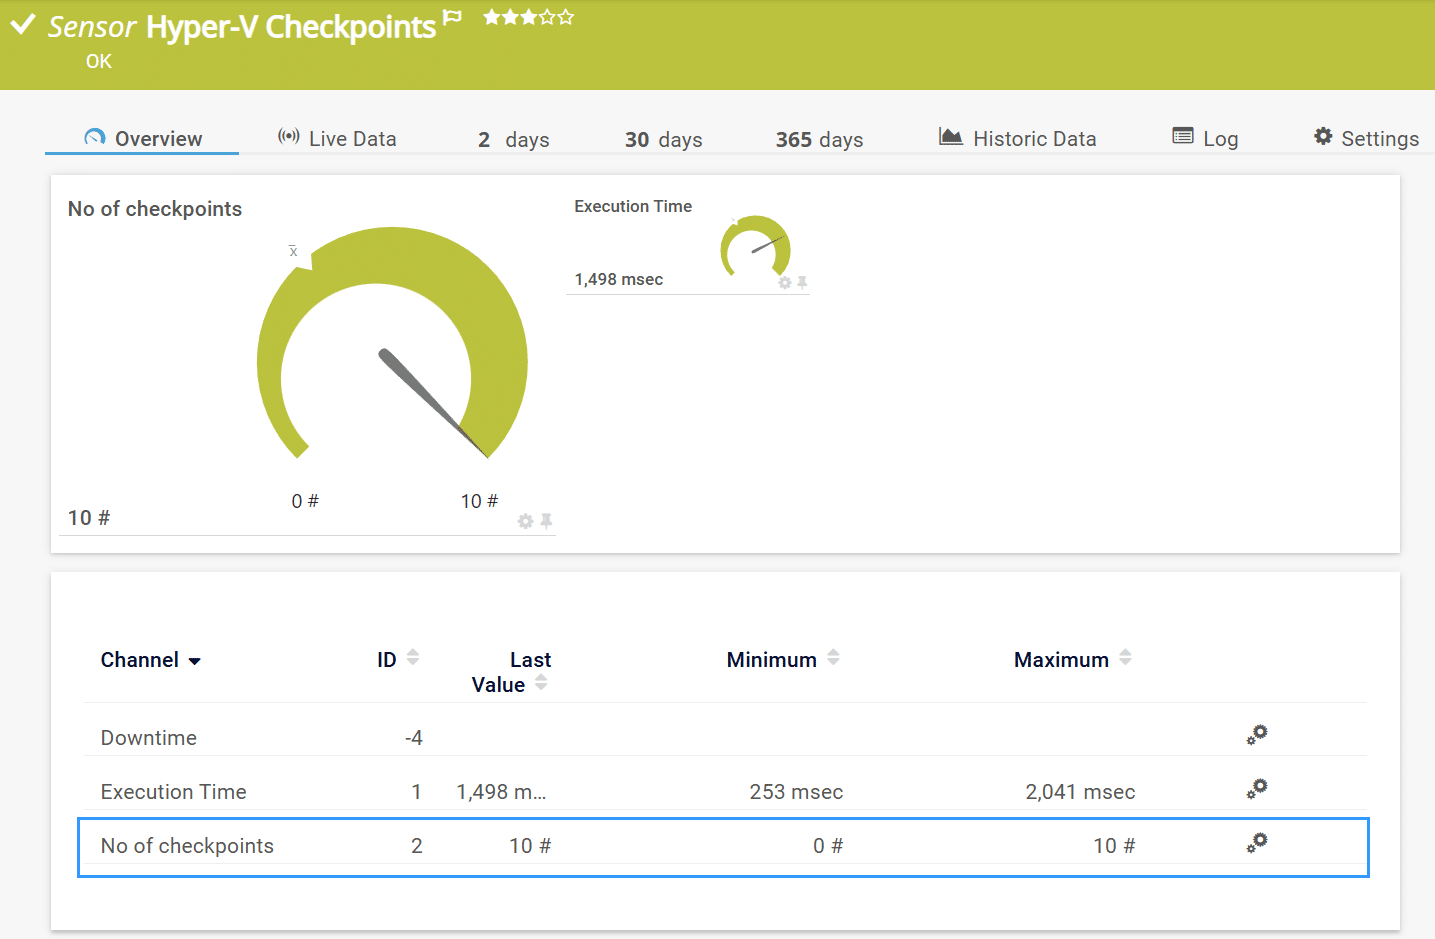
Once done, click Create. The sensor will display the current number of checkpoints on your Hyper-V server. PRTG will check the Hyper-V server every 60 seconds to see if any checkpoints exist.
In my case, there are 10 checkpoints available on the Hyper-V server.
4: Configure thresholds
But what now?
We have a number of checkpoints, and what do we do with them?
How do we define a warning and an error alert?
Well, it’s time to create thresholds that tell the sensor when to enter a Warning state and when to go into an Error state.
So, all you need to do is click on the No of checkpoints channel, select Enable alerting based on limits, and then configure the following:
- Upper Limit: Enter
10 - Upper Warning Limit: Enter
5 - ErrorLimit Message: Enter
Critical: Over 10 checkpoints! - Warning Limit Message: Enter
Warning: Over 5 checkpoints!

Once done, click Apply and then OK.
It was previously showing a green gauge (screenshot Check the channel ‘No of checkpoints’), and now it will change to display green, warning, and error ranges based on your configured thresholds.
In my case, this sensor is in a Warning state because it has between 5 and 10 checkpoints.

5: Create a notification trigger
We have everything in place, but we’re still missing notification triggers. Essentially, we want PRTG to notify us when a sensor enters a Warning or Error state via email, SMS, ticket, or any other method (fully customizable).
Navigate to the sensor, then go to Notification Triggers. Add a new State Trigger and configure the Warning and Error states as follows:

Once an alert is generated, PRTG will trigger the notification alerts. Here is an example of the output in the ticketing system, which is assigned to the admin.

Enjoyed this guide or have a question?
I enjoy working with Hyper-V and PRTG.
Share your thoughts or ask for help in the comments below. I read and reply to every message!


Tony Fantaci
March 8, 2023 at 15:29
Hi,
The script seems to work when there are no snapshots, but when there is at least 1 snapshot, it fails with message ‘Response not well-formed: “( )” (code: PE132)’.
Tony
Tony Fantaci
March 9, 2023 at 15:23
I found the issue. Apparently PRTG does not like the “” symbols in the message. I removed them and it worked.
Jasmin Kahriman
March 11, 2023 at 09:06
Hi Tony – Gald to hear it works now. Thank you for sharing a fix with us.