How to backup Hyper-V VMs using BDRSuite

Backing up virtual machines can be a daunting task, but with BDRSuite, the process becomes a breeze. If you're using Microsoft Hyper-V, you can easily backup your VMs in just three simple steps.

If you happen to be utilizing Hyper-V as your virtualization platform for running various workloads, it is imperative to prioritize the backing up of your virtual machines to a secure location. To this end, this article will introduce you to the process of achieving this using BDRSuite, a comprehensive backup and disaster recovery solution.


To begin with, you will need to install BDRSuite on your Windows Server. Fortunately, I have already published an article that explains the procedure in detail. You can refer to that article for step-by-step guidance on how to download, install and configure BDRSuite on your Windows Server.

Once you have completed the installation process, you will be ready to start backing up your Hyper-V virtual machines using this powerful tool.

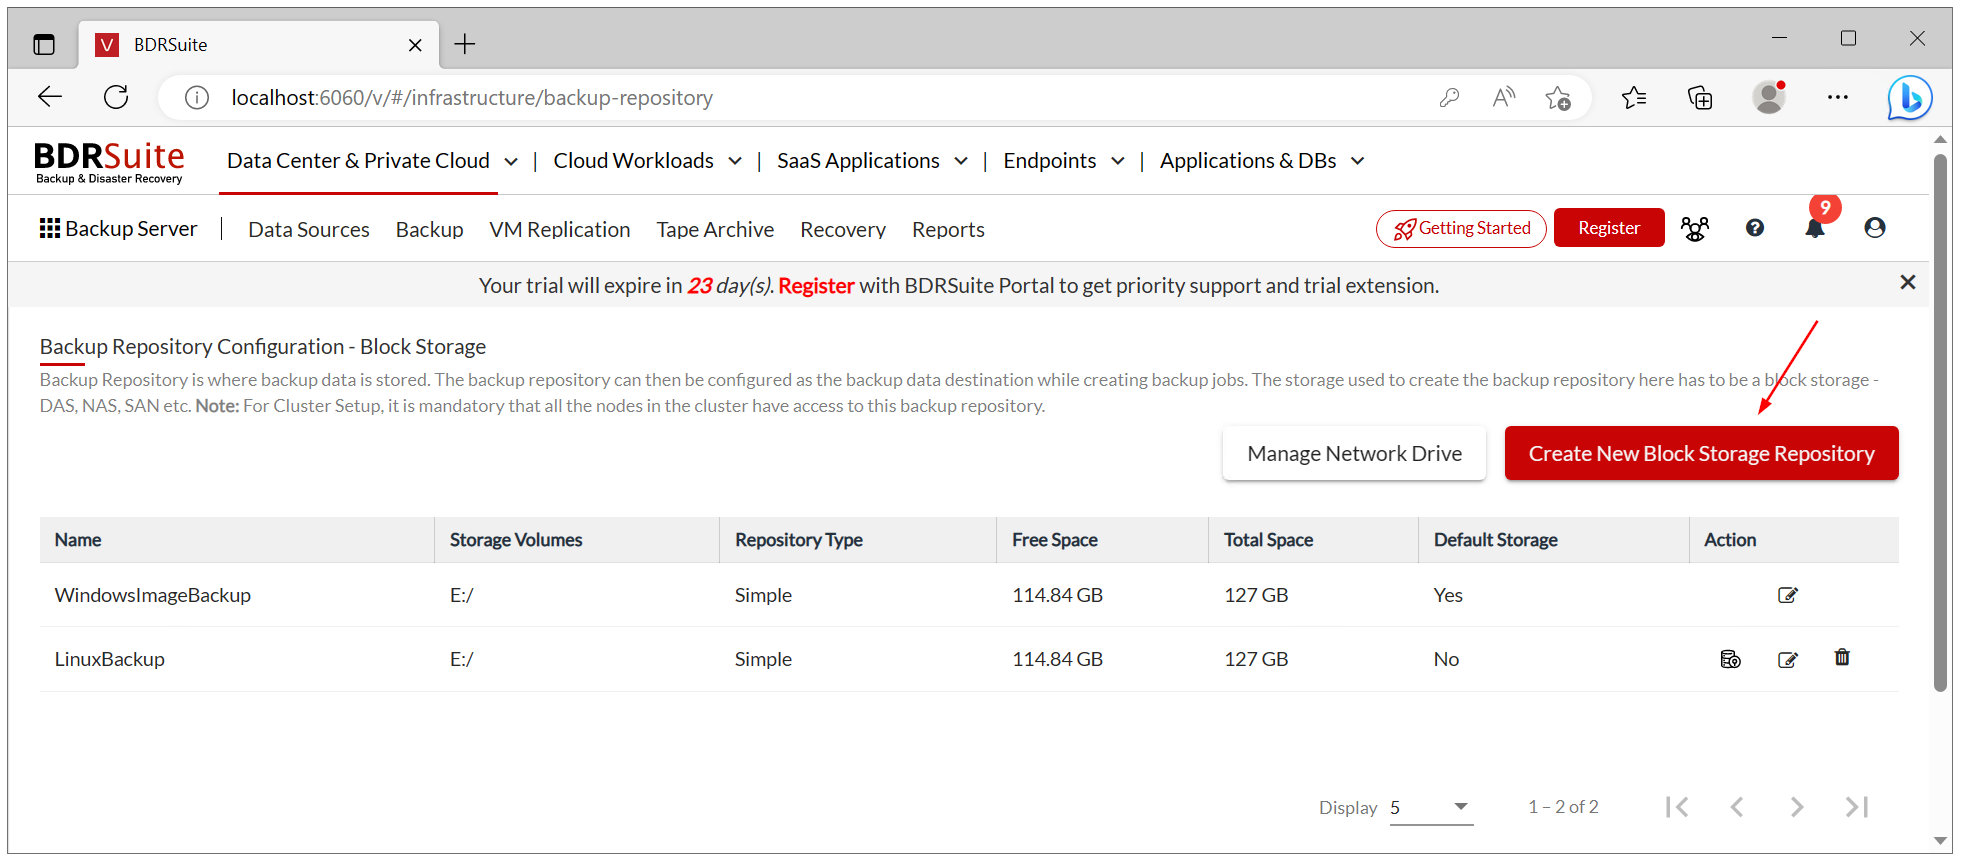
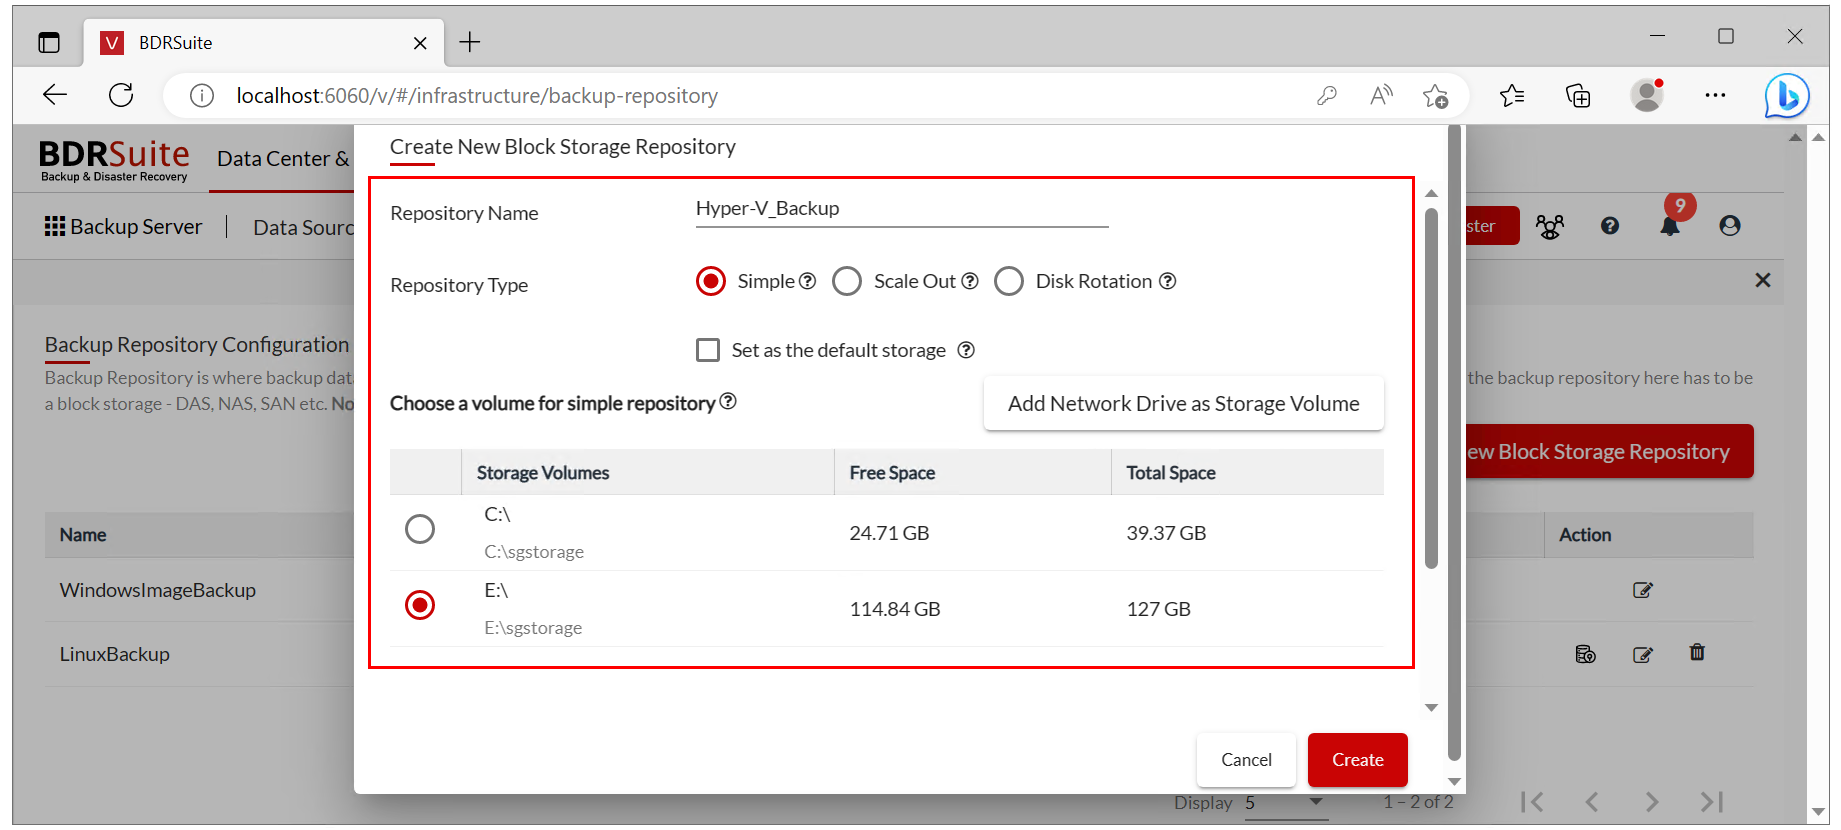
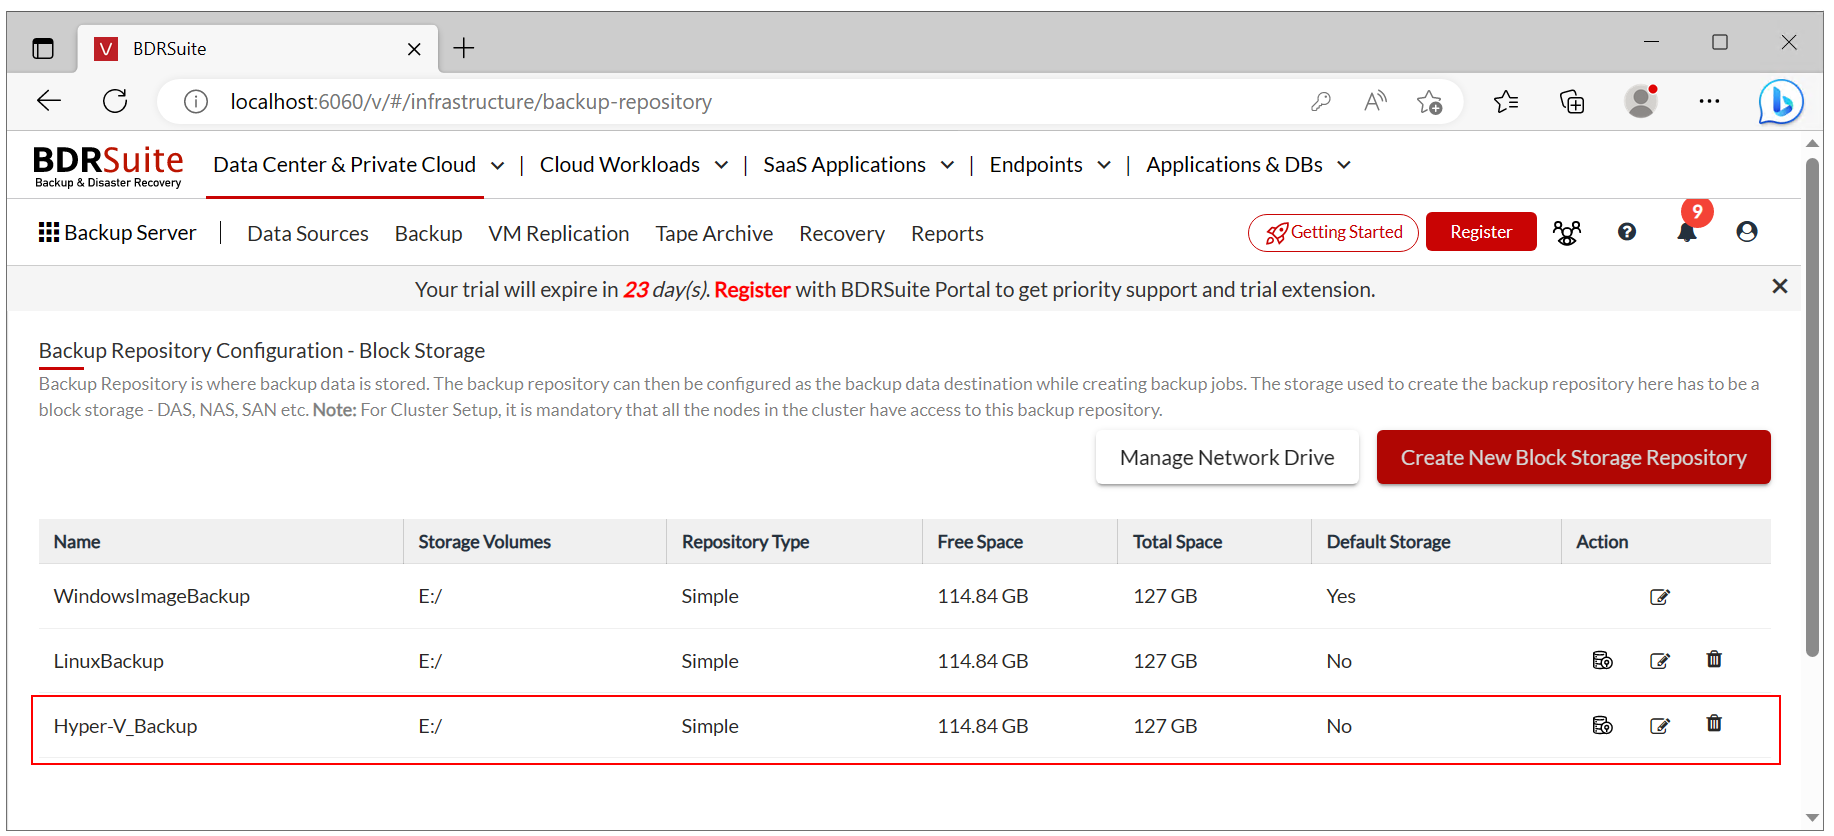
Step 1: Add backup storage destination

The first step in using BDRSuite to backup your Hyper-V virtual machines is to add a storage location where you can store your backups. It is important to note that this storage location should not be on the Hyper-V host or guest VMs themselves, but rather on network storage such as Synology, Dell EMC or a similar system.

  1. Login to your BDRSuite using web UI.
  2. Click on Backup Server and then select Block Storage.
  3. Click Create New Block Storage Repository.
  1. Enter Repository Name, select Simple as Repository Type and choose volume for simple repository and then proceed with Create.
    1. Your block storage will be listed in the storage section. If you have several backup locations, they all will be listed there.
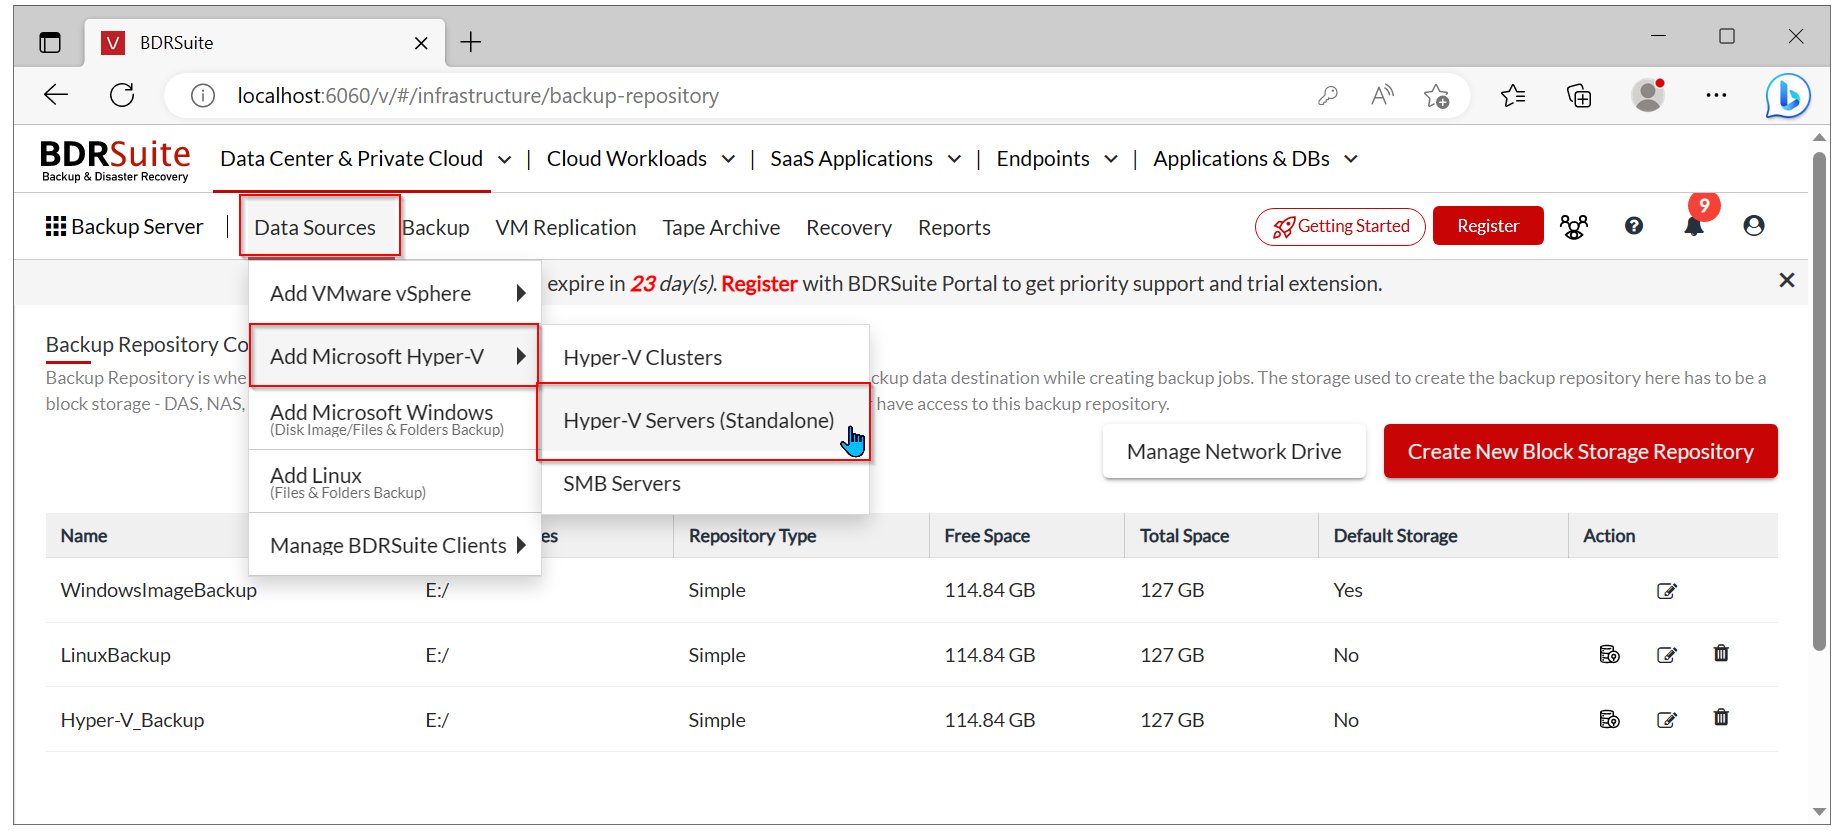
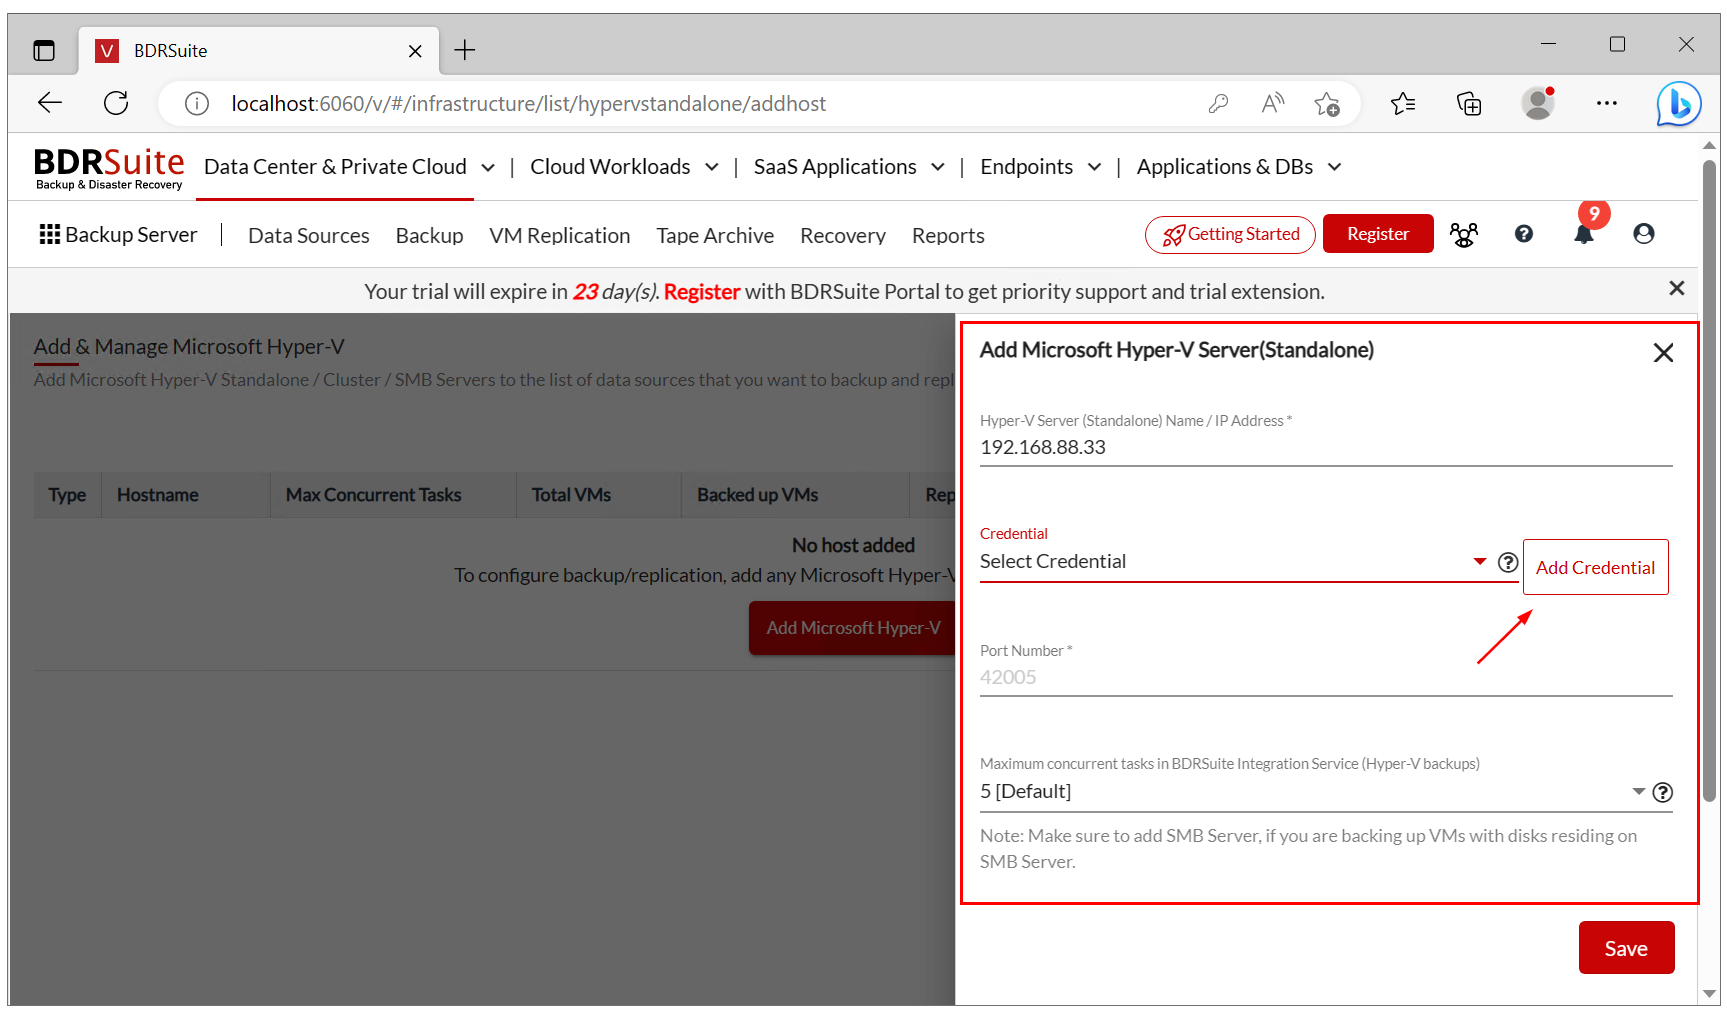
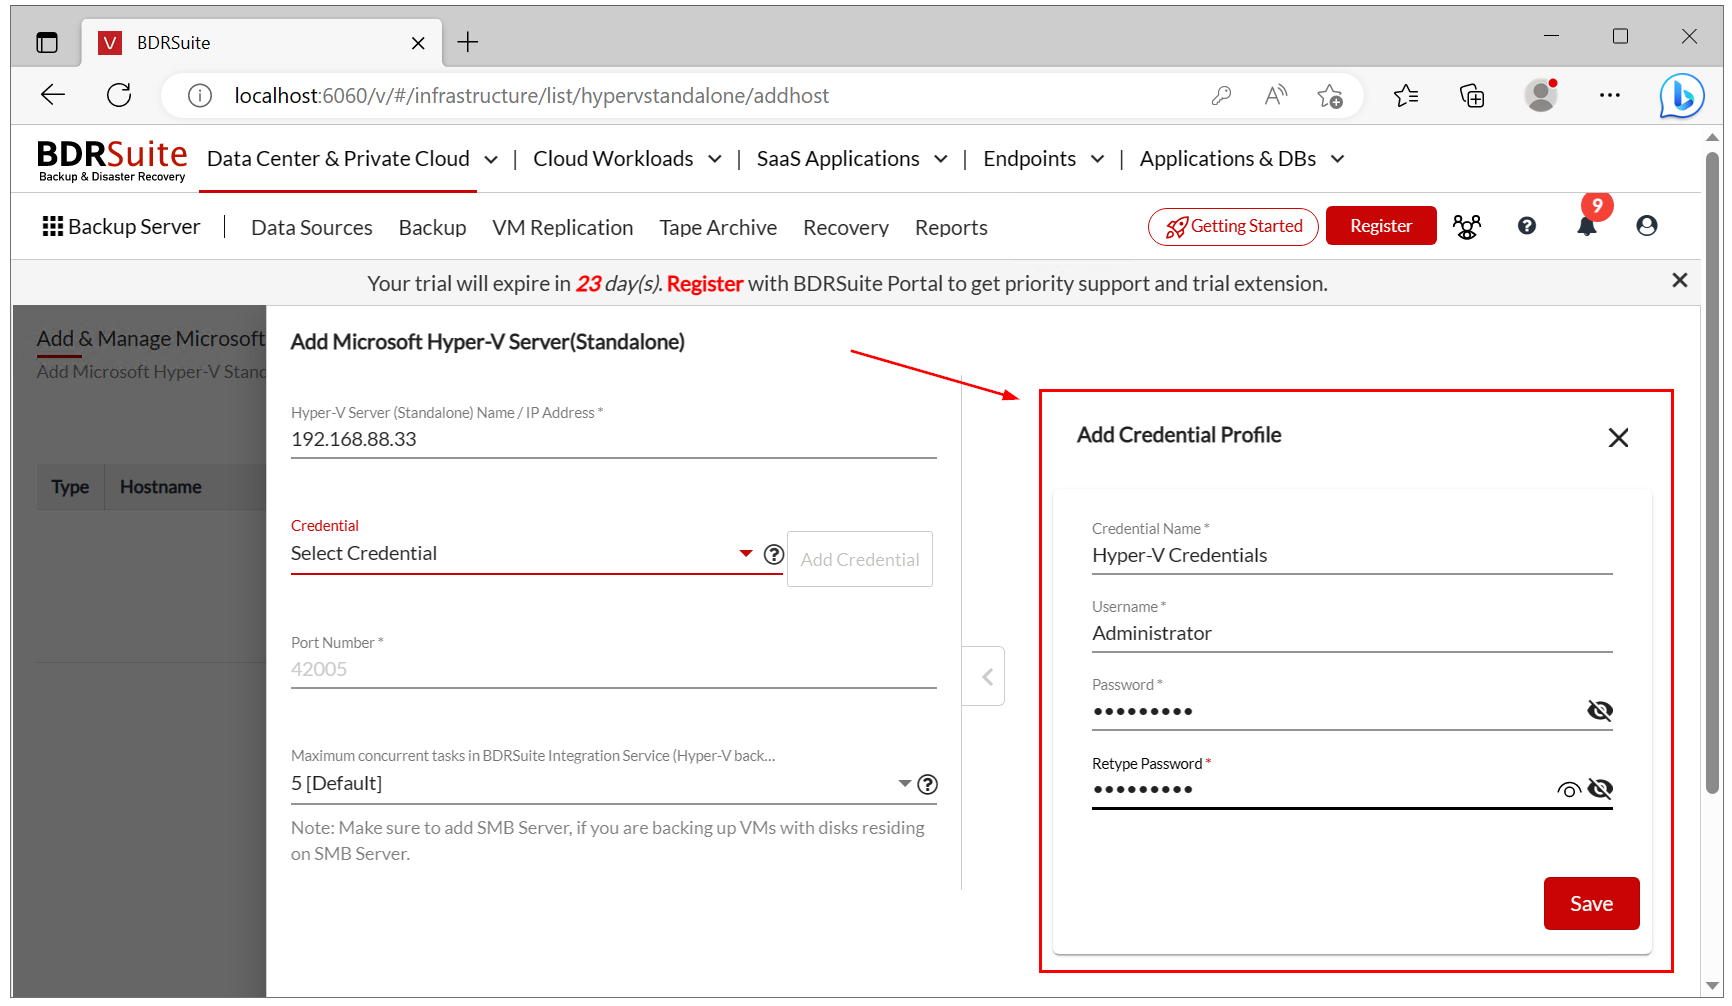
    2. Step 2: Add Microsoft Hyper-V

      After you have added the storage location for your backups, the next step is to include Microsoft Hyper-V as the destination host that requires backup in BDRSuite.

      1. Click on Data Sources.
      2. Click on Add Microsoft Hyper-V and then click Hyper-V Servers (Standalone).
      1. Click Add Microsoft Hyper-V.
      2. Enter Hyper-V IP or FQDN and the click on Add Credentials to add credentials that have access to your Hyper-V Host.
        1. Add credentials name, username, password and then click Save.
          1. Click Save to confirm.
          2. Click OK, Proceed with add Hyper-V Server and automatically install BDRSuite remote agent on your Hyper-V Server.
          3. Wait until done.
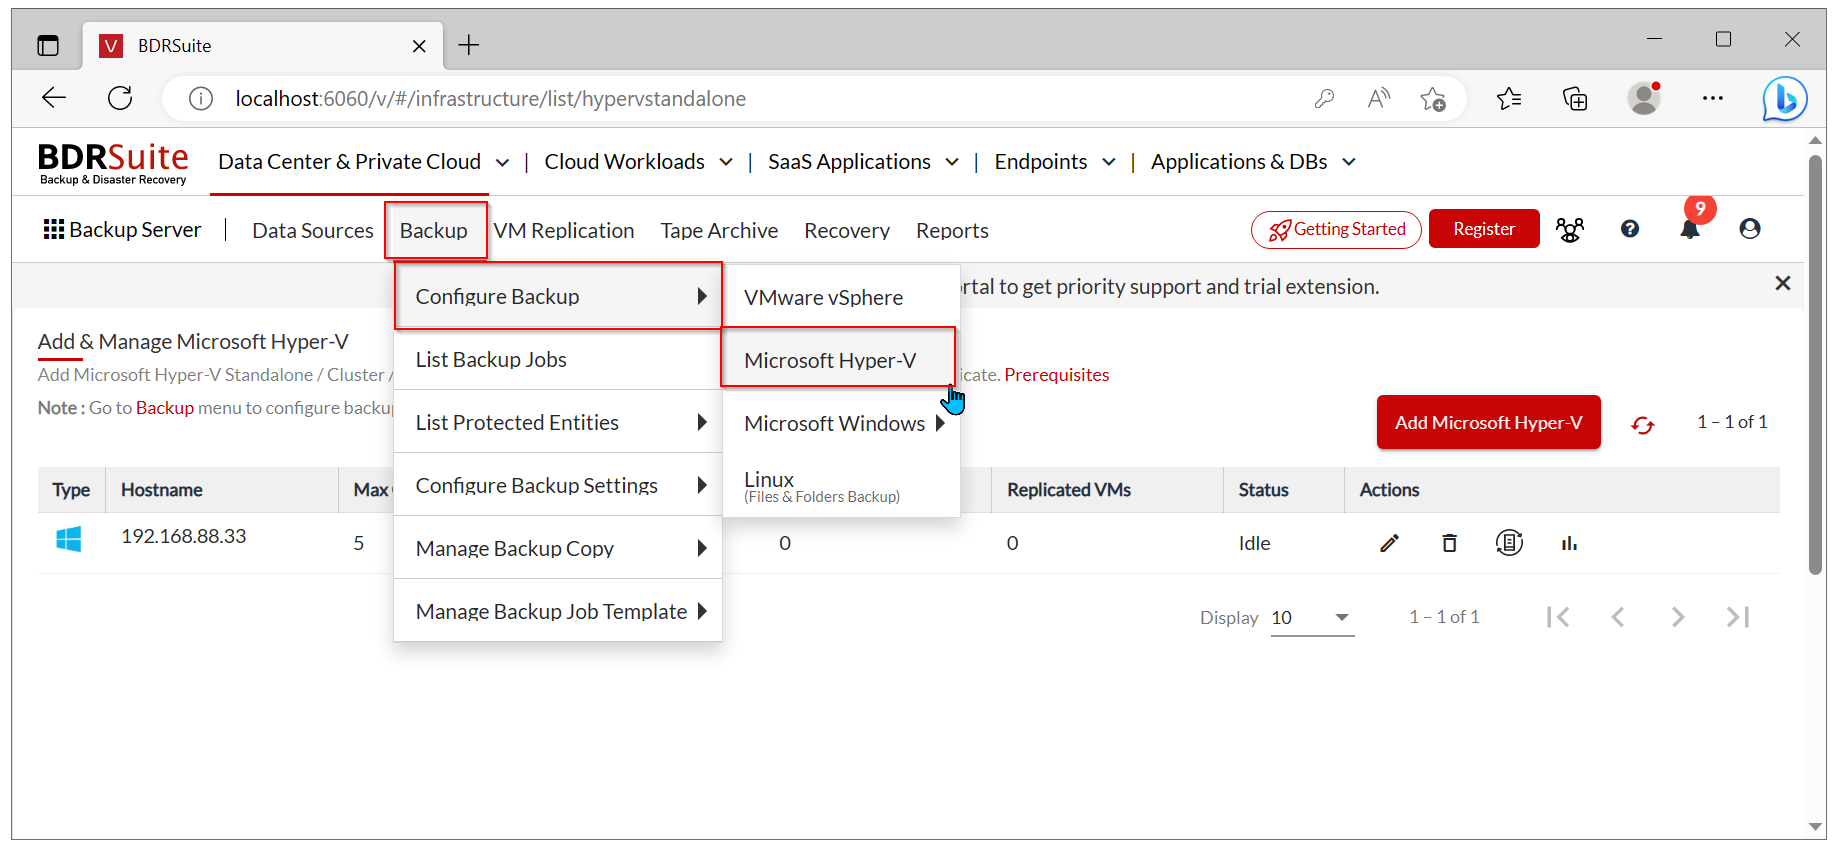
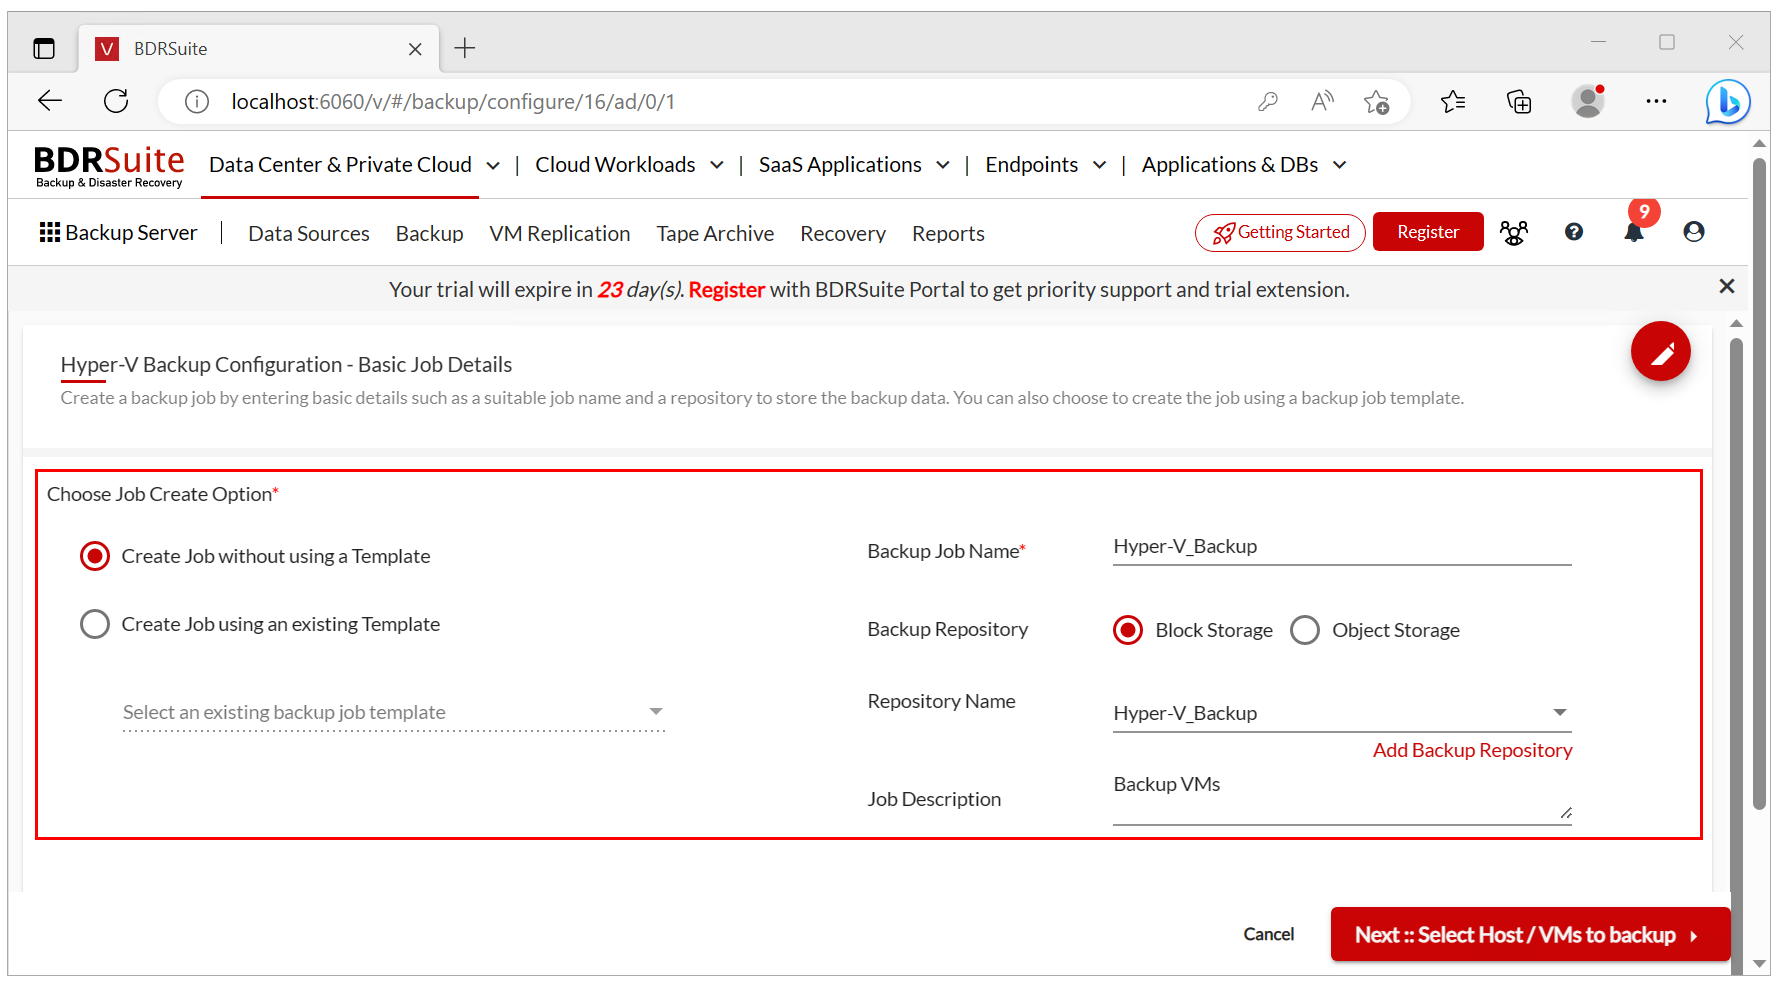
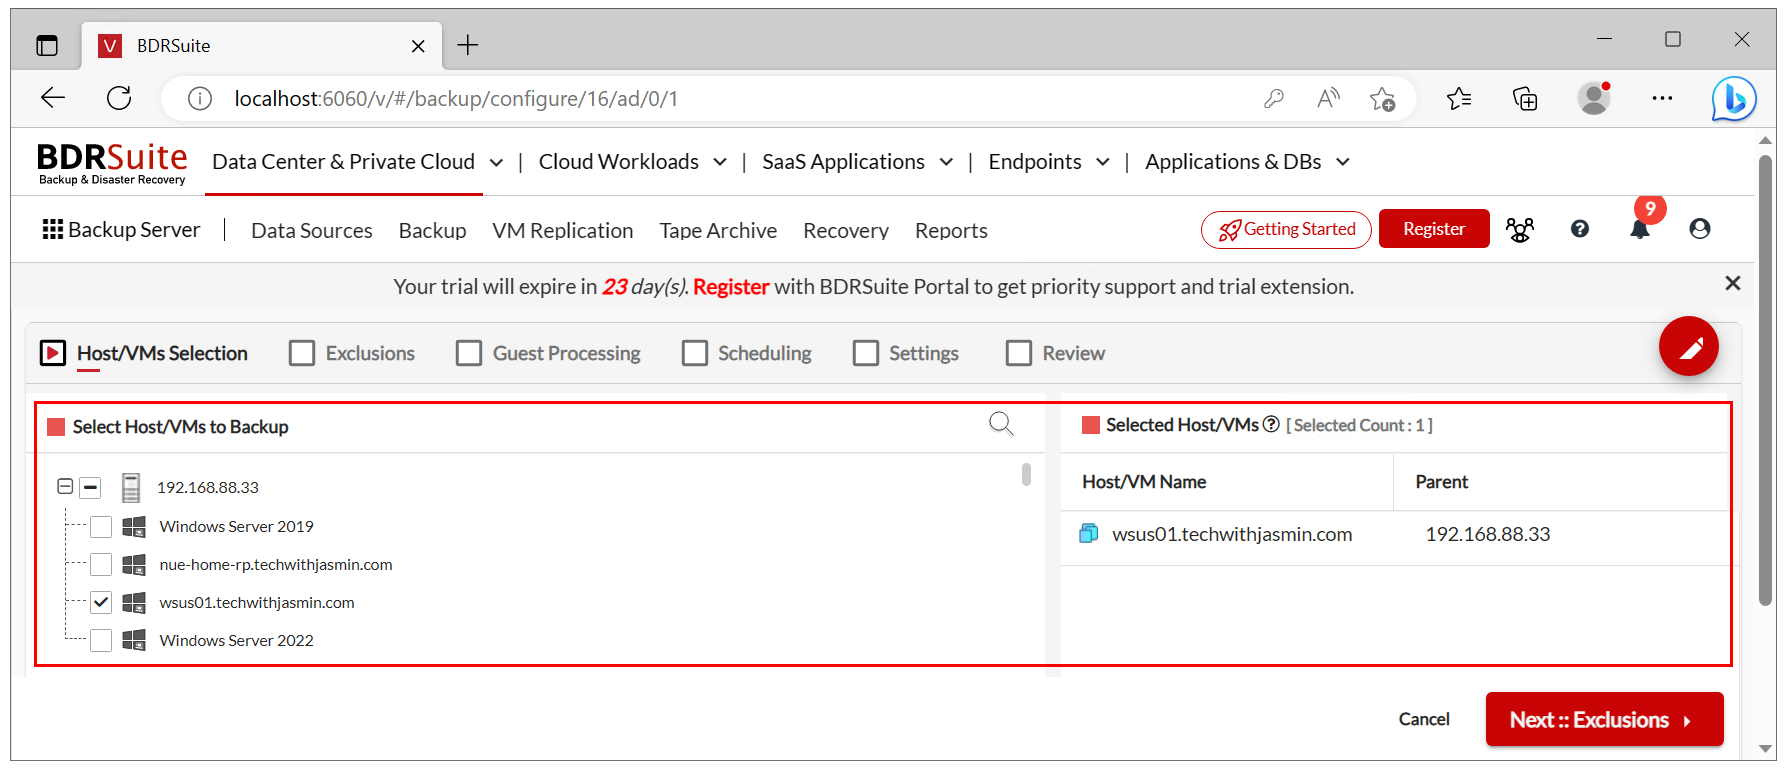
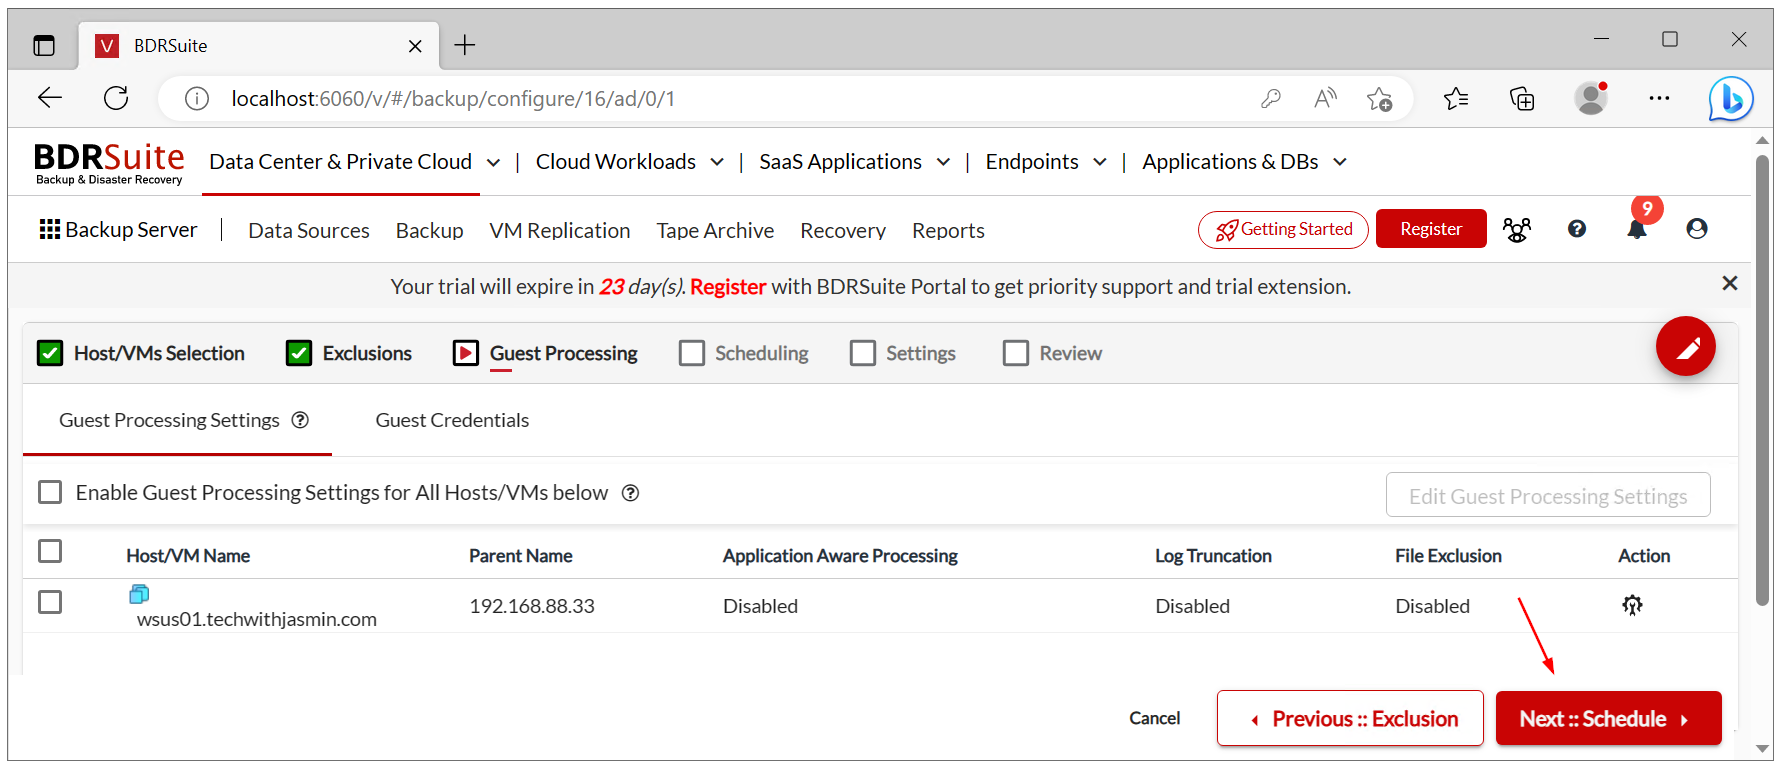
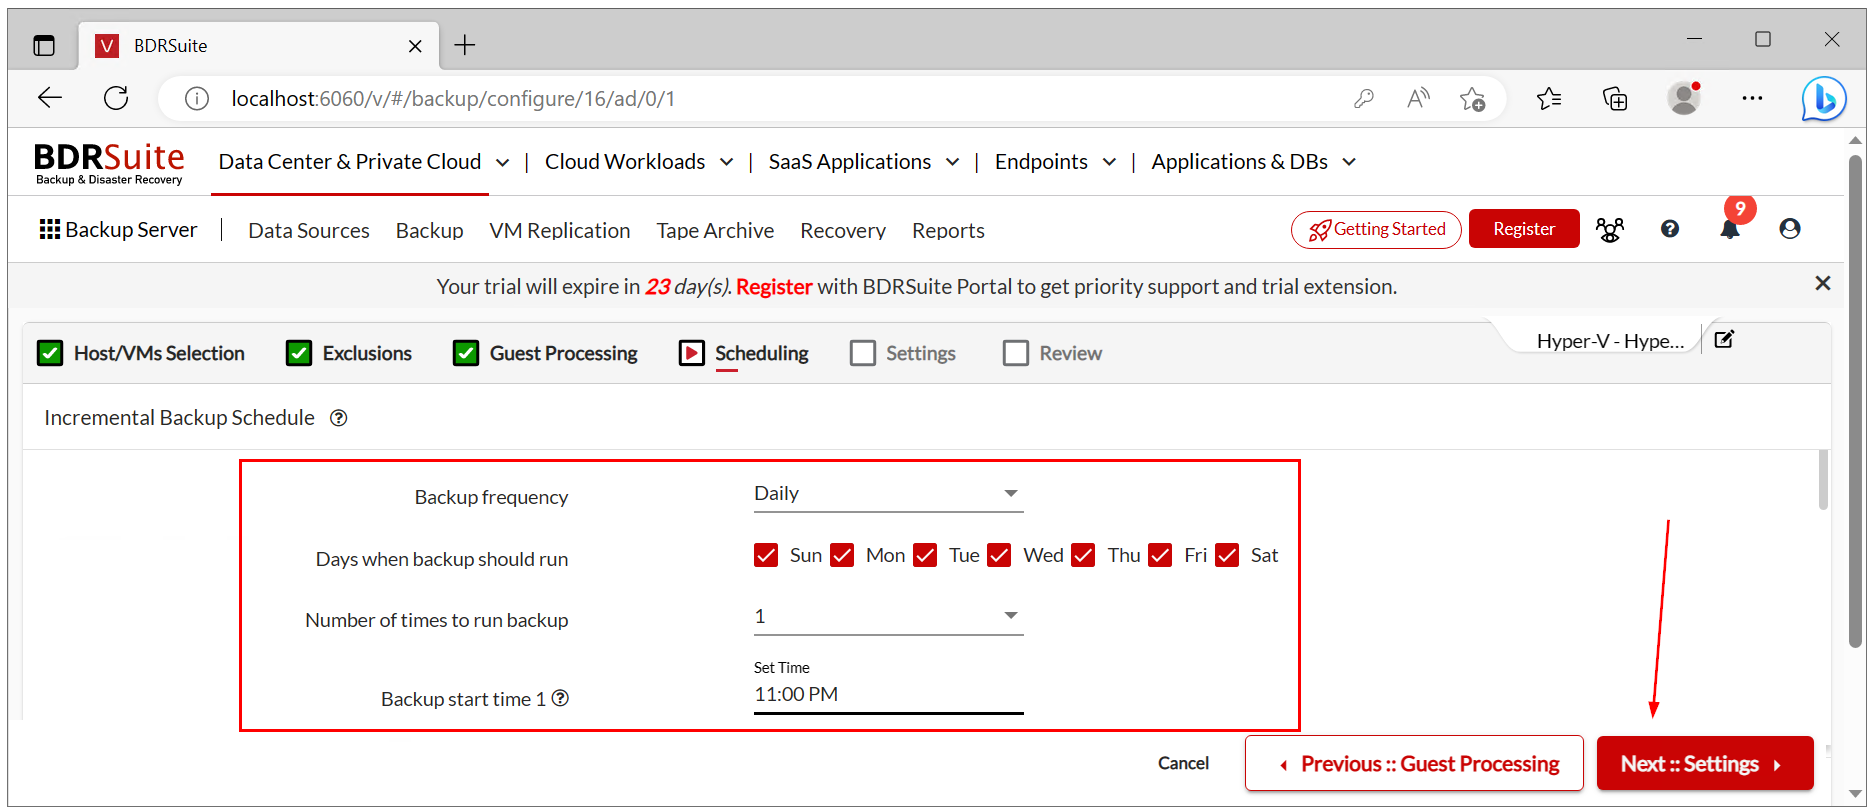
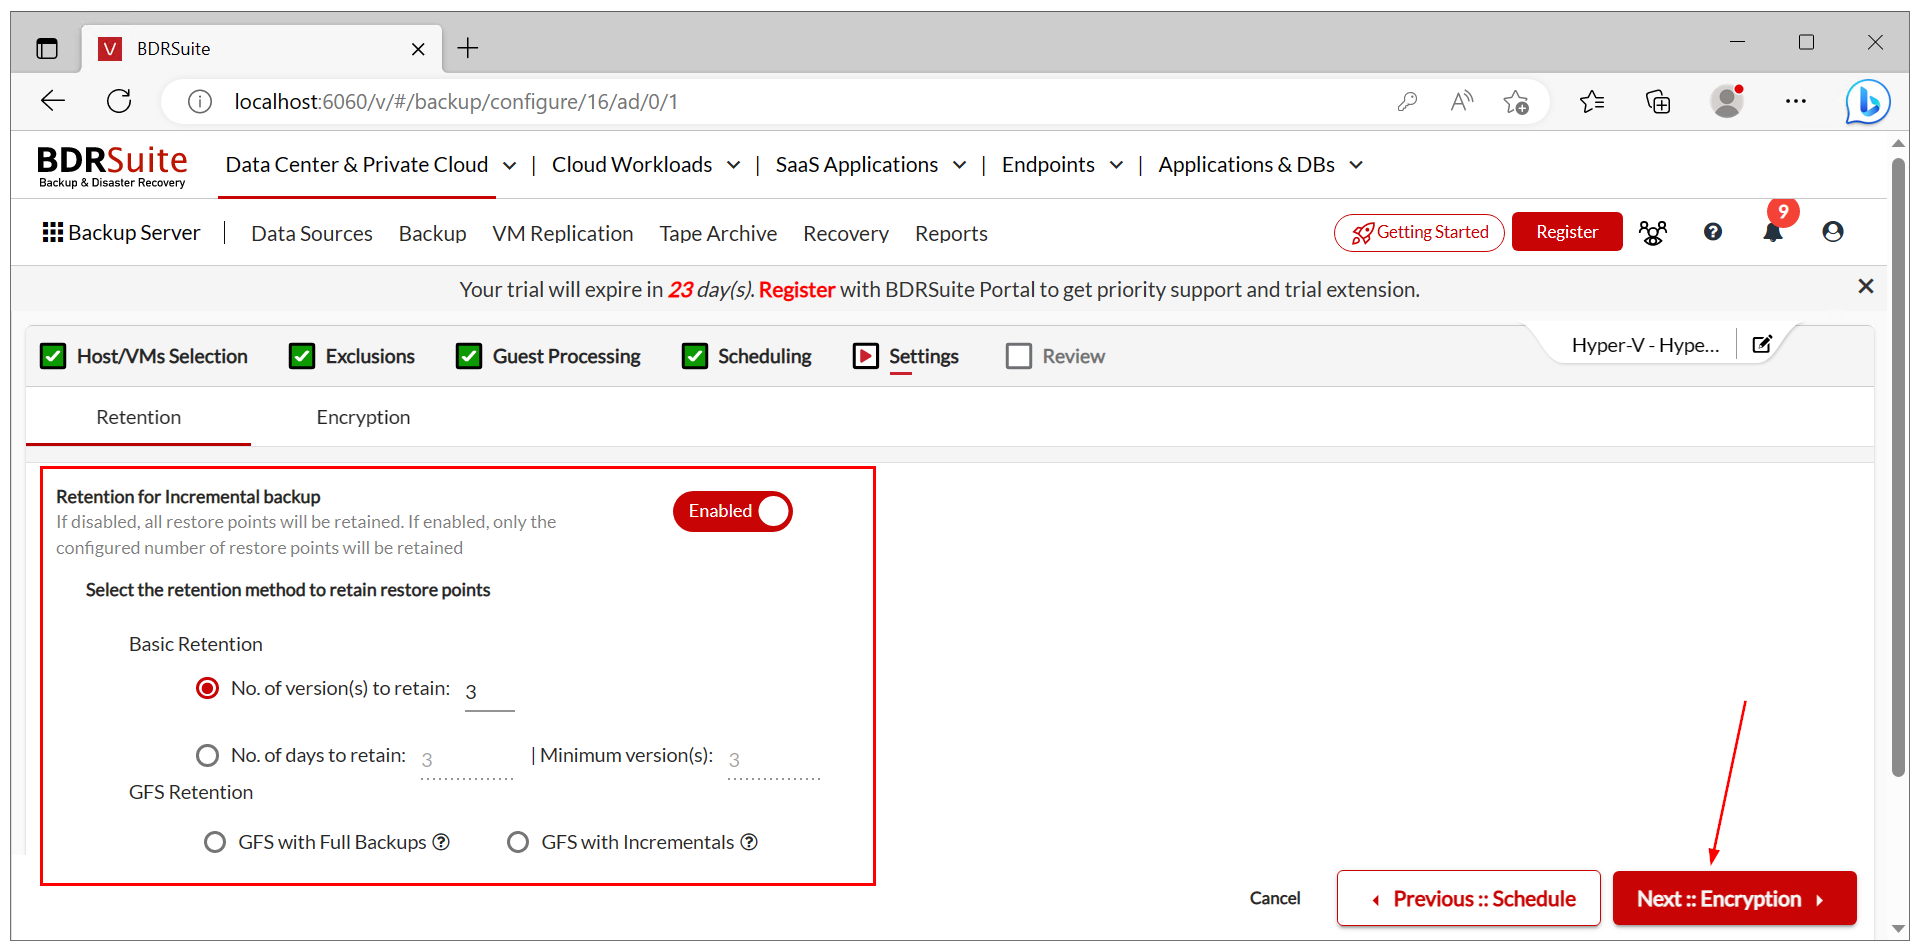
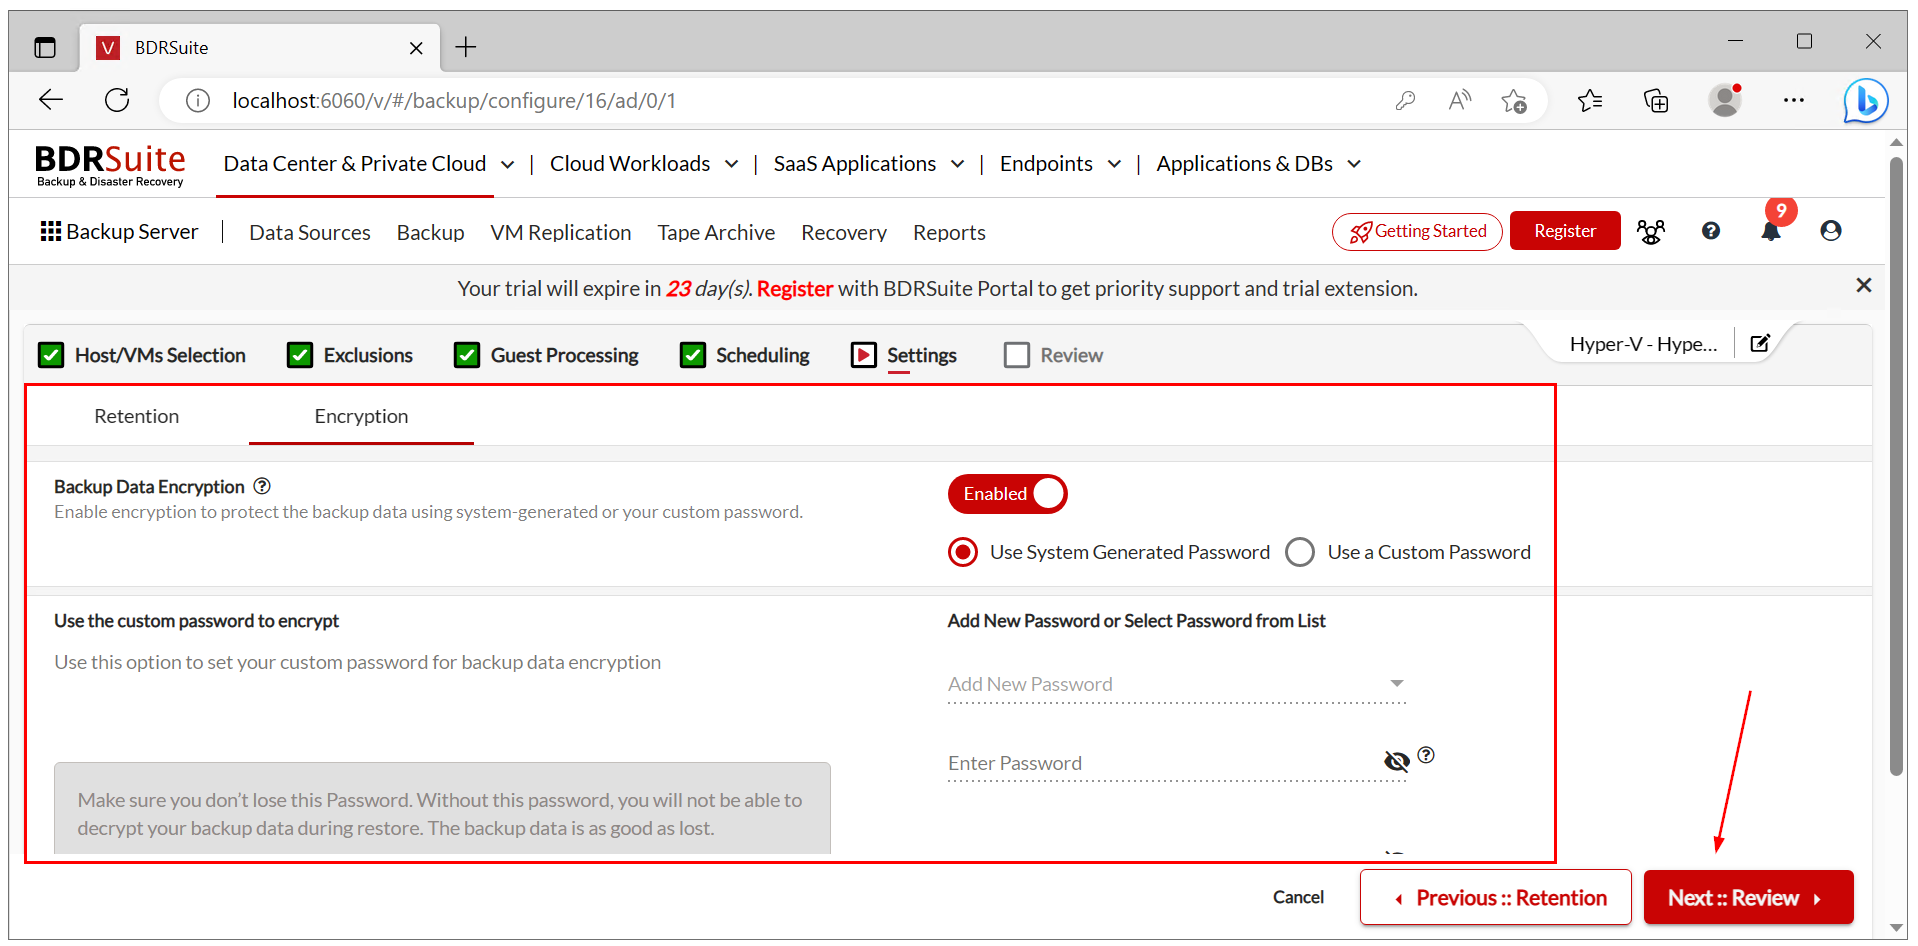
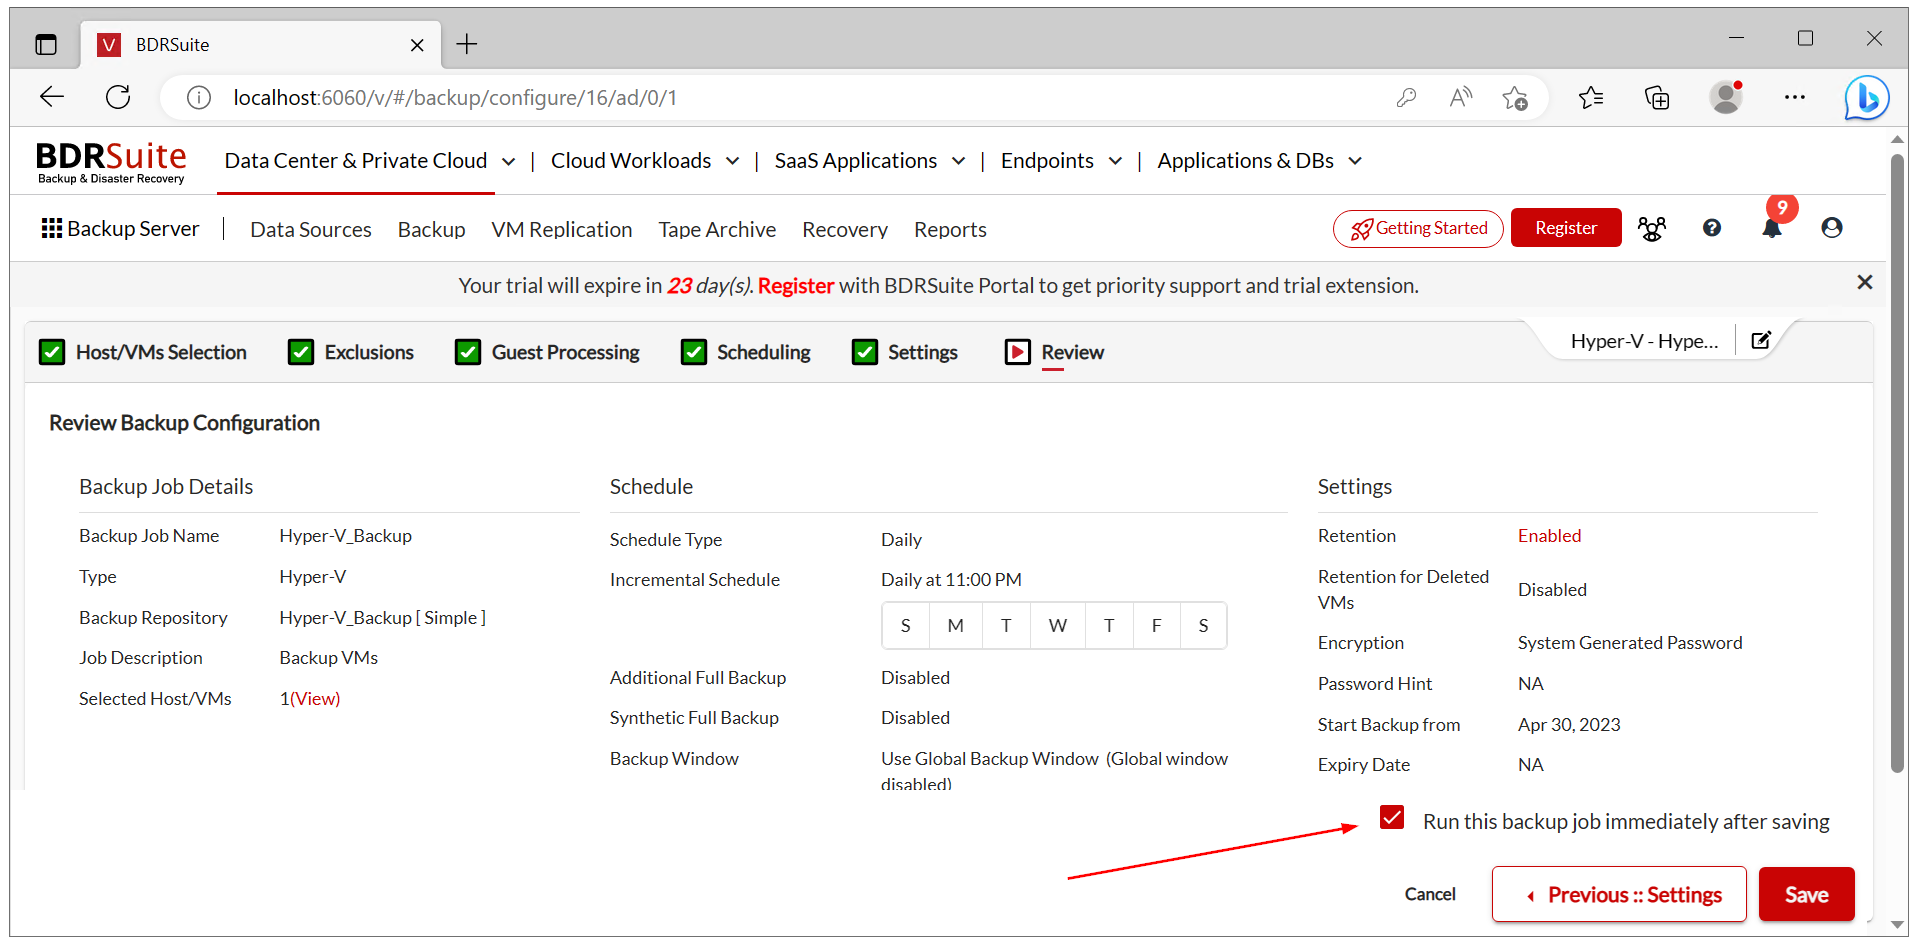
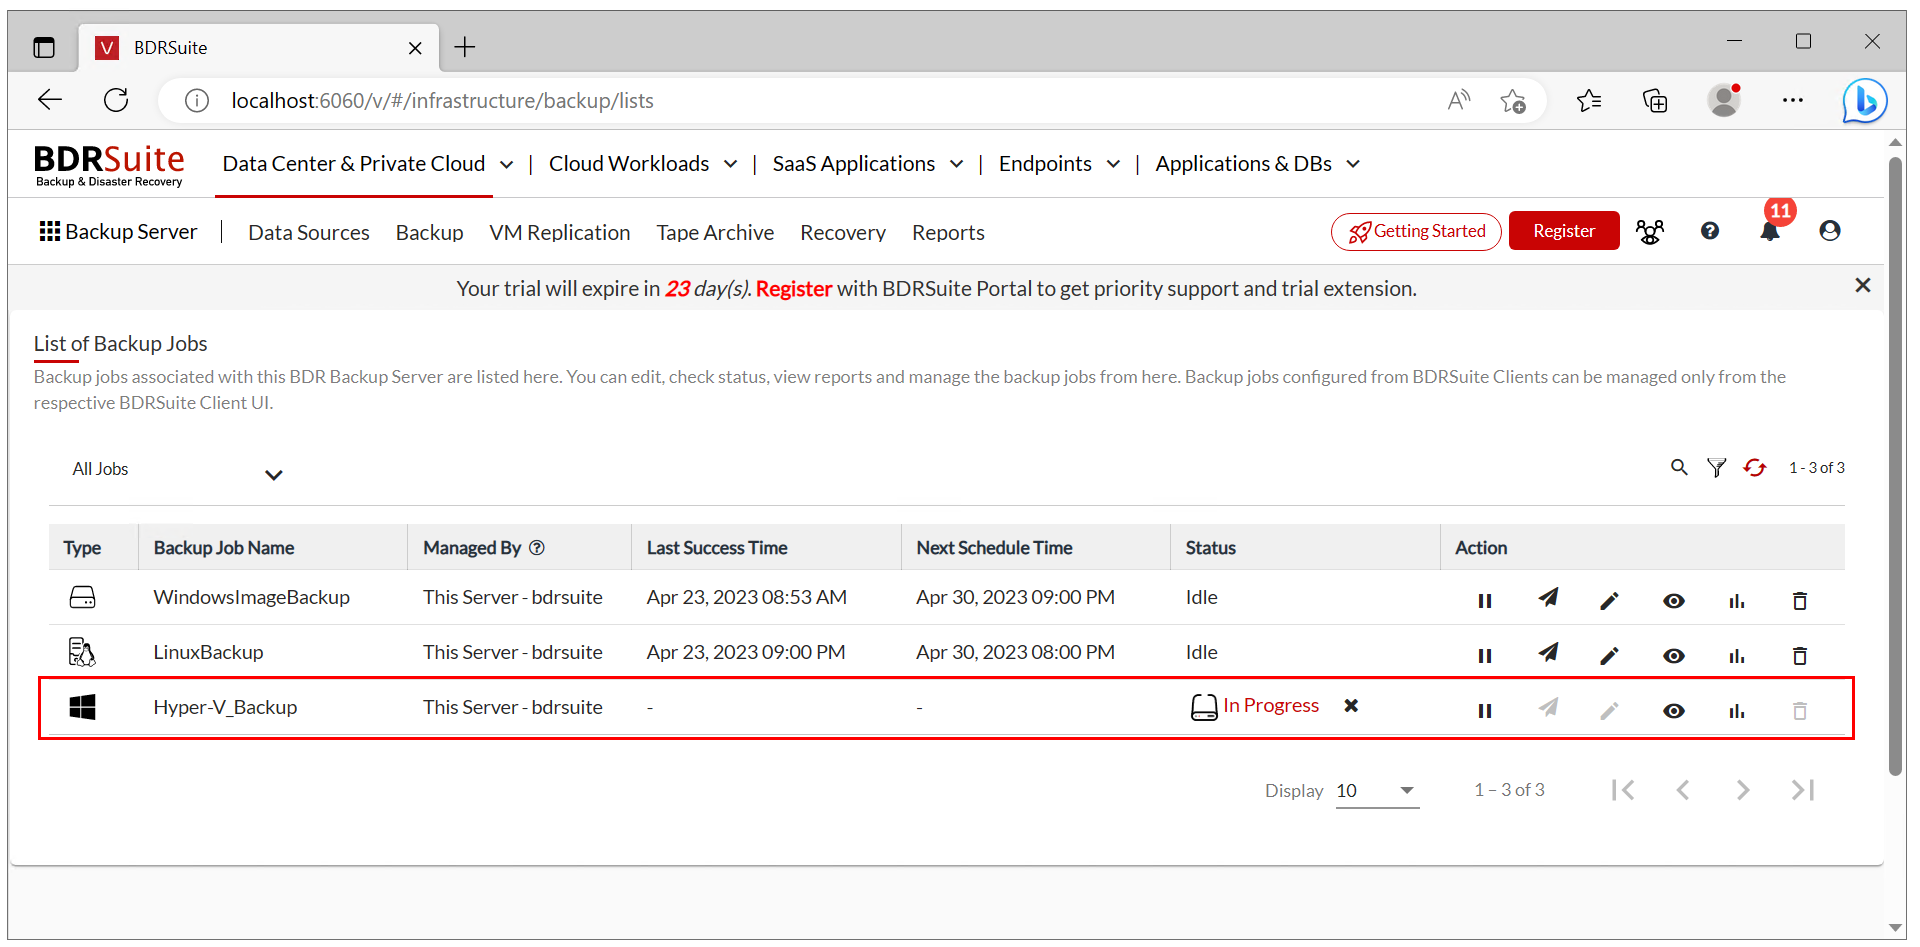
          4. Step 3: Configure backups

            The third step in using BDRSuite to backup your Hyper-V virtual machines is to configure the backup job and add the virtual machines that you want to backup.

            1. Navigate to Backup.
            2. Click Configure Backup and then select Microsoft Hyper-V.
            1. Enter the backup name, choose backup repository you created in the first step, add job description (optional) and then click Next::Select Host/VMs to backup.
              1. Expand the host and select VMs you want to back up and then proceed with Next::Exclusions. In my case, I selected VM wsus01.techwithjasmin.com.
                1. Under Disk Exclusion, click Next::Guest Processing.
                  1. Under Guest Processing Settings, click Next::Schedule.
                    1. Under Scheduling, configure how often you want to backup your VM. In my case it is being back up on daily basis at 11 PM. Once done, click Next::Settings.
                      1. Under Retention, enable Retention and click Next::Encryption.
                        1. Under Encryption, enable encryption and then click Next::Review.
                          1. Select Run this backup job immediately after saving and click Save.
                            1. Confirm by clicking Save.
                            2. Wait until backup is finished.
                              1. Open File Explorer and navigate to the location where backup files are saved.
                              2. If you found this article helpful, please consider sharing it with your friends and followers on social media.

                                Leave a Reply

                                Your email address will not be published. Required fields are marked *

                                Share via
                                Copy link