
Altaro VM Backup offers different backup and restore options. One of the options that recently helped me to restore missing files from failed VM is Restore Virtual Disk. This feature allows you to restore single VHD, VHDX, and VMDK files from your backup set.
I recently had a situation where I needed to restore some scripts and .cab files from one of the disk drives on my failed WSUS that was hosted on my Hyper-V server.
Thanks to this powerful and easy-to-use feature, I was able to do it in less than 60 seconds.
In this article, I’ll show you step by step how to restore files from VHD file (Hyper-V), but the same procedure applies to VMDK (VMware ESXi).
For writing this article, I run my workloads on powerful mini PC - Intel NUC powered with the CPU i7 the latest generation, 64 GB RAM DDR4, 256 M.2 SSD. Intel® NUC Mini PCs are fully complete and ready to work out of the box. You can learn more here Intel® NUC Products.If the VM has a snapshot, it will be merged in order to give you a single VHD(X) file. Please note only backups taken with 7.5.6 and onwards can use the Virtual Disk Restore functionality.
How to do it?
- Connect to your Altaro VM Backup server.
- Click on Restore > Restore Virtual Disk.
- Choose a resource source and click Next. In my case it’s Hyper-V-Backup

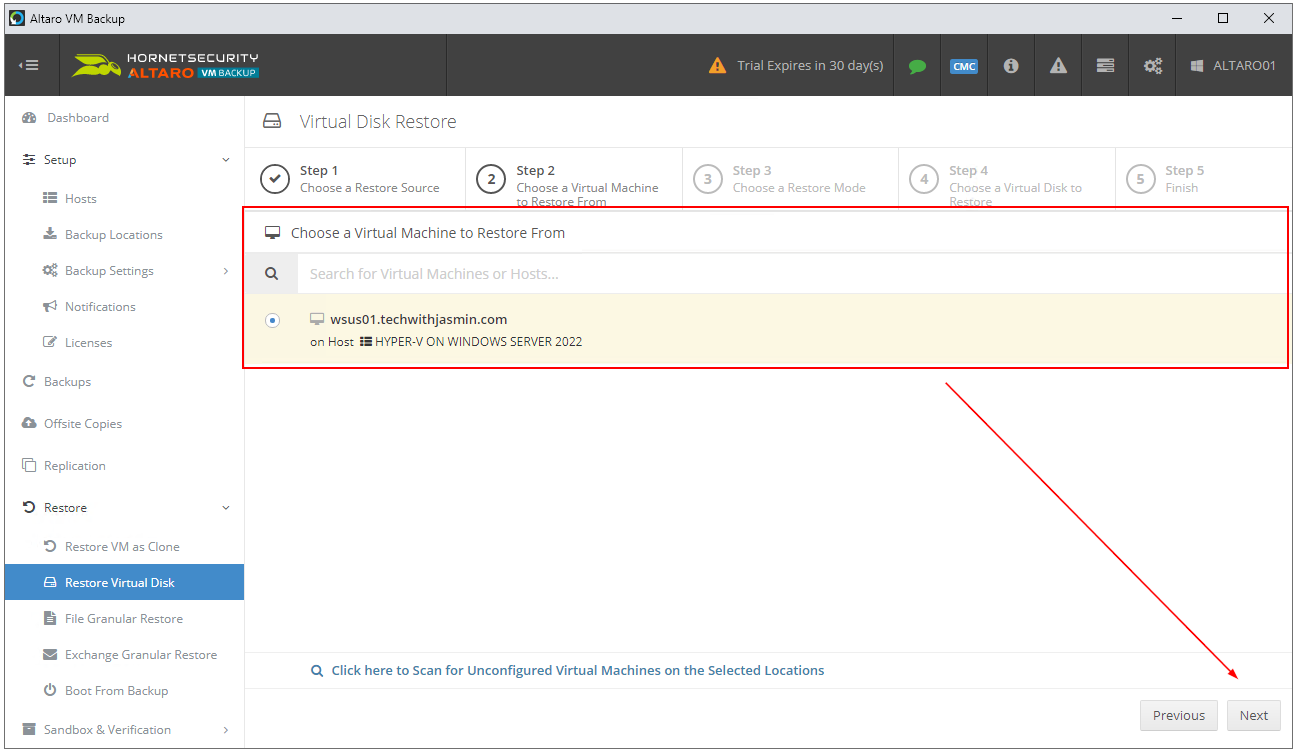
- Choose a virtual machine to restore from and click Next. In my case, I’ll restore VM that is hosting the WSUS server. I want to get access to some scripts and WSUS content there.
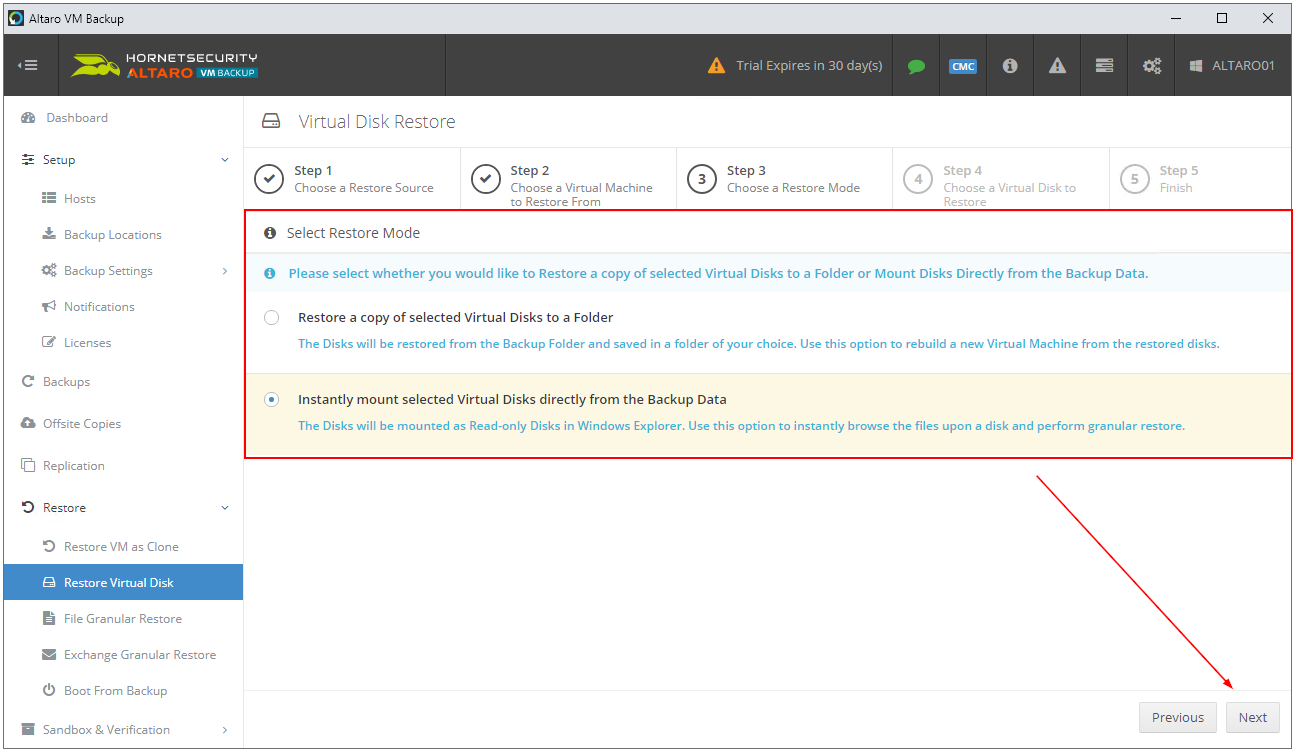
- Select Restore mode and click Next. You can choose between restoring a copy of the virtual disk to a folder of your choice or only mounting the disk to Windows Explorer to copy the data you need.
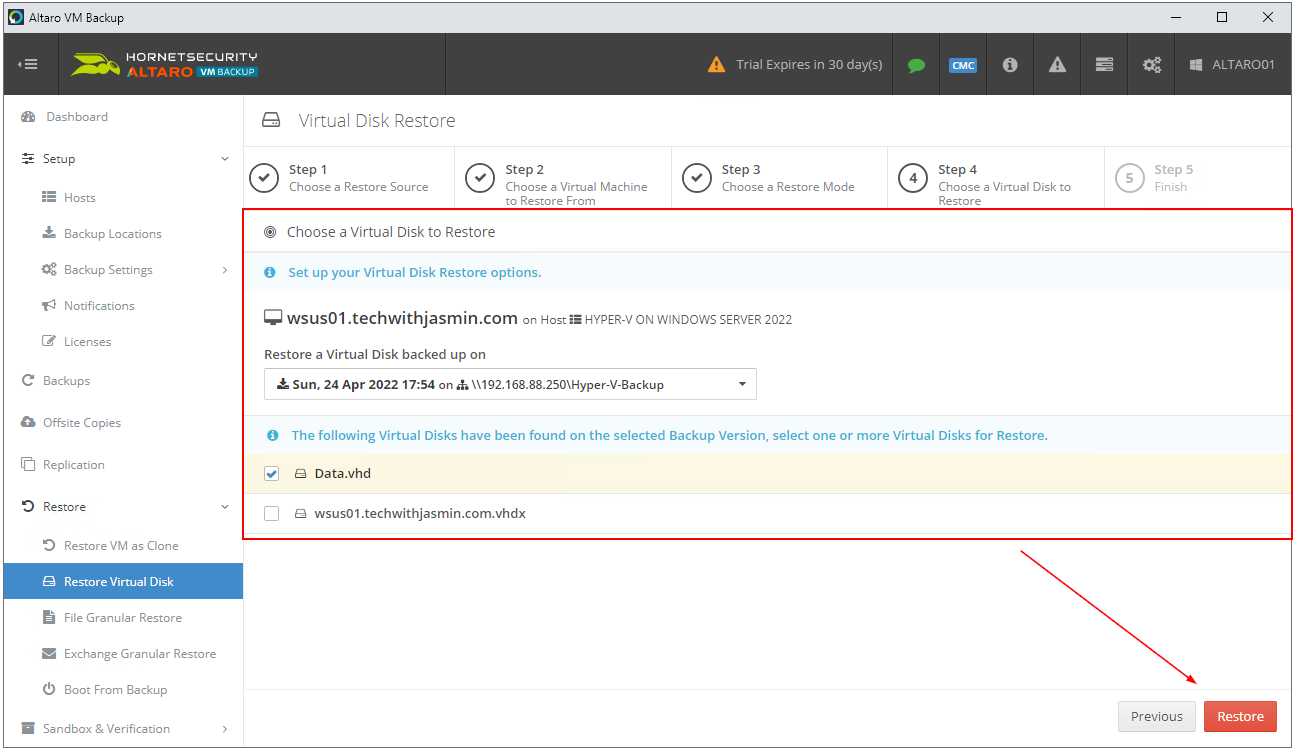
- Choose a virtual disk to restore and click Restore. Altaro VM Backup will automatically detect what virtual disks are attached to the virtual machine. In my case there are two VMs, one is Data.vhd which I want to mount and another one is wsus01.techwithjasmin.com.vhdx which is the WSUS role.
- Congratulations you have done it.
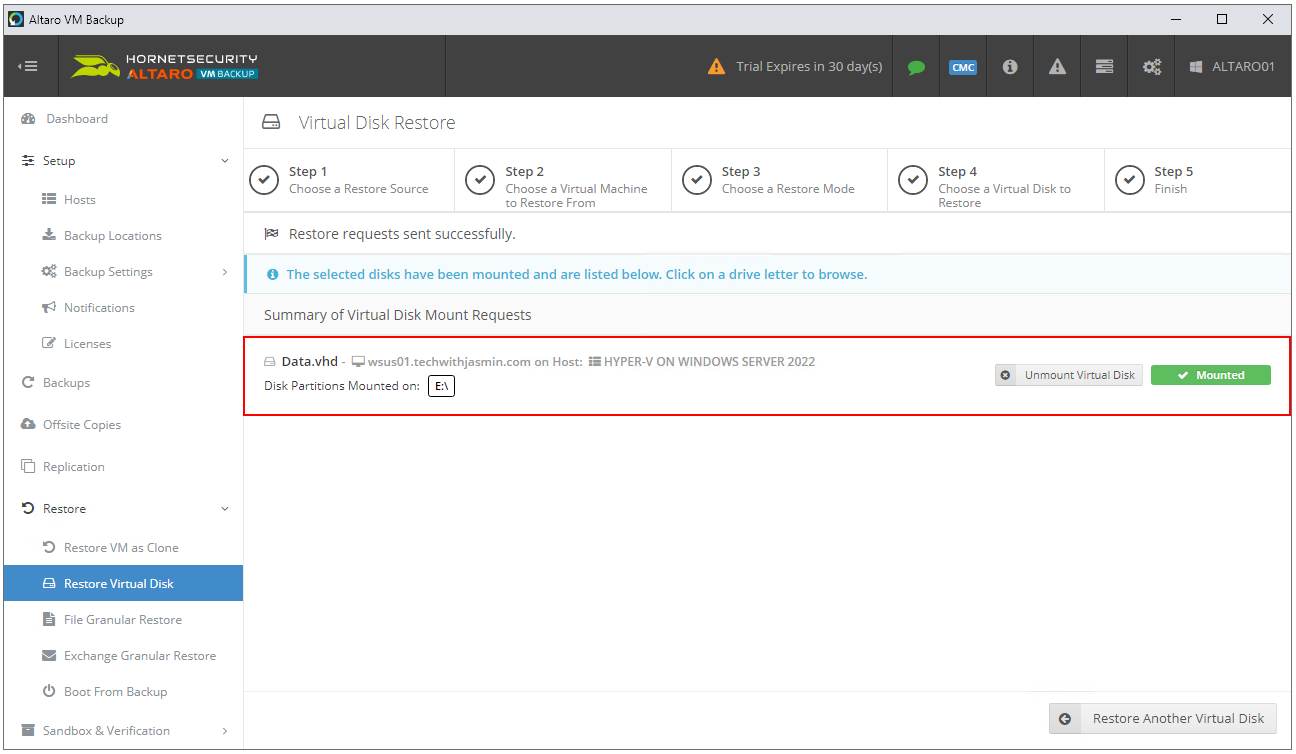
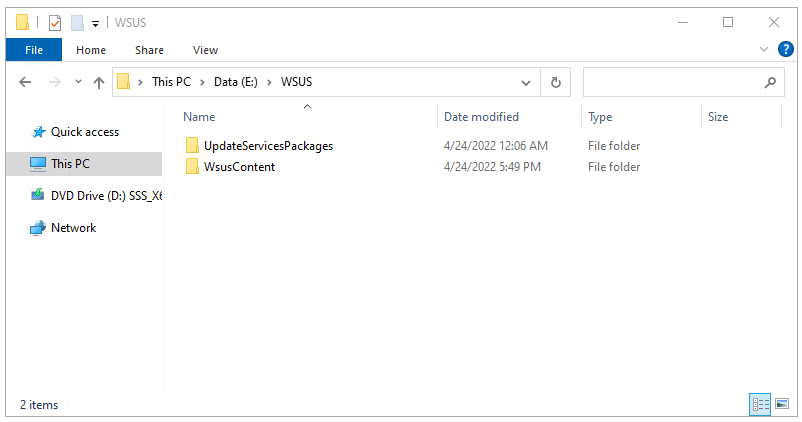
If you click on partition letter, you will have access to mounted drive and your data.
Did you see how it is easy to restore a virtual disk from a failed virtual machine? Installation, initial configuration, and usage of Altaro VM Backup are straightforward.
You can download the FREE version of Altaro VM Backup and back up unlimited VMs for 30 days. After 30 days, you can use Altaro VM Backup on 2 VMs for free, forever.
I hope you enjoyed this article. If you do, please feel free to share it with your network.