
When you try to install Windows Server, you will be provided with two options, Windows Server Standard and Data Center (Desktop Experience) and Windows Server Standard and Datacenter Server-Core. The desktop experience is GUI-based and something that most of us are already used to. The Server Core is a minimal installation that includes most but not all server roles. It has a smaller disk footprint and reduces attach surface due to a smaller code-base. When you deploy it, you will be provided with the command line-based UI from which you configure it and access PowerShell for additional configuration.

The procedure of installing and configuring the SNMP service is a bit different due to the command-line interface, but the good thing, the SNMP is still supported in Windows Server 2022. For demonstration purposes, I´ll use Windows Server 2022 Server Core, but the procedure is equally applicable to previous Windows Server versions.
If you are using Windows Server that is Full GUI-based, please check the article Can you still monitor your Windows Server 2022 with SNMP.
Step 1: Install SNMP Service
PowerShell is your friend, here. Due to the fact, there is no GUI, you need to execute a few commands to install SNMP service in Windows Server Core.
If you are unsure if SNMP is already installed on your Windows Server Core, you can run the following command to verify it. The “Available” means that service is available, and “Installed” that is installed.
Get-WindowsFeature SNMP*
Run the following command to install SNMP Service and press Enter.
Install-WindowsFeature SNMP-Service
You can verify the status of the SNMP service by typing the following command. As you can see SNMP Service is successfully installed.
Get-WindowsFeature SNMP*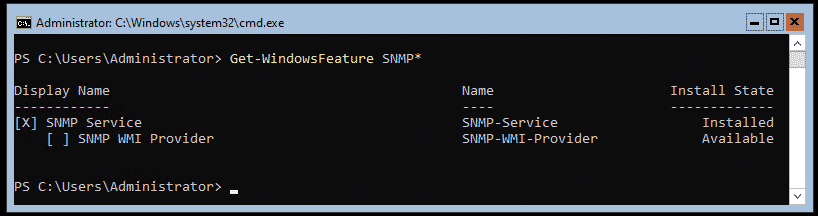
If you also want to install SNMP WMI Provider, type the following command and press Enter.
Install-WindowsFeature SNMP-Service -IncludeAllSubFeature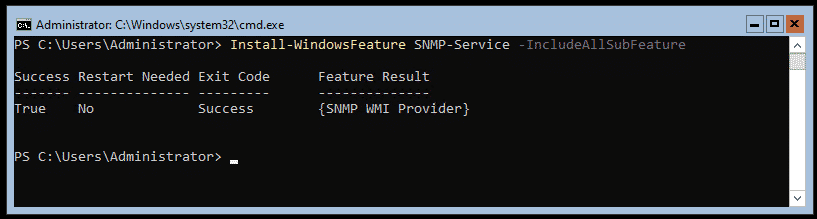
You have successfully installed SNMP Service. Now it is time for the configuration part.
Step 2: Configure SNMP Service
There are no PowerShell cmdlets for SNMP administration, hence you need to do create and edit a few registry keys. The registry key for configuring SNMP is located at
HKEY_LOCAL_MACHINE\SYSTEM\CurrentControlSet\Services\SNMP\ParametersHowever, we can make it easier. Instead of playing with PowerShell and registry keys, you can remotely access SNMP service from Server Manager or MMC (Microsoft Management Console). Connect to one of the Windows Servers that is GUI-based, MMC, and follow the procedure below. If you want to do it using Server Manager, you need to navigate to Server Manager > Tools > Services > Actions > Connect to another computer and continue from step 4.
- Search for mmc and run it.
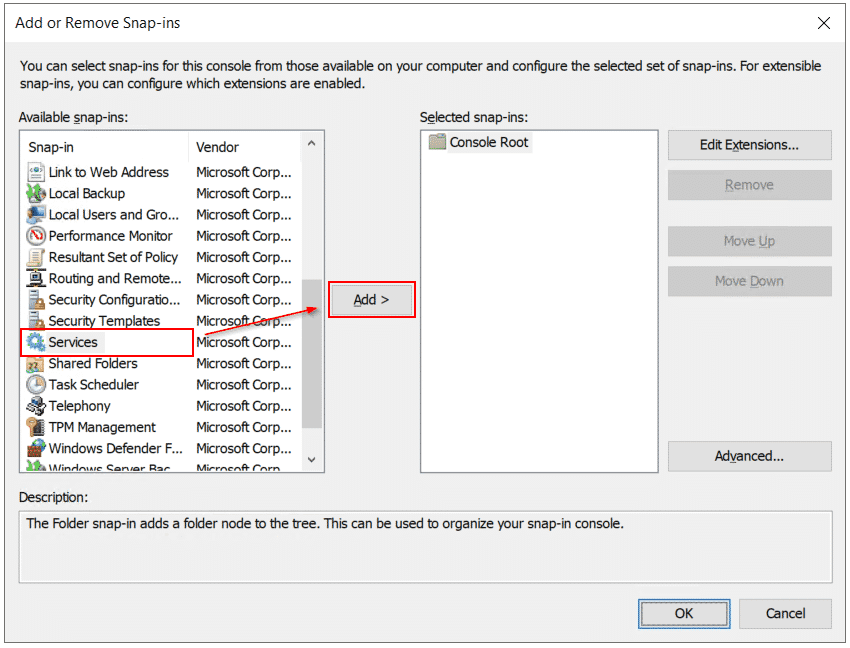
- Click on File > Add/Remove Snap-in…
- Select Service and then click on Add >
- Select Another computer and type DNS or IP address of Windows Server Core adn then click Finish. You can also click on Browse and select the machine from your domain.

- Click OK to confirm adding remote service to MMC console.
- Expand Services and navigate to SNMP Service and then Right click > Properties.
- Click on the Security tab to configure community string and ACL.
- Click on Add… under Community to create a community string. In my case, the community string is called prtgnetworkmonitor
- Select Accept SNMP packets from these hosts and click Add… to add the IP of your NMS (Network Monitoring Solution). In my case, the IP is 192.168.88.21 which is my PRTG Core Server. This means Windows machine will only accept SNMP communication coming and going to my NMS.
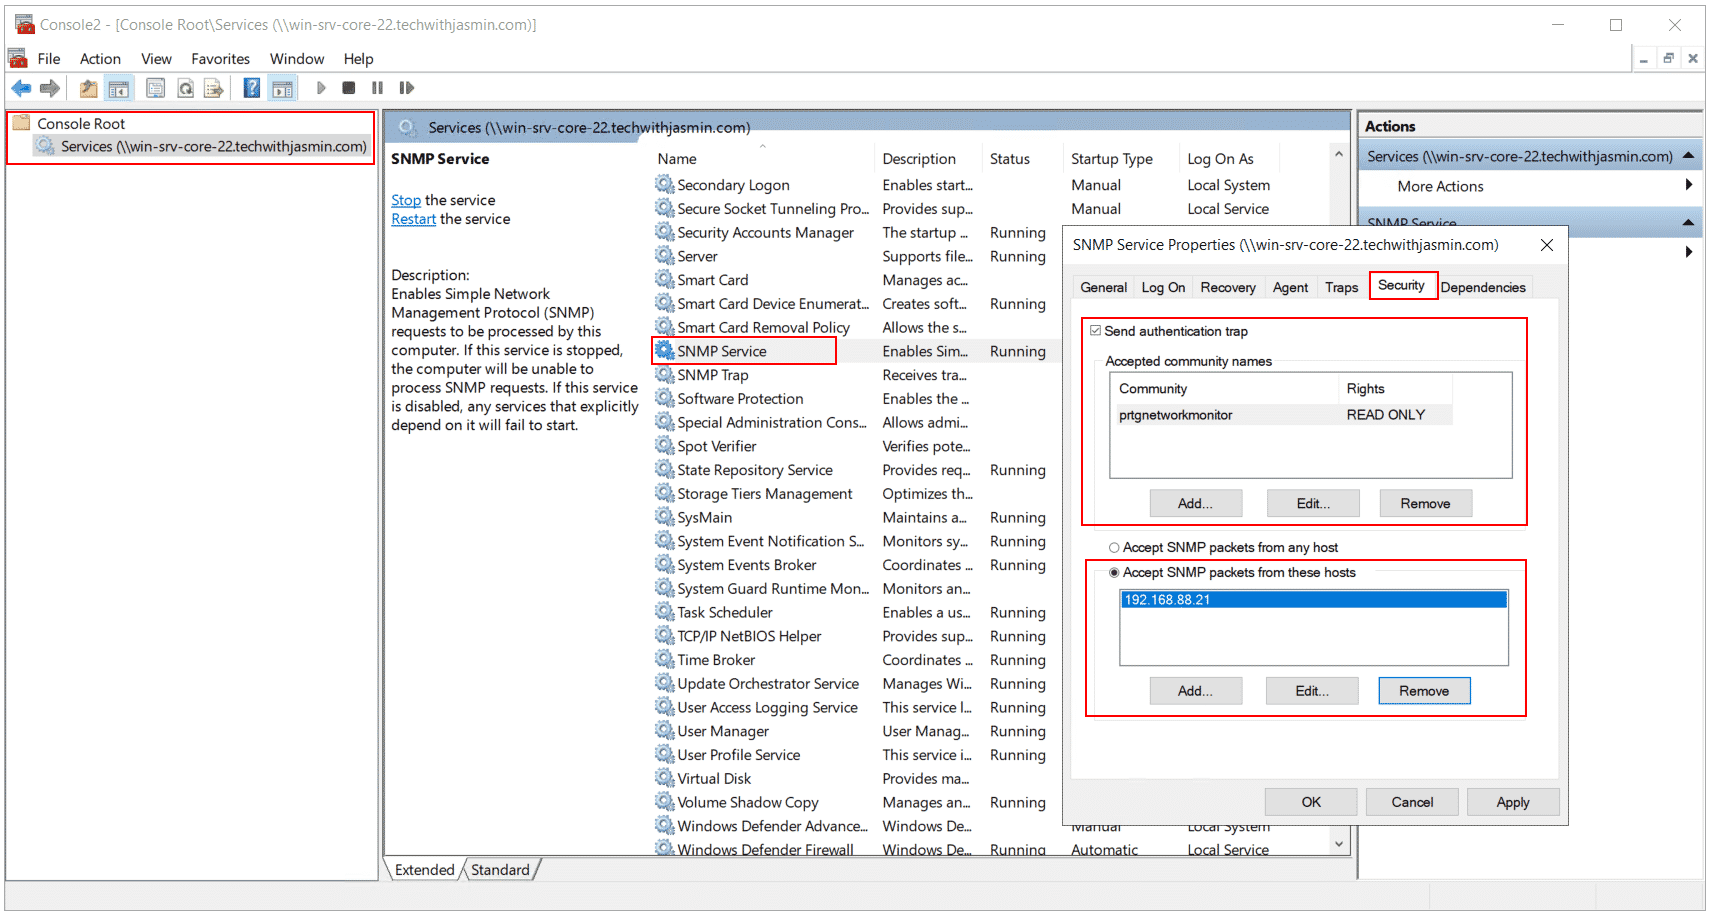
- Click Apply and OK and you are done.
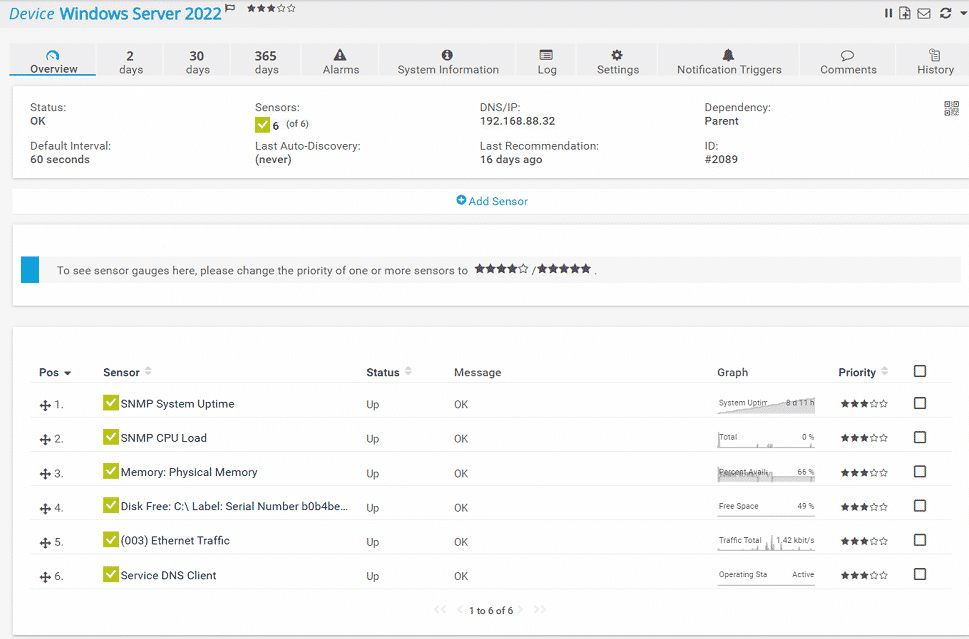
Now you can monitor your Windows Server Core using SNMP, or SNMP Traps (requires additional configuration). In my case below, I am monitoring several metrics (uptime, CPU load, RAM, HDD usage, network traffic, and DNS service) by using PRTG and SNMP.
I hope you enjoyed this article as I did. If you think this might interesting to your friends and network, please share it using the social media button below. Thank you.


Mark D Gilbert
March 17, 2022 at 07:30
It would still be helpful to have powershell commands in order to automate this on fleets of servers . ..
Jasmin Kahriman
March 20, 2022 at 20:54
Thank you for your comment, Mark. I agree. There are a few PowerShell scripts out there that can be used to automate installation.
For sake of sharing; In case SNMP is installed, and you want to change configuration on all machines, you can do it easily using GPO: https://techwithjasmin.com/monitoring/automate-snmp-configuration-in-windows-domain-network.
Max
August 14, 2023 at 20:15
I agree with the other guy.. It’d be nice to know how to configure the SNMP parameters outside of PS, GPO or using . Not sure why you mention the registry key path but then claim managing that service from another windows server is easier.