
In my previous article Full control over your VMware and Hyper-V with Altaro VM Backup, I talked about Altaro´s architecture and features that can help you to protect your Hyper-V and VMware workloads. In this article, I´ll show you how to backup your Hyper-V virtual machines to an onsite and offsite location. The onsite location is local network storage such as Synology NAS, and the offsite location is Azure Cloud Storage.
Altaro VM Backup supports Hyper-V Server from version 2008 R2 SP1 to 2019 including Windows Server and Hyper-V Server Core. I tried to use it with Hyper-V 2022 which is at this moment in the preview version, but it still doesn’t work.
Altaro VM Backup provides Augmented Inline Deduplication which dramatically reduces storage requirements for your backup repository by creating the smallest backup size. And as more VM backups are added, the greater your savings on storage requirements.
altaro
In order to successfully back up virtual machines, there are a few steps; adding host, adding backup locations (Synology and Azure Cloud Storage), and taking backup. The procedure is straightforward and it doesn’t take much time. So, open your Altaro VM Backup Console and follow me through this article.
Note: It is required that your Synology and Azure Cloud Storage are ready. Please check this and this link for more information.
Step 1: Add Hyper-V Server
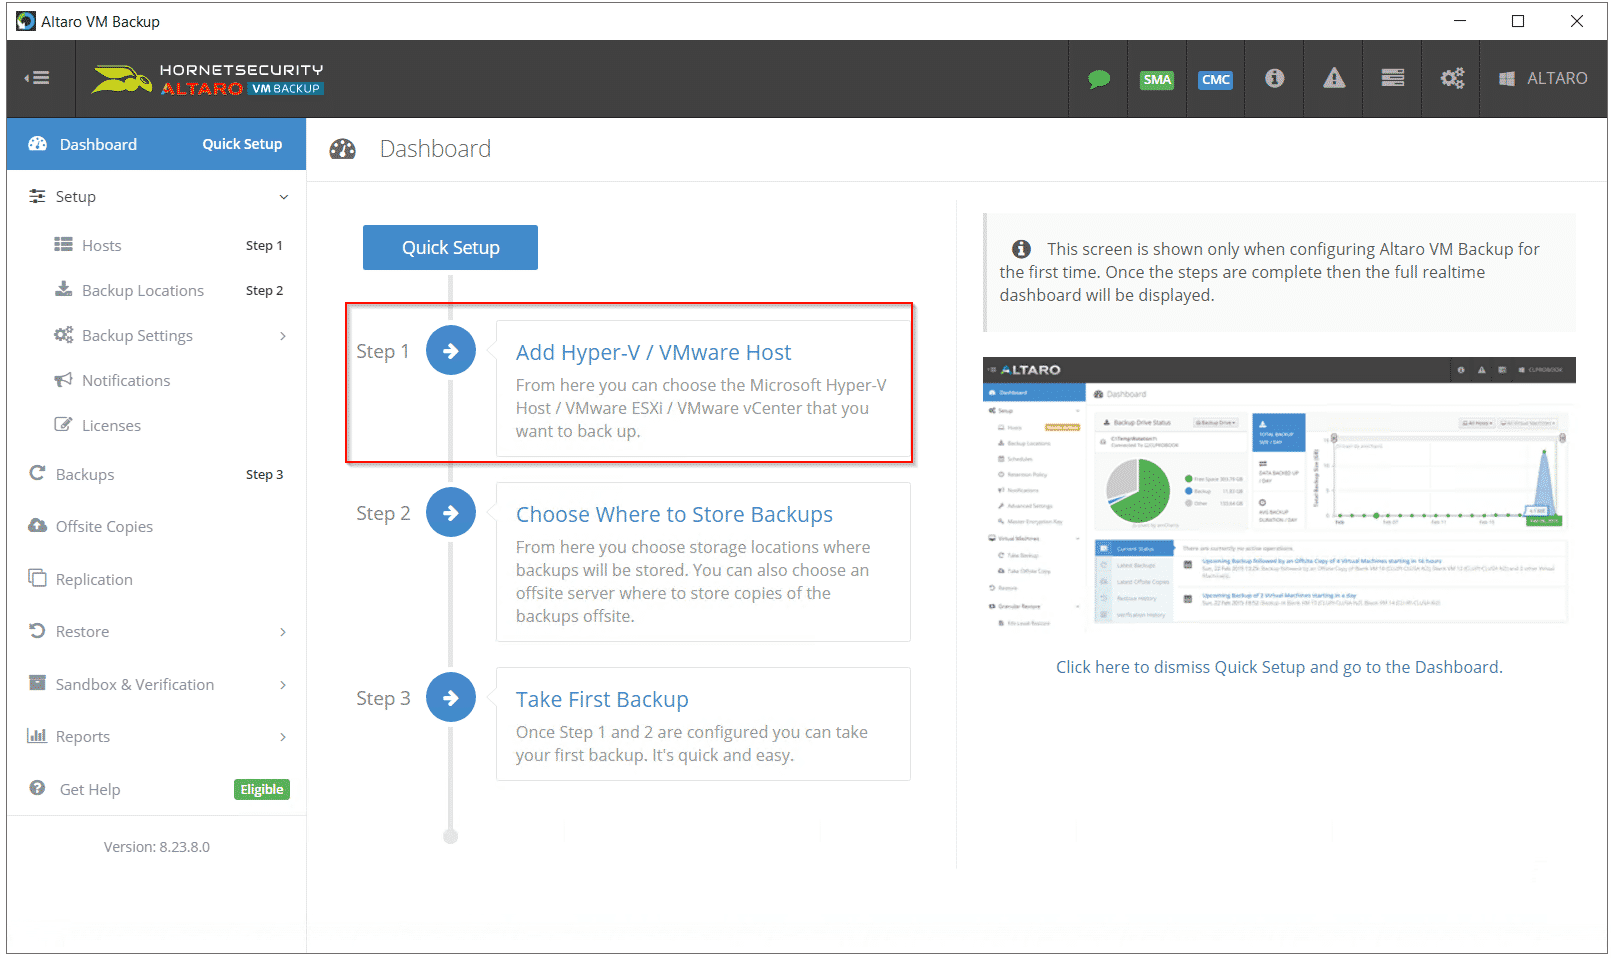
In the first step, you will add Hyper-V Host that you want to back up. In my case, I just installed Altaro VM Backup and the first thing I see is Quick Setup where I have an option to select Add Hyper-V / VMware Host as shown in the screenshot below. You can also add a host by clicking on Setup > Hosts > Add Host.
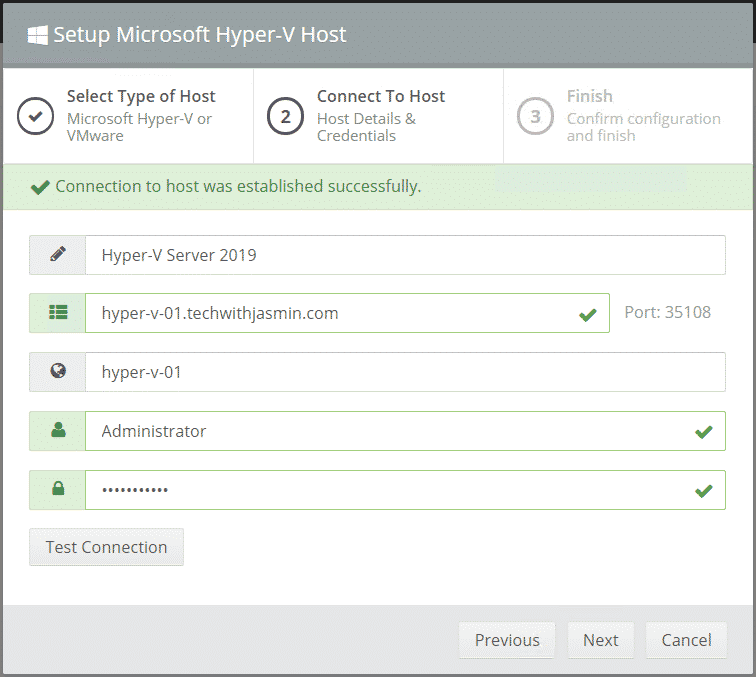
Fill out the form by adding necessary information such as friendly name, Host IP or Name, Domain or Machine Name and credentials, and then click Next. You can verify the connection by clicking on Test Connection.
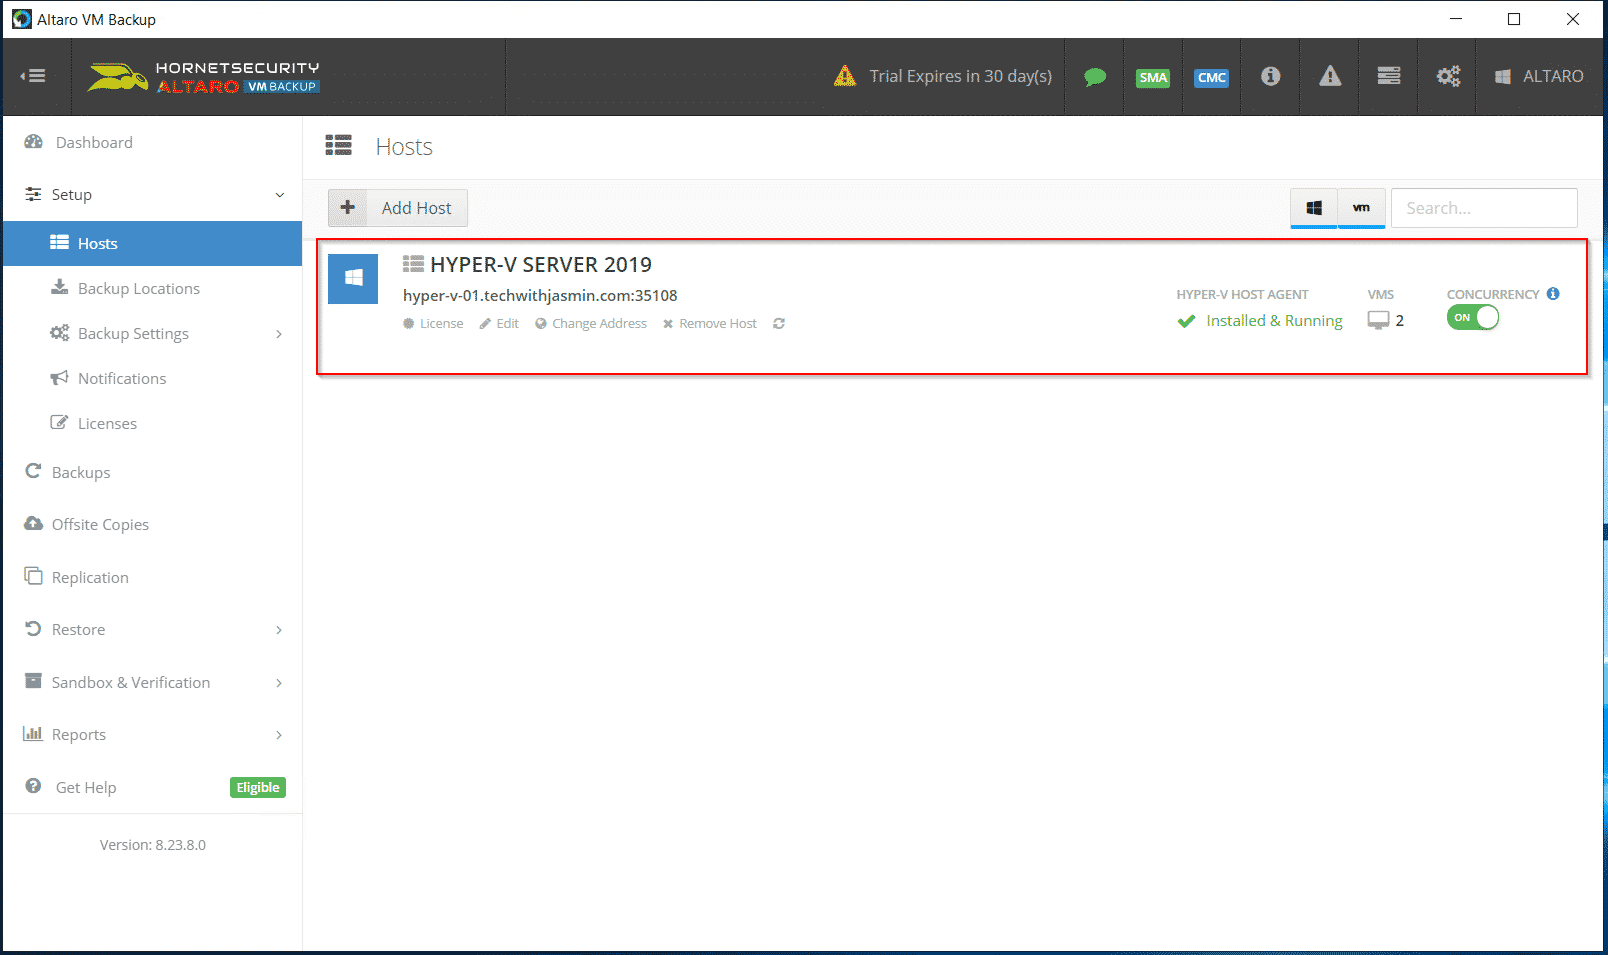
Once the Hyper-V Host Agent has been set up successfully, Altaro VM Backup will discover available VMs on your Hyper-V Server. In my case, there are only two VMs available, as shown in the screenshot below.
Step 2: Add backup locations
In the second step, you will add two backup locations. The primary location is an onsite backup location such as Synology NAS (or any other), and the secondary is the offsite backup location to Azure Cloud Storage. The offsite location is used for disaster recovery purposes. You can also backup your VMs to the following locations: USB External Drives, eSata External Drives, USB Flash Drives, Fileserver Network Shares using UNC Paths, PC Internal Hard Drives (recommended only for evaluation purposes), RDX Cartridges, Altaro Offsite Server (incl. Replication), Amazon S3 and Wasabi Cloud Storage Account.
a) Add Onsite Backup Location
In this part, you’ll add a local share where the backups will be stored. I use Synology NAS, but you can use any other network-attached storage or you even can create a file share on your Windows machine.
- Click on Backup Locations on the last navigation pane and then select Network Path (LAN Only) and then click Next
- Enter the full network share path where the backup will be shared and network credentials. You can verify the connection by clicking on Test Connection.

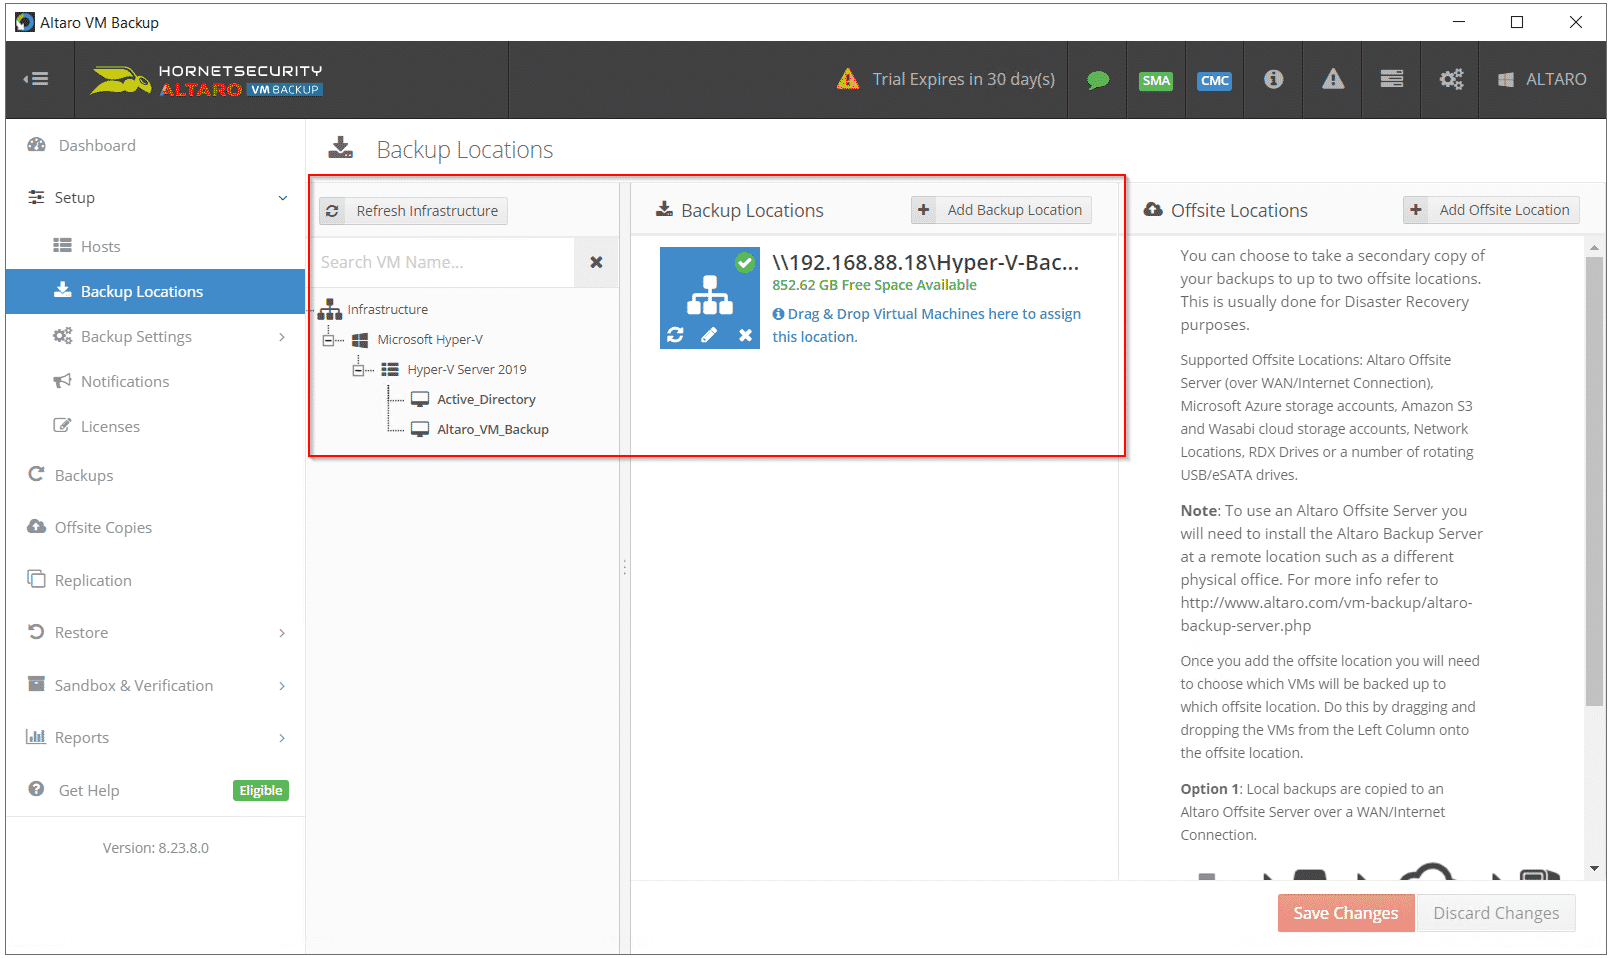
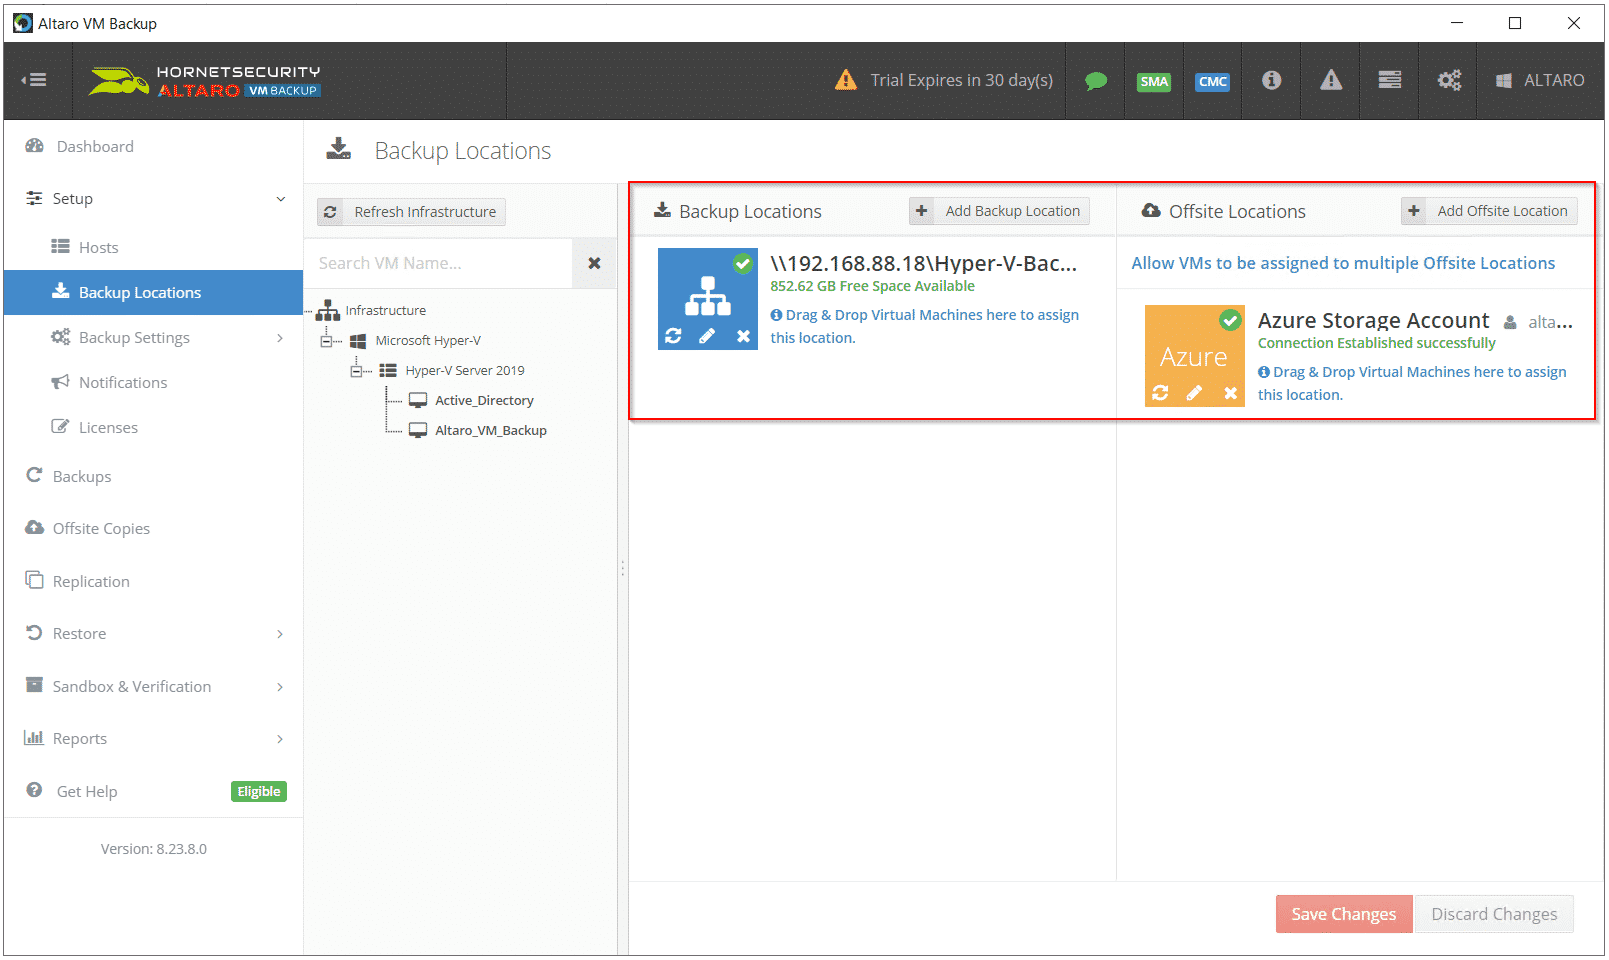
Once you added it, you will see your storage under Backup Locations. As you can see, my onsite backup location is working properly. Before assigning VMs to this backup location, we’ll create Offsite Location in step 2b.
b) Add Offsite Backup Location
You can choose to take a secondary copy of your backups to up to two offsite locations. In this case, we will save offsite backup copies to Azure Cloud Storage.
- Click on Backup Locations on the last navigation pane and then click Add Offsite Location
- Select Cloud Backup to an Azure Storage Account and then click Next
- Enter your General Purpose Azure Storage Account connection string. Both Access Keys and Shared Access Signature (SAS token) are supported as long as you provide a full connection string. Click here to learn how to get a connection string. You can verify the connection by clicking on Test Connection.

Once you added it, you will see your Azure Storage Account under Offsite Locations. In the next step, we will assign virtual machines we want to backup to onsite and offline backup locations.
Step 3: Take a backup
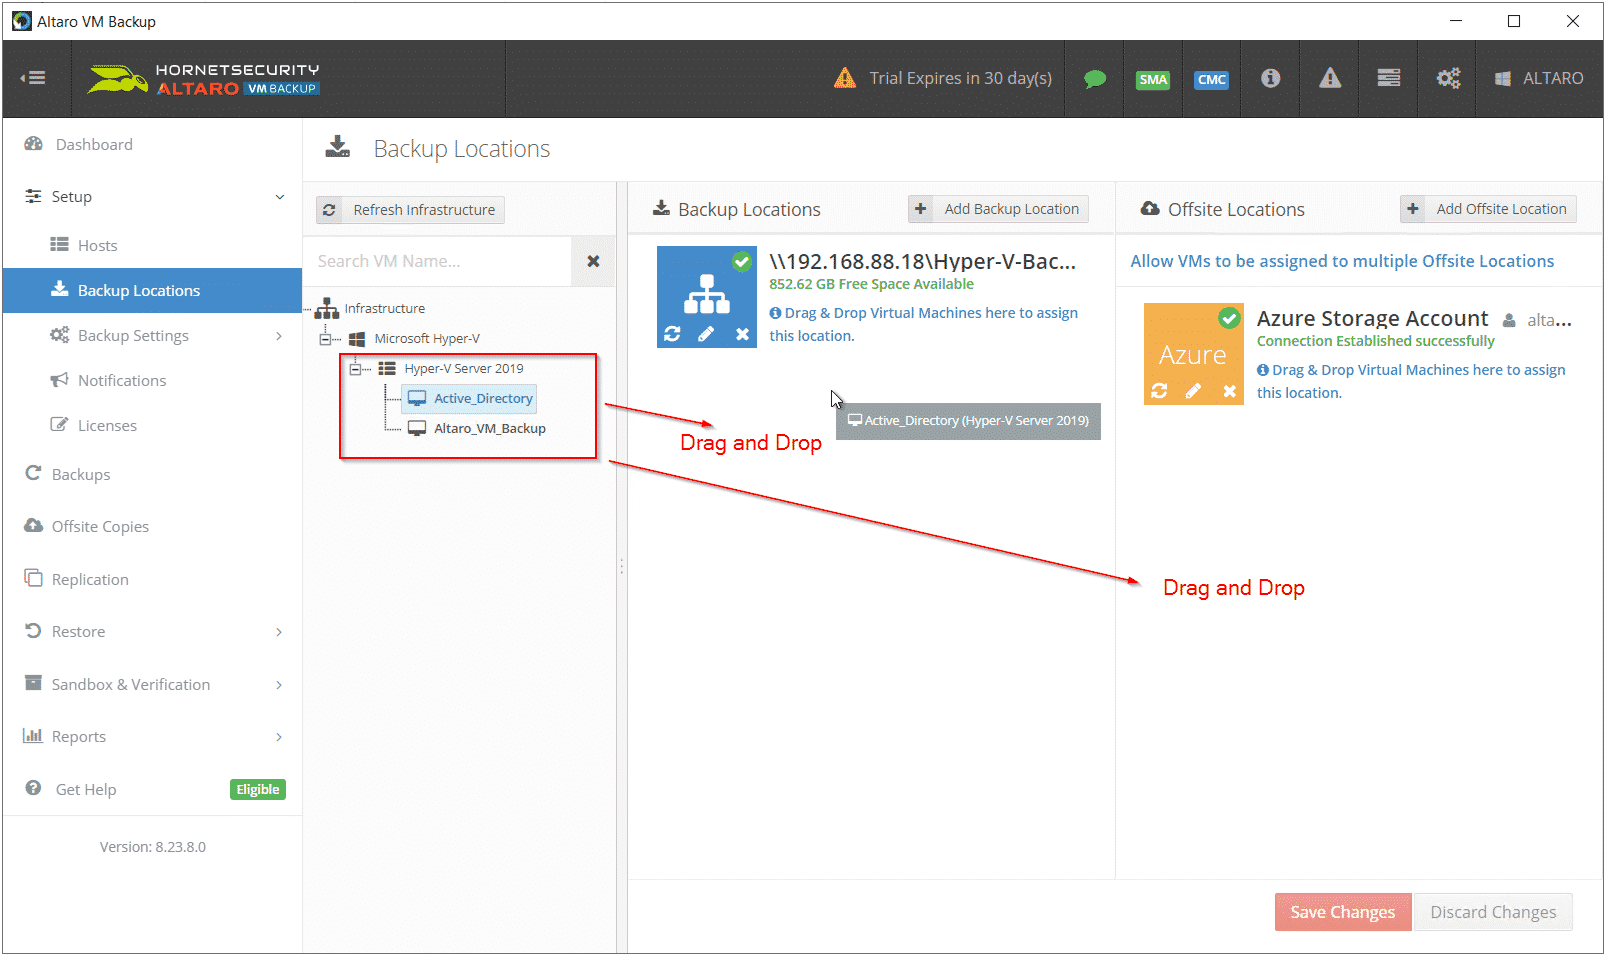
Before you can take a backup of your virtual machines, you will first need to assign them to onsite and offsite backup locations. You can do it by selecting VMs and then doing drag and drop to Backup Location (Synology) and then to Offsite Location (Azure Storage) and then click Save Changes.
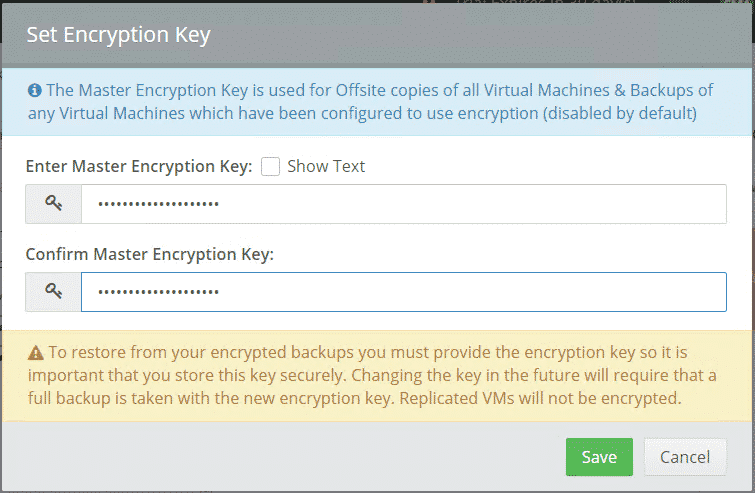
Set encryption key and then click Save. The Master Encryption Key is used for Offsite copies of all Virtual Machines and Backup of Virtual Machines which have been configured to use encryption (disabled by default).
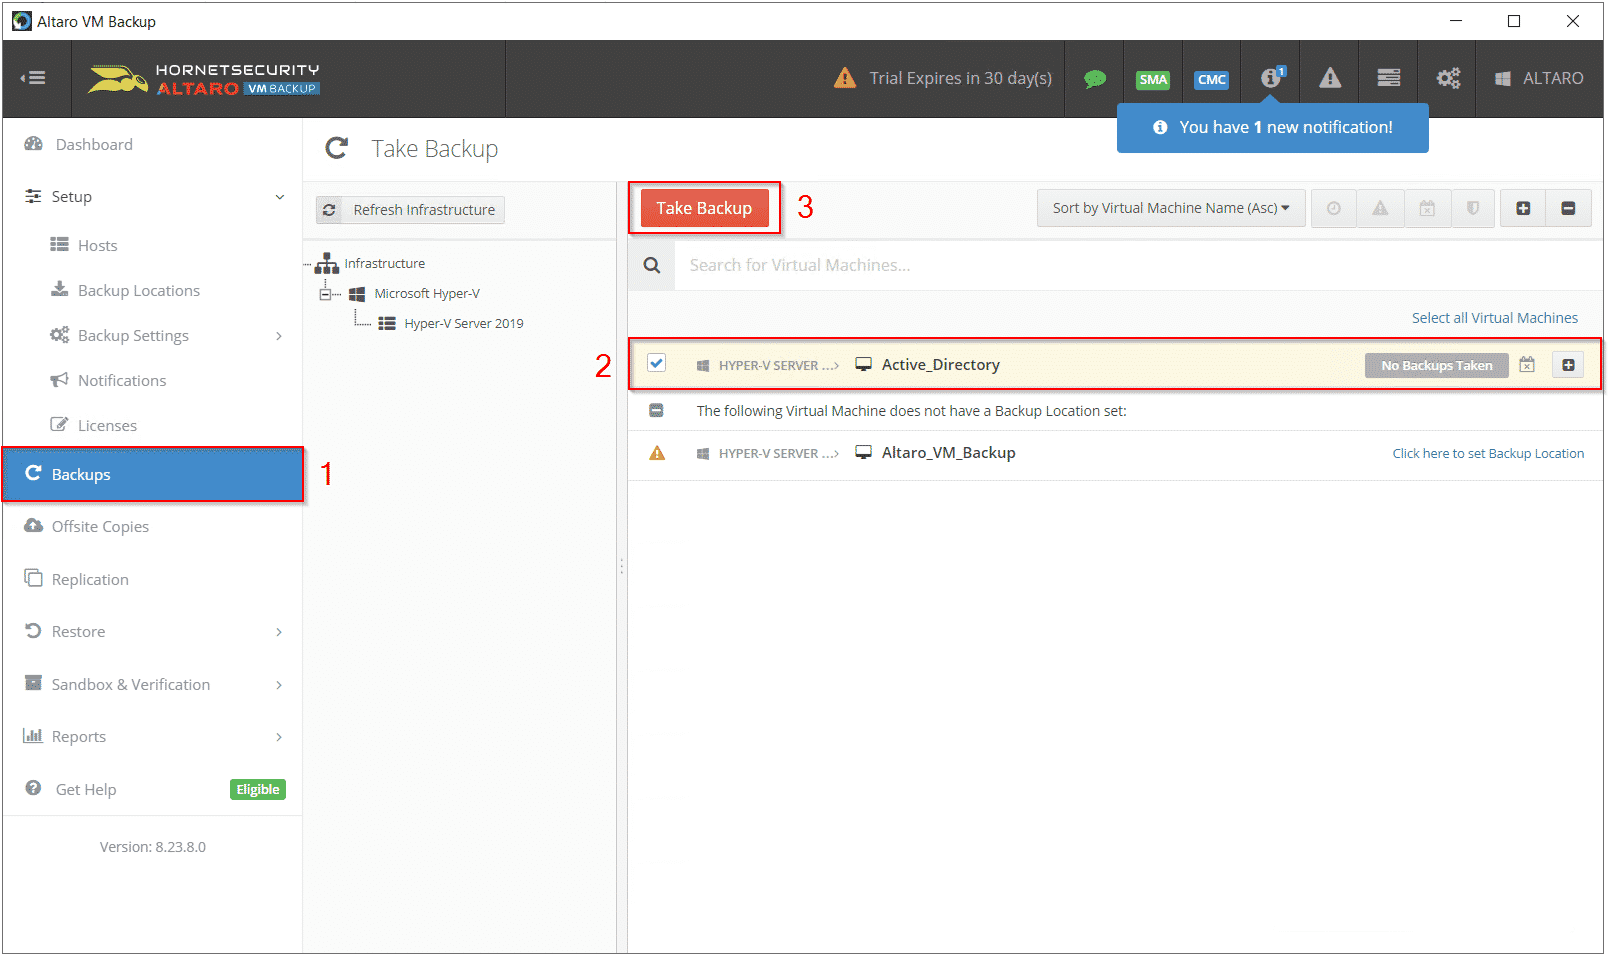
You can take backup manually or automatically via the scheduling system (recommended). In this case, I´ll do a backup of my Active Directory Server manually to Synology and Azure Cloud Storage.
Click on Backup Locations on the last navigation pane and then select the virtual machine you want to backup up and then click Take Backup as shown in the screenshot below.
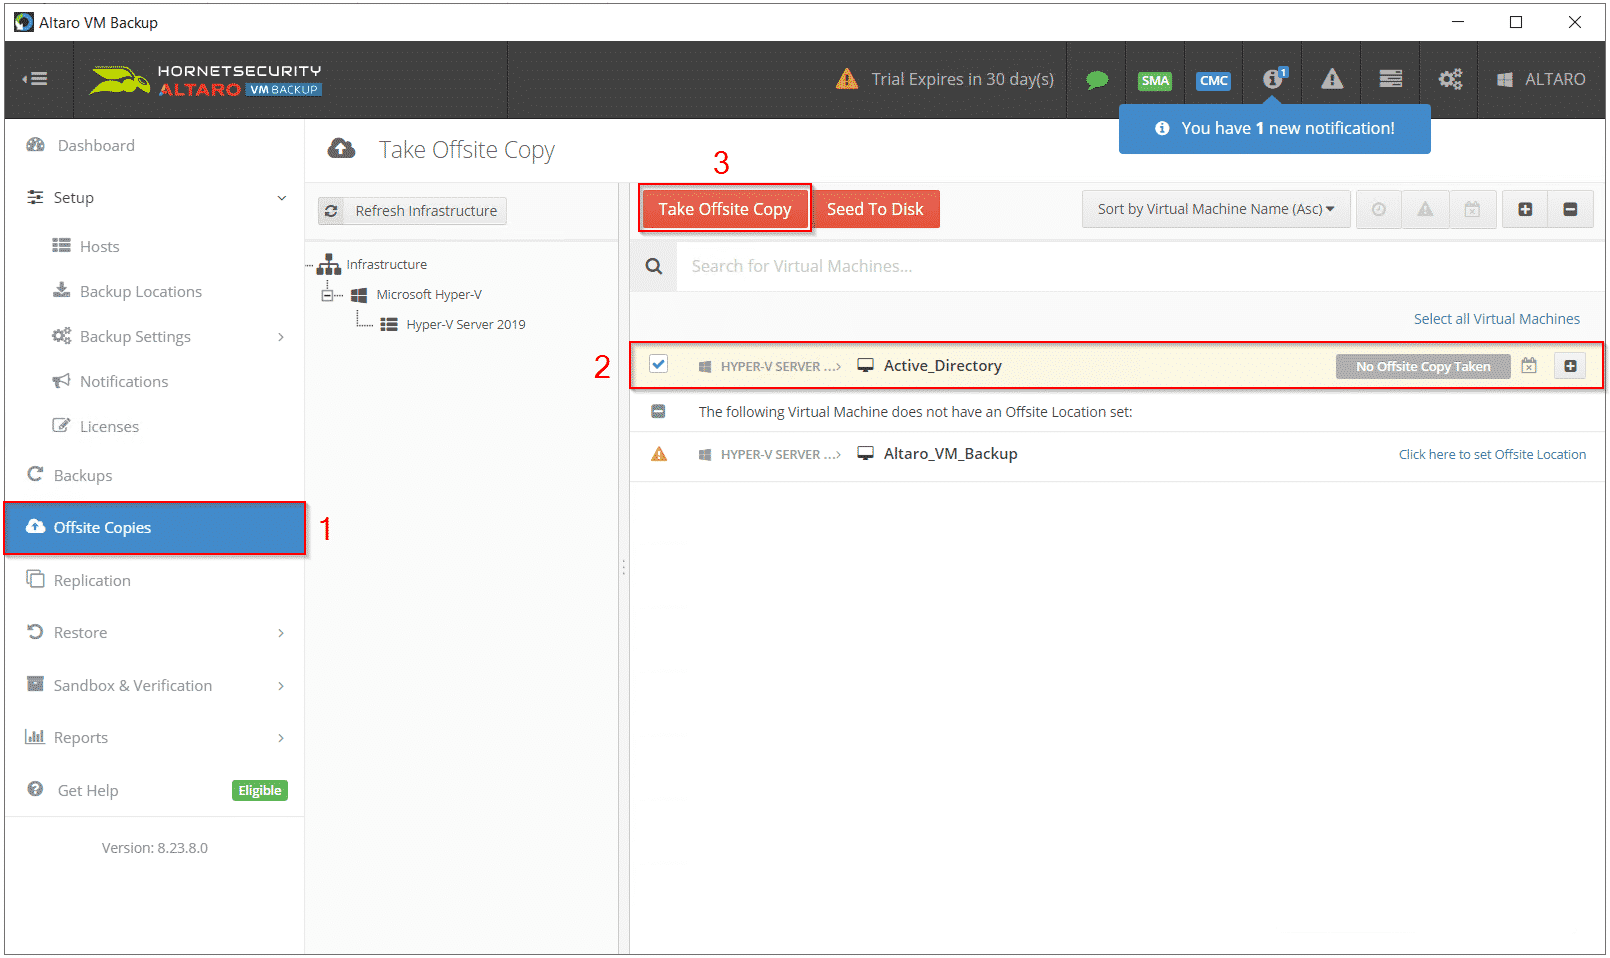
Click on Offsite Copies on the last navigation pane and then select the virtual machine you want to backup up and then click Take Offsite Copy as shown in the screenshot below.
The backup will be done in a few minutes to the onsite location, and it will take a bit longer to copy backup copies to Azure Cloud Storage due to the size of the virtual machines and available bandwidth.
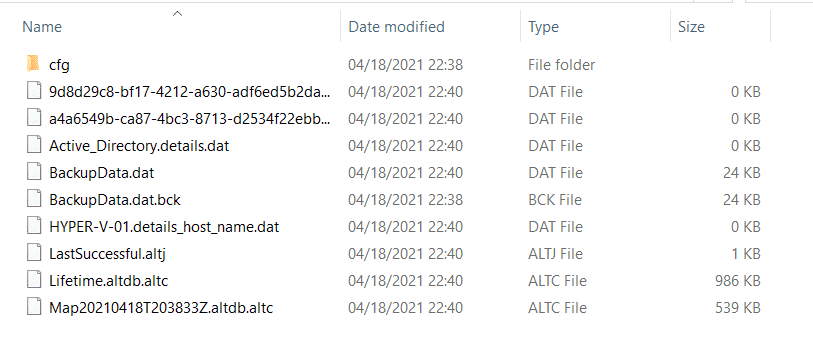
Here is how it looks on my Synology NAS…
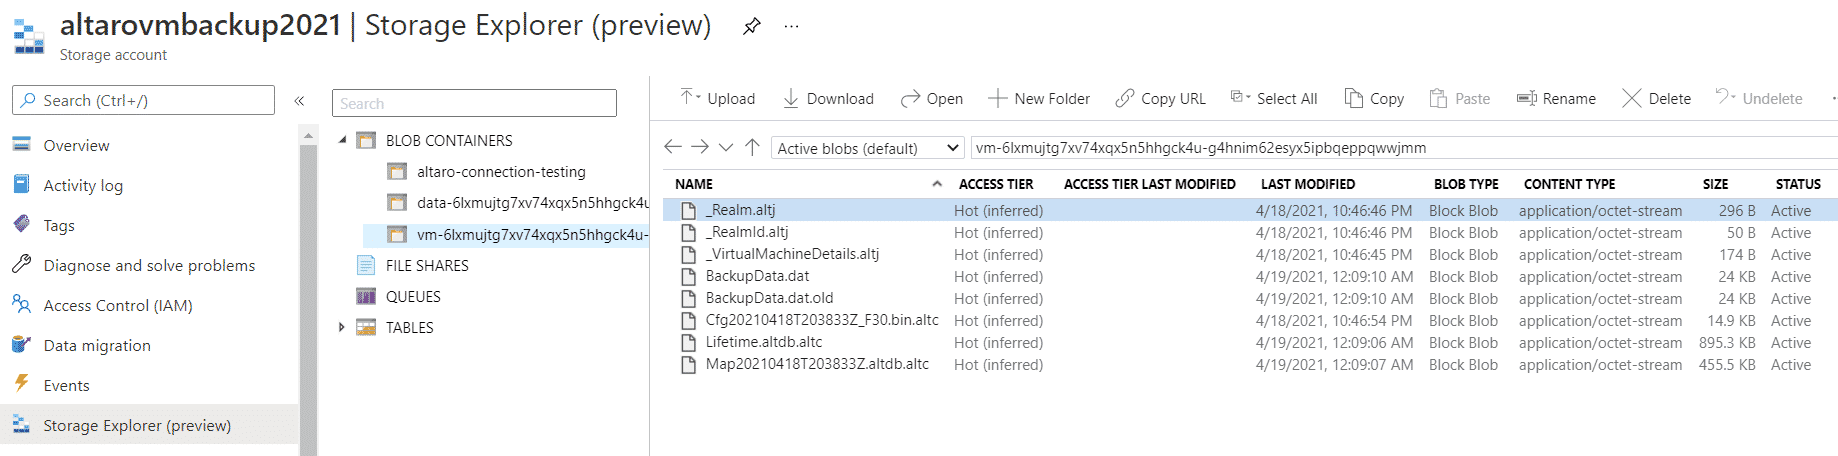
And here how it looks in Azure Cloud Storage…
That is all for today. In the next article, I will show you how to restore your virtual machines from onsite and offline locations to the same different Hyper-V Server. Stay tuned!
Back up unlimited VMs for 30 days. After 30 days, you can use Altaro VM Backup on 2 VMs for free, forever. Download now!
I hope you find this article useful. If so, don’t forget to share it with your network via the social media buttons below.
In case of any questions, feel free to comment or contact me.

